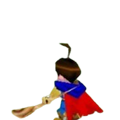
Holy Magic Century

(as "Quest 64")

โฮลี่ เมจิก เซ็นจูรี่


บทสรุปเกม
WALKTHROUGH

Quest 64 [By rpgclassics.com]

Holy Magic Century


Here is a complete walkthrough of Quest 64. "The Ending" page is the actual ending of the game and is jammed packed with spoiler information.

The Journey's Beginning
The Thief
The Stilled Wind
The Stirred Water
The Murderer
The Eletale Book
The Ending (Spoiler)


The Journey's Beginning 

Melrode Monastery

The game begins with the Grand Abbott warning Brian of his quest. With the Eletale Book gone demons have been release and animals perverted. If an experienced Spirit Tamer Lord Bartholomy, Brian's father, could not find it. Then how could master apprentice Brian fare?

When the conversation is over, explore the monastery. Like most RPG's the brothers tell Brian the basics of the game. Talk to brother in the refectory (dining hall) before you open the chests. Practicing good hospitality, he gives Brian a loaf of bread. Let me point out now that there is no "buying" in the game. People will give Brian stuff for free if he does not have it. It is a nice feature, but it does not let you directly stock up resources. After exploring the Monastery head outside. Go down the steps and follow the counter-clockwise trail to the stable. In the haystack is the first Spirit. Grab it and follow the trail down to the gates.

Melrode

The town is just like the monastery and gives more information on game basics. Points of interest are the General Store and the Inn. The store will give Brian the White Wings that fly him to Melrode whenever he is on the map (not in forest, caves or other towns). Just make sure to pick up another pair before leaving Melrode after using them. At the Inn Brian can heal up and save the game. In the common room is Shannon Stork. She too warns Brian of the dangers outside like everyone else. For treasure there is loaf of bread in the shepard's hut and a Spirit is in the far corner of the sheep green. After exploring everything head for the south gate outside.

The Holy Plain

Ah wide opens spaces. Out on the plain monsters will attack Brian in random encounters. Take these opportunities to practice your battle skills, raise levels, and choose an ethos. (General Informaiton.) Combining elements for spells with the C button is odd, but it will become second nature soon. If Brian is close to dying do not worry. Just remember above all things DO NOT use your items. Brian will die in his first outings, but each battle makes him stronger. If he does die, he will faint and reappear at the last place he saved at. All events up to death including gained experience and are kept. So if he faints on a trip just save and try again. It will be easier the second time through. After a few Inn rests, deaths or actually excursions you may notice the time changes. As far as I can tell it is just scenic. People say the say the same things and there appears to be no variation on monster appearance. Also as in most RPG elemental advantages and disadvantages are used. Use an attack with the same element as the monster for less damage (50%) and the opposite element for more damage (125%). Opposite elements are Earth/Wind and Water/Fire.

When Brian is strong enough follow the trail south. There is a Spirit on the southern edge of the beach on the left. A little bit further is a gypsy's hut on the right. Inside madam will give free reading. Useless as that is there is a free Spirit in the middle and a place to rest. It may not be noticeable but huts or areas empty of monsters a use. Run Brian around to restore his MP and increase his Agility. If you have Healing, use it to restore your HP and run to restore your MP again. In time Brian can fully recover himself.

Speaking of Healing what spells have has Brian learned? Many people recommend boosting Water immediately since it will get you Healing. It is true that Healing is needed for any sane or social person to finish the game, but it is not that dire if you hold it off a bit. If you chose elements other than Water do not think "Oh #$*$ I screwed up!" Part of the pleasure of the game is using the different spells.

As Brian continues south he will pass another hut. Use it as a rest area if needed and grab the Spirit in the fence corner. When Brian comes to a crossroads make a right to the walled city of Dondoran.


The Thief

Dondoran

Like Melrode talk to everyone and learn stuff. Dondoran is the capital of Kennishire and produces pots and earthenwares for Celtland. It seems that a thief has stolen a jewel from the castle and no one is safe. (You'd be scared too if you lived your entire life in safety, then some jerk robs you.) Points of interest are the quarry, pub, store, and inn. The quarry has a Spirit right in the middle. The pub has Dew Drops and Fresh Bread for Brian and the store has the Yellow Wings. They work just like the White Wings but take Brian to Dondoran instead. At the inn Shannon is waiting in the common room. She seems to know that the thief is hiding in Connor woods. When Brian is finished with the town head for the Castle.

Dondoran Castle

Inside the castle go strait ahead to the throne room and talk to the guards along the way. King Scotford has been expecting Brian since he received a letter from the Abbot. He is in quite a pickle with the thief taking the Earth Orb. It is the stone holding the Earth spirit and source Dondoran's prosperity. Although he doubts that Brian can recover the Orb he still asks his for help. After that chat explore the castle. Adjoining the throne room is Scotford's bedroom with Dew Drops and Bread inside. On the second floor is the princess Flora. More confidently than her father, she orders Brian to retrieve the stone. While you are invading her privacy raid her chests for some more Dew Drops and some Mint Leaves.

Connor Forest

Rest up at the inn and head west for Connor. You should go strait ahead from leaving the castle. In the wood are stronger monsters, but Brian's death should be commonplace by now. Head down the right path and pick up two Spirits along the trail. At the end is a chest with Dew Drops and a gate. The gate leads to Dondoran Flats, but is locked now.

Backtrack your way through the trail and now take the left path. Shortly there is a hut with another Spirit and some Giant's Shoes inside. Don't worry about getting lost, in the woods. Just stick to the path and head east. It may wind but it is linear. After a few bends there is a tree that is forked and by the path's edge with a Spirit is next to it. Eventually the path circles at the entrance of the old fort with another Spirit by the entrance.

Regardless whether Brian is ready for battle, it is now time to beef up Brian with this trick. Get into a battle with monsters that have weak repetitive attacks like Homing Arrow or Wind Cutter--at this point it is a Frog Knight with Wind Cutter 2. Destroy all other monsters in the group with your staff. When its mano-a-bufo pass turns and let the frog slow drain your HP. When Brian's HP is really low end the battle. If you have Healing, restore your HP and repeat. If not go nuts with the staff until the battle is over by triumph or death. This voluntary beating blasts you Defense through the roof, making battles easy. It is recommended that you do this once per area. Now let's see Brian has been at Melrode, the Holy Plain, Dondoran, and Connor. Better get caught up in training. I have delayed this technique because dying one HP per turn by Were Hares is more annoying than normal monsters.

Enter the fort and heal up with short pathway. Solvering the thief is in the middle of the platform, and ready to battle Brian. He is an Earth monster and has two moves, (like every other monster out there). The long range one is a blast of fire as thick as a tree trunk. The close range one is a hop that trusts spikes of rock all around him. At his defeat Brian not only gets the stolen Earth Orb, but 10 HP as well for defeating a boss.

Brian should have an elemental level around twenty at this point, and he should battle taking advantage of the ethos followed. Fire specialists should use Power Staff for starting. Then change to Fire Ball when Brian starts to pant. Earth specialists should put on Spirit Armor and use Staff Attacks, since Earth spells are weak against him. Water specialists can use Water Pillar. Back off once in while to use Healing. Wind specialists can start the battle with a Wind Bomb to lower Agility then use Large Cutter or Wind Cutter. Generalists must use Staff attacks since no spell is strong at this point. Since this is early in the game, Brian may not have strong spells to defeat Solvering quickly. So use Fresh Bread or two if needed.

Booty

With the Orb retrieved its time to sack the fort. There is a chest with Honey Bread and another with Mint Leaves on the other platforms. Now head back to Dondoran and visit Scotford. (Death is a quick way to return.) He entrusts the Orb in your care and in gratitude opens the treasure room. With the thief gone he opens the gate in Connor to Dondoran Flats, and says that your father went there to cross Loch Kilderey. After that conversation search behind the throne for the entrance to the treasure room with a Spirit, a Heroes Drink, Healing Potion and Replica inside. Afterwards rest up and head to gate in Connor.

Dondoran Flats

With a new map do not forget to train Defense. Brian can always use extra Defense. The Flats has a simple path with three Spirits along the way. However make a beeline to the inn at the southern shore and do not board the boat. Once there Brian can gather the Spirits at he leisure without worrying about crossing the Holy Plain and Connor in case he dies.

Glencoe Forest

Although the map clearly shows a path to Glencoe Forest it seems to be inaccessible. This is because the camera angle hides the path from Brian's normal view. On the southern road to where it "supposedly" meets the western one to Glencoe place Brian at the edge. Turn him to face away from it and press B. Now you will see the plank that leads him down to the Forest.

Glencoe holds six Spirits and is actually one of the optional areas of the game. (See map.) The downside to the cache is that the monsters are stronger than the ones on the Flats. However this allows for good experience. If you do enter Glencoe go left from the entrance to find a cottage. Inside are a lady and a Silent Flute. Head north (use your compass) to take a look at the cave the lady spoke of. It is flooded with water so you cannot enter for now.

Lake Kilderey

When you are finished training or exploring, board the boat by the inn. The captain will give you a free ride. Enter the cabin and exit to arrive in at West Carmach. Talking to the captain will reveal the predicament of this country. The wind has stopped and the current is in the wrong direction.


The Stilled Wind 

West Carmagh

New area means new monsters, so get some defense training in. Take advantage of the inn right by the port for saving. Follow the path and gather two Spirits on the slopes nearby. Along the path across the bridge is crossroads. Make a right to enter the water city.

While speaking of water, Healing will be imperative shortly. It is gained at Water levels six and twenty-five. Keep that in mind as Brian raises his next few levels.

Larapool

This place lives up to its name as the Water Capital. Gossips speak of the city's beauty and the prowling monsters. There is a general store with Blue Wings, and a lady at the inn will give you Mint Leaves. Shannon is at the inn too, and suggests that Brian fix the Wind or Water to continue his search. (She must have a dozen wings.) Another important face is Leila the water sorceress. Currently she is keeping the monsters out of Larapool with her magic. Why don't we help her out? (If you did not notice Larapool does not have those nice big walls like Dondoran to keep monsters out.) Before you leave though talk to the guy in one of the lower rooms of the inn. He will tell a legend to Brian which is actually a history lesson of Celtland.

Cull Hazard

Normoon the wind city to the south seems like the place to search, but the bridge to Windward is out. This forces Brian to take the long route through Cull Hazard. South of Larapool before the crossroads is a path on the right, take it to follow the road to Cull Hazard. At its end is a house to save at with a Spirit outside of it. Rest up and cross the bridge to enter the cave.

Cull Hazard is really just a long underground road for Brian. After several spiraling paces deep into the earth Brian will come across the main cavern. There is only one path, but the only tricky part may be the plateau shaped rock. It may disorient Brian to going in circles or back to the entrance, but always head north if he gets lost. At that rock there is a Spirit on eastern side, and a Healing Potion and Spirit on the west side. Along the trail there will be three other treasures. One is in a corner around the bend where you will see to chests across the shore with a Heroes Drink. Then further along the path are the two chests "across" the river with Honey Bread and a Healing potion. Continue on and the tunnel will be overrun with roots. There are no monsters here, so heal as needed. After the roots is an underground lake. Pick up the Silent Flute and continue onward. The rest of the tunnel is a climb up to the surface. There will be a path on the left, but that is a dead end for now. Continue going foward and follow the light.

Normoon

This city of Wind is full of retired old Druids, which have been terrorized by a band of thieves. However even the thieves are scared. The band's magician disappeared when the wind went screwy. Search the fields for three Spirits and the mills for three loaves and a Heroes Drink. There is a general store with Green Wings, and a man in the north most house will give Brian Honey Bread. At the inn is Shannon ... again. This time she tells Brian the legend that Windward keeps the Wind Jade. Upstairs is another magician Leonardo. He is stranded because of the Wind and gives word about Bartholomy. Rest at the inn and head north to the forest.

Windward Forest

The forest is basically a snaking path to a pond and another snaking path out. Brian can take the scenic route or walk right above the hills. Around the first bend is a Spirit. By the pond is a house with a Spirit and chest inside and out of it. Their contents are a Honey Loaf and Healing Potion. Rest at the house (run around and use Healing), and then continue around the bend till you meet a slender guy in silver and purple.

Zelse found the Wind Jade and with it his power and ego grew. He has three attacks, each increasing in power as range decreases. From far off he shreds Brian with paper airplane shaped gusts. The medium attack involves ripping the wind as a spiked ball horizontally before Zelse, similar to Rolling Rock if he has it. This is the only attack that can be avoided well. Just move away from the blast perpendicular to it. At staff range Zelse pounds you will a sword shaped blast similar to Large Cutter. An effective technique to use on Zelse is to place one of the trees between him and Brian. Zelse will keep trying to walk towards him but can never move. This positioning allows Brian to control the attacks. If performed correctly, Brian can force him to cast the Wind Ripper and dodge perfectly. Or he can get close to make Zelse use the Wind Sword, but be far away that it tends to Miss. When he is beaten Brian gets the Wind Jade and 10 HP.

Brian's elements should be around fifty-five for this battle. Fire magicians can use close up Fire Ball 3 or Magma Ball for beat downs, or a nice combo of Power Staff and Vampire's Touch to suck Zelse dry. Earth mages can use Avalanche on him fora quick battle since he is weak with Earth. They can also they can use Rolling Rock to estimate the distance that he uses the middle attack. Water mages pretty much have to use Water Pillar and take time outs for Healing. Wind mages should keep a distance and use Evade and Wind Cutter. Generalist can use Fire Ball, Hot Steam, Water Pillar, Rock, or Large Cutter while taking breaks for Healing.

Still Stranded

Back at Normoon the people are happy that Zelse is gone and the Wind is fixed. This frees their minds and now they have more to say on the nature of magic. Head back to Windward and collect a Spirit in the field where Zelse was. Continue along the path to cross the newly repaired bridge. Since the water is still messed up, head to Larapool to see what is new there.


The Stirred Water

Crystal Well

Back a Larapool everything is the same except Leila. She has just received a message from Epona, and would like Brian to see her. However she lives in Crystal Valley, which is at the end of the Blue Cave. In order to enter the cave the water must be lowered, so Leila asks you to meet her at Crystal Well. Exit the inn from the basement door, and follow the path to the room under the town fountain. Leila is inside and the Crystal Well is right next to her. She tells Brian to use the Well to lower the water and go to the valley. Take the Silver Amulet in the chest by her and leave. With the water gone a new path is opened in the town. Follow it down and collect the two Spirits on it. One is on a hill the other is by the exit of the inn. (It only appears when the water is lowered). Now enter the temple like building. Inside is a Spirit behind one of the columns and a stairwell into the earth.

Blue Cave

First there are two things wrong with the game at this point. 1) There should be a sign at the entrance to the Cave saying, "Abandon all hope, ye who enter here." 2) the Cave's name should be "The Ninth Circle". Since we are dealing with Pure Evil here--forget about the perversion of nature, destruction of the innocent, and that guy at the end--the rules change.
  1. Have Healing.
  2. Level Water up.
  3. Use your staff.
  4. Escape, yes, escape from battles.

Reaching Crystal Valley is the highest priority this time. The Blue Cave is ominous and very long. Every failure leads you closer to the brink of insanity, since it will have to be traveled all over again from the start. High Water and Healing will increase the chances of survival. Staff attacks will increase maximum HP and restores current MP. Escaping will allow Brian to reach the end faster. Sure he may not gain experience, but he will be closer to the end and have status experience. Unless you are cheating with Avalanche this is the most difficult part of the game. Even with Avalanche the mass MP consumption will get you.

The Tunnels, Cavern, and Maze

The first section of the Blue Cave is a sequence of tunnels. The correct path is marked with arrows on pillars by their entrances. Wrong paths lead to dead ends but often treasures too. A wrong turn at the first arrow leads to a Spirit (and Glencoe if you have the Water Jewel). The third wrong turn has a Heroes Drink, and the fourth has a Spirit. At the end of the tunnels is a spire in the path, at its base is another Spirit.

The next section is a cavern with one tunnel connected it. Take this time to restore you MP by running and HP with Healing. When Brian enters the tunnel joining the cavern there is only one wrong turn. The dead end holds a Healing Potion and Dew Drop. After this tunnel you will be back at the cavern and enter the maze.

This is the most confusing area in Quest. There are three Spirits, a Healing Potion and some Mint Leaves here. In order to reach the exit all Brian has to take are right turns from the entrance. It can be explored for fun but here is the map for convenience Blue Cave. Use it to find the treasures and the Spirits, and remember use your compass, that thing in the upper right hand corner of the screen. It was placed in the game to help with a situation like this. When you reach the exit the maze there is a long stretch of tunnel leading to the sweet light of Crystal Valley.

Crystal Valley

Mmmmm ... rainbow sherbert. Follow the path down to Epona's house, and check behind it for a Spirit. Inside is the sage and who knows a lot about Brian's quest. Give Brian his next task of retrieving the Water Jewel from Colleen before anything happens. Conveniently she made a Circle Stone in the next room to take teleport Brian to her. Before you go though talk to Nesty to save. Now stationed in the Blue Cave Brian can freely explore it without too much trouble.

Loch Kilderey

Stepping on the Circle Stone will warp you to Kiliac's pirate ship on Loch Kilderey. Instead of throwing him overboard, he asks that Brian use his magical powers with Colleen to calm the raging storms. Enter the cabin and to save if you like. Go down to the hold and pick up a Dragon's Potion and another. Exit the ship to arrive at the Isle of Skye.

Isle Of Skye

This place is very small so do not worry about getting lost. On the right hand side of the dock is a Spirit, and strait ahead is Colleen's house. There is another Spirit by its gate and another behind it. Colleen and Kiliac are inside discussing their situations. Colleen reveals that the Water Jewel was recently stolen even though she has been guarding it. Not only that, the thief has hid itself in the lake, and sealed the ring of stones entrance. After that conversion follow the short trail outside to the stones. Search its northern edge is another Spirit, and step in the center to enter the Loch. Use the underwater path to heal up and approach the girl on the platform.

Bent on ruling the world Nepty is will make you her first victim with her new power from the Water Jewel. Her long-range attack is a blast of three bubbles at subtle arcs. The first will hit Brian and the other two will miss if he stays still. The close range attack is a spin attack with a bubble around Nepty. This does a lot of damage and erases status enchantments instantly. Use powerful range spells and Healing. In the end she give up the Water Jewel with another 10HP for Brian.

Brian's elements should be around 75 for this battle. Fire specialists can have fun with Nepty since she is weak against them. Fire Ball and a close Magma Ball do a lot of damage. Earth magicians can use Avalanche and Magic Barrier. Water magicians are pretty screwed at this point. Water Pillar is the only strong spell and Healing doesn't necessarily catch up with her attacks. The battle stretch technique can be useful here. (See Battle Techniques.) Wind mages can use Wind Bomb to lower her Agility, and chip her down with Wind Cutter. Wind Walk is useful here for more maneuverability since she can crowd Brian quickly. Generalists are recommended to use Fire Ball with breaks for Healing.

Travel

With the gem in hand, head back to Colleen's house. She will entrust you will the Jewel and open the door to the next room. Inside are a Spirit and a Circle Stone to Crystal Valley. At Crystal Valley Epona will give you a history lesson a Circle Stone outside to teleport you to Larapool. A chat with Leila shows that the water is back to normal, and that now she will help protect Brian on his quest. Since you have the Water Jewel various new paths are open. The rock fall in the first wrong path of the Blue Cave that leads to Glencoe is clear. Also if Brian returns to Dondoran Castle and searches the library shelves there is a secret passage leading to a Spirit. If he visits a dock the captain will sail him around Celtland. His route is Dondoran to Carmagh to Limelin and back to Dondoran. When Brian has finished exploring take the boat to East Limelin.


The Murderer 

East Limelin

When you reach Eastern Limelin get off the dock follow the path to the city of Limelin. Along the way is a Spirit around the bend, right before the plain.

Limelin

In the city are two types of people, rich snobs and important ones. The local gossip is about Fargo the Fire Mage and murderer. He is the final sign of the corruption in Celtland in which a fellow human, not a monster that is evil in nature, takes another life. Lighter news tells of the dangerous mines with a mysterious lady roaming them, and a Spirit Tamer was seen two fortnights (four weeks) ago. Take advantage of the cities wealth and raid the people's houses for provisions. At the tavern a guy will replenish your Heroes Drink, and the store will hand out Red Wings. As expected Shannon is at the inn, but this time gives a philosophy lesson. After talking with everyone circle the edges of town for Spirits. There is one by a barrel at the docks, one in front of condemned house, one behind the jail, one by the shackles inside the jail, and one in the grain field. After exploring the town head for the palace.

Limelin Castle

Carmagh is certainly a prosperous kingdom to build this joint. At the base of the central pillar is a Spirit. Inside the main hall there are two behind the relief. Talk to the guards to learn more about Fargo. In the armory there is some Honey Bread, a Healing Potion, and Mint Leaves. In the library search the books from the stepladder for another Spirit. In the throne room is Queen Deanna. Slightly depressed on losing Striker, who captured Fargo but was recently killed by him, she hints one asking for help. After that conversation search behind her throne for a treasure room with Celine's Bell, a Silver Amulet, and another Healing Potion.

Abandoned Mine

Exit the town and head south to the Baragoon Tunnel. Take the one wrong turn for a Spirit that you had to pass up. At the entrance to the mine (still outside) there is a Spirit to the right of the steps leading down. There are two more in the shack at the bottom and one under the scaffolding. When they are all gathered enter the mine.

Baragoon Tunnel

The tunnel consists of two areas. First is the mine tunnels, then a series of halls. They both follow a wavy pattern, so keep heading east if Brian gets lost. Right at the beginning of the tunnel there is a Heroes Drink and Healing Potion. Along the path will be two subterranean river crossings and an open area with a door. Gather the Spirit and Healing Potion then head done the really long shaft without monsters. Take the opportunity to heal up. At the end of the shaft are a series of steps leading to the halls.

The halls are just like the tunnels except there are distinct turns. Right at the start head left for a Spirit, then goes east as before. Eventually Brian will come across a room with raised steps. Stay off it and head to the upper right and left corners for a Replica and Dew Drop. Next go to the middle section and grab the Spirit. Then go on the opposite raise platform for another. Finally head down the middle and heal up for battle.

At the center of a maze of pits is Shilf the seductive crony of Mammon, whoever he is. (I wish I knew what keeps her sky dry after 1000 years.) Like other bosses she has two attacks. The close up is a laser beam to Brian; the range is a flock of dove shaped wind blades to Brian. Unlike other bosses damage by the melee attack does less than the range. On her defeat Brian will get an extra 10 HP.

Brian's level should be around 100 to battle Shilf. Fire mages can beat up on her with a Power Staff and Vampire combo, or Fire Balls. Earth mages can obliterate her with Avalanche. (She is weak against it). Water mages will resort again to Water Pillar, Healing and Drain Magic. Wind specialist could use Large or Wind Cutter, but Staff Attacks will deal more damage. Generalists can use Avalanche if they know it or Staff Attacks supplemented with Power Staff.

Exit to the anteroom for a Spirit, Silver Amulet, and Healing Potion. Now head up the chamber to the light at the end.

Dindom Dries

Like in real life the first thing to do in a desert is seek water. Strait ahead from the exit is a tent by an oasis where Brian can rest up. Conveniently there is a Spirit inside. Afterwards head south to another camp and learn more about the Dries. After resting up head to the southwestern corner of the upper section of the Dries to find another Spirit. Now Brian can either head to the southern part of the Dries for loads of Spirits and treasure or continue east to Greennoch.

Shamwood

The main section of the Dries, like most video game deserts, is an infinite loop. Head south or east too much and Brian pops back in the middle. Hug the northern cliff edge head east for three "curves". Next head south for three dunes. Right around that area (the very middle of the desert) is a Spirit in a ditch. Now if Brian looks to the southeast there will be a bobbing black crystal on the horizon. Make a beeline to it to find a Stone Circle. Step on it to teleport to the mythical Shamwood.

Shamwood like Glencoe is optional but worth the effort. There are nine Spirits and one of each item in the game. Head up the trail and walk around the courtyard to the back of the palace. There should be a Spirit in the middle of the wall. Now head back to the main path and climb the stairs for loads of treasure. There is one of each item in the game in the center of the room with two Spirits right by them. After sacking the place take either exit to the second outer tier. Go the north side of the tier for another Spirit, and in the northeast corner of the highest tier for another. In the top room there are four more Spirits and a Golden Amulet. Talk to Lavaar to learn more about Celtland's history. He is the jerk who opened the Eletale Book the last time, and Epona was the mage to correct his mistakes. Now he waits for Mammon to be destroyed.

Greennoch

Whether Shamwood is visited Brian should visit Greennoch. On the way there is a Spirit at the end if he takes the right fork in the road.

On entering Greenoch the refugee from Larapool (remember him) concern's for the

On entering Greennoch the refugee from Larapool (remember him) concern's for the town becomes pointless. There is no town to worry about! Search the remains a house for a Replica, and visit the store for a Healing potion. At the inn Shannon (surprise surprise) summarizes the recent demonstration from Beigus. The devastation was just a test. Rest up and head east towards the Boil Hole.

Molten Fields

Hmm, seems like Fargo has been here since all the fields are melted. If you head north there is a blocked cave. This will lead to the avalanche at Cull Hazard by the Normoon entrance. This is the quickest way to return to Dindom using Wings, once the Fire Ruby is gained to open the rock fall. However Brian needs to go south towards the Hole. There is a Spirit in the corner of one of the rocks in the middle of the road. Then there is another in the middle of where the road becomes unstable. To cross this area go ledge to ledge as if they where stairs. Finally by the entrance to the Boil Hole is another Spirit were the road split.

Boil Hole

The final caves, the Boil Hole is a test of endurance rather than strength, but it is not as bad as the Blue Cave. By now your abilities should be through the roof so if a battle comes and the monsters are behind Brian, just run ahead they same path you were taking. After three subterranean lava pools there will be a section that is "roofed", i.e. not a closed tunnel or an open pocket. In that area is a Dragon's Potion by the edge of the lava flow. Continue to another "roofed" section and pick up a Healing Potion, Spirit, Giant's Shoes, and a Replica around the bends of the cave. Finally there will be a large "roofed" section with miniature volcanoes and Fargo in the middle.

Like every thief before, Fargo wishes to take over the world using the jewels Brian has conveniently gathered. He has a Lava Ball attack at range and causes an exposition of lava with close encounters. When it is over he will attain the Fire Ruby.

By now Brian should have around 110 (if he did not visit Shamwood). Fire mages should use Power Staff and Vampire touch, as Fargo is strong against fire magic. Earth specialists should use Avalanche and Magic Barrier. Water magicians should use Water Pillar, Healing, and Drain Magic. However since Fargo is weak against it have fun with other spells like Walking Water or Ice Knife. Wind Cutter and Wind Bomb should be used by Wind mages and specialists should use Avalanche or Water Pillar.

With Fargo gone, explore the room for more booty. There is a Spirit on the lower ledge and a Dragon's Potion by the volcano near the exit. Head up the tunnel to enter the somber Moors of Baragoon.


The Eletale Book 

Baragoon Moor

Right at the beginning of the road is an inn and behind it is a Spirit. The keeper will provide board for Brian. Upstairs is whole bunch of items and a Spirit. Rested and stocked up direct Brian east to the castle town. Before entering explore the platform in front of it. There are Spirits in each of its ends.

Brannoch

Just as cheery as outside all the citizens are in terror over Beigis's policies. (Yes, Beigis has cannons in an island that is an agrarian society pointed at the villagers, the sicko.) Some of the villagers have locked their doors (I don't blame them), so enter those who are still trusting. The barracks house frighten soldiers and hear the rumors of the magical experimentation. A kind soldier will replenish Brian's Heroes Drink, and another will give a hint on how to enter the castle. There are some Black Wings in the store and an inn right across. Inside Shannon (again) describes how the prisoners are treated, and alludes to Barthomoly being one of them. Save and train Brian in preparation of not returning to Brannoch or anywhere else for the matter. Visit Glencoe or Shamwood if they have not already, and boost defense. Do not bother with raising Elements naturally. Brian's statistics are so high that experience in battle is gained as fractions of a percent. He should be 125 or higher. (I got up to 150.)

Brannoch Castle Lower Levels

When Brian is ready take the western gate to Brannoch Castle. The castle doors will not open so take the left path to the back. Go up the stairs and head along the wall. If Brian goes all the way around there will be a Spirit. Take the door there to enter the castle.

The castle is very linear. Moving along, Brian will pass above the main hall and

The castle is very linear, composed only of corridors with central floor rooms. Moving along, Brian will pass above the main hall and up the spiraling keep. From here on the directions are simple, counter-clockwise takes Brian deeper in and clockwise leads out. The first chest he comes across will hold a Dragon's Potion and be by a door. Inside that room is another Spirit. There are no monsters in the room so rest as needed. Next there is a room full of cannons. Then there are more halls, and finally there is a large room holding the source of Beigis's power.

Guilty has developed the magical artillery for Beigis and seems to have enhanced himself with it. Now he wants the Spirit Gems that Brian possesses. He has two basic attacks. His range attack is six nails grabbing Brian like two hands. The close attack is a shock wave from pounding the ground that disenchants Brian. Guilty does not have an elemental association so use your strongest attacks like Staff, Avalanche, Fire Ball, Water Pillar, and Large Cutter. He is susceptible to Wind Bomb's Agility decrease so start the battle with that if Brian knows it. Guilty also is slow, so if Brian runs in a circle he will not be able to catch up. With his defeat Brian gets an additional 10 HP.

Brannoch Castle Upper Levels

With Guilty out of the way head out the door for more halls. After a few corridors there will be another room full of cannons. Raid the chest by them for a Heroes Drink and Healing Potion, then some more corridors. Along the way there will be a chest and a door. The chest holds some Mint Leaves and the door has a friend.

It seems that Leonard has sneaked into the castle before you did (probably the same way Shannon does at inns), but thinks that he cannot go farther. He offers to heal Brian and save your game. Keep in mind that Exit does not work in Brannoch before you save. Raid the room for lots of goodies the final Spirit.

Refreshed, continue along the halls until Brian reaches are a map room. In the center is a model of Celtland with a Spirit Light and Golden Amulet on the sides. Across the room are Shannon and a wounded man. Shannon certainly has changed personalities. She scorns the man's efforts and bullies Brian to face Beigis fatalistically. The man turns out to be Bartholomy. Yeah, your original quest is over! He urges Brian not to go any further, but with Celtland's fate in his hands you must continue on. Beyond the map room is a hallway and then the throne room.

More like an inner sanctum, Beigis comments on Brian's futile actions in from his seat. Like other bosses he has two moves. The range is a green blast like Solvering's and the close is a Spiritual sword slash. They both do about the same amount of damage but the slash removes enchantment. It is best if Brian uses strong attacks on Beigis. He is weak against water so Water Pillar is useful at this time along with Avalanche, Fire Ball, Magma Ball, Wind Cutter, and Large Cutter. However Staff attacks will probably do more damage since its power results from all elements combined rather than a specific level. When Brian begins to pant retreat to the catwalk, since the distance will make him a harder target, and heal up. If Brian cannot defeat Beigis do not worry. It would be better to use this battle for experience than waste items. On his defeat Brian will gain his final 10 HP bonus.

After the battle follow the second catwalk to a door behind the throne.

Castle Ramparts

With Beigis gone the whole castle is quiet. Take advantage of no monsters and heal yourself. Soon you will be on the roof where Shannon is. Finally she reveals everything to you. As puppet of Mammon, she stole the Eletale Book and entices the thieves to take the Spirit Gems. Now that you have them all you can release Mammon to destroy Celtland. (So that's how she traveled fast.) Take the tome and head for the elaborate stone circle to teleport to the World of Mammon.

David Copperfield Glitch

Yes, Brian too can be like David and make all of Brannoch Castle disappear! First save at Leonard. Next get the Eletale Book. Now enter the World of Mammon and die without saving inside. Brian will be warped back to Leonard. Don't save! Exit--not the spell--the castle to the moor. Now cast Return and Presto! Brannoch Castle is gone as well as the rest of Celtland outside of Brannoch. You can now walk on/in the invisible castle, through walls, and up those impossible to reach cliffs. It is nothing useful but neat nonetheless.

The World of Mammon

This place looks like the Twilight Zone crossed with Celtland, so utterly simple and so effective. This dimension has the strongest monsters and possibly has the lots of empty sections. Take advantage of those points for healing. Always keep going forward entering the other midair door and you should be fine. If Brian enter a "room" without another door just exit it the one he came from.

Over time you will meet Begonia, who offers to heal and save. (She a 1000 year

Over time you will meet Epona, who offers to heal and save. (She is a 1000 year old sage; instant teleportation is cake for her.) If you do save remember there is no way out of the World of Mammon from this point on. Exit her room to enter an anti-Melrode. Nobody is here and all of the doors are locked. Take the gate to the Monastery for more odd platforms to an empty one with Shannon in the middle.

Strangely you do not fight Shannon. She instead gives you the Dark Gaol Key to open Mammon's prison and quips over humanity. She knows the extreme power of Mammon, but cannot help but think how tiny humans live so happily. Exit the platform to the final lair. If Brian is not strong enough to take Mammon on, do not talk to Shannon. Take the door to warp back to the beginning platform of the World.

Mammon

Head up the platform to face the demon that caused the Day of Grief. He is eager for Brian's arrival since he opened the way for it to leave. Now let's get ready to rock. Mammon employs three moves. First is a Solar Explosion from his hands. This is move is pretty much unavoidable and removes enchantment. Next is a Machine Homing Arrow that volleys nine flaming arrows at Brian. Weave in and out to minimize damages. Finally there is a Flaming Wall in which three walls of fire spread out from him. Step back away from Mammon to maneuver better. Grit your teeth and blast away with Brian's most powerful attacks. He has the whole platform to move but only the higher end give him enough range for Staff Attacks. Since Mammon is far away from Brian homing or wide range attacks are better for battle, e.g. Avalanche and Wind Cutter. Use the Dragon Potion's and Spirit Lights, you are not going anywhere after this. When all is completed sit back for a quick chat, nice philosophy of life, and gentle monastic music.


The Ending (Spoiler) 

Epilogue

Mammon dies and finds peace in the eternal sleep of death. Brian and Shannon appear on the platform before the Gaol with a bright sky. Shannon is puzzled that she still exists, and thinks Brian had a hand in preserving her. Free from Mammon she admits that she had an intuition that he could defeat Mammon, who was so jealous of the beauty in humanity. Now she vows to leave Celtland and meet as many people as she can before she dies, hoping that she would find her humanity.

Artwork image of the floating Monastery appears and the epilogue roles. Basically it states Brian entering the world of Mammon, the retiring of Brian, the secrecy of his quest (i.e. only a few people know that he saved Celtland), and describes the pact in which humans use the blessing of nature to live and rebuild their lives, forgetting the evils of this grief.

Short History of Celtland

Years ago Celtland made a pact with the Spirits allowing them to be used by the people to aid life. Probably this was written down in the Eletale Book. 1000 years ago the kingdoms fought over the Eletale Book as a source of power. Lavaar was the champion and opened the book. However the demon Mammon was unleashed and wrought great ruin to Celtland. It was Epona using the Spiritual Gems and the Spirits; she sealed away Mammon into the Gaol. As a penance she banished Lavaar to Shamwood to wait until Mammon was truly destroyed. Shilf a servant of Mammon exiles herself to the Baragoon Tunnels to await its return.

Some time ago Mammon created Shannon as its hand in Celtland, and dispatched her to bring about its release. She cast a spell on the Monastery and stole the Eletale Book. Simultaneously she tricked Solvaring, Zelse, Nepty, and to steal the Spirit Gems and convinced Beigis to engage in war. After the gems are stolen nature goes awry and Shilf reawakens. To gain power Beigis employs Guilty to create magical cannons and Fargo to retrieve the other Spirit Gems. In doing so Fargo destroys a house in Limelin and is arrested by Striker. When the cannons are developed Beigis uses them to free Fargo and destroy Greenoch. Afterwards Fargo kills Striker and flees to the Boil Hole. Bartholomy takes the quest to find the Eletale Book and journeys trough Celtland. Shortly afterwards Brian searches for him, and Shannon picks him as a dupe. Recognizing his power and innocence, she helps Brian along to test his power and do the dirty work for her. Always one step ahead of Brian, Bartholomy reaches Brannoch and is arrested. He fights Shannon and looses. Shannon tells him that Brian is to release Mammon, and he tries to fight again. Brian then enters the room shortly thereafter and continues his journey till he reaches Mammon. After defeating Mammon permanently Brian grants life to Shannon, allowing her to live after the destruction of Mammon. Brian and Bartholomy return home and Shannon leaves Celtland to find her humanity.

เครดิต
Credit

ตัวละคร.
CHARACTER.


ข้อมูลเบื้องต้น
Basic information


ข้อมูลที่น่าสนใจ
ARRTICLE INTERESTING


ความลับ ,โกงเกม
Secrets, Cheat Game


เว็บไซต์:ข้อมูลที่เกี่ยวข้อง
Related Website

ยูทูป เกมส์มิ่ง
Gaming - YouTube

เกมที่เกี่ยวข้อง
Related games

ดาวน์โหลดเกม
GAME DOWNLOAD

-