
")
")

The Walking Dead: No Man's Land
เดอะวอล์กกิงเดด: : NO MAN'S LAND
บทสรุปเกม
WALKTHROUGH

Getting Started
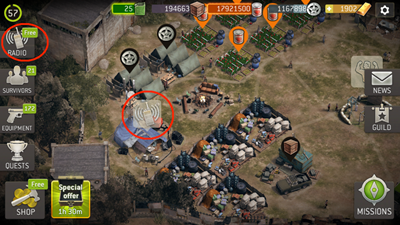
Let’s take a look at your Home Screen, which shows your Camp. From here, you can navigate to all aspects of the game.
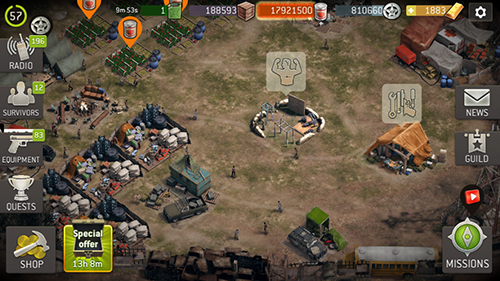
Since the most basic aspect of the game is collecting Resources, let’s see what those resources are:
- Resources
- Survivors
- Survivor Classes
- Heroes
- Battle Mechanics
- Player Level
- Buildings
- Equipment
- Radio Calls
Resources
 Gas Gas - White.PNG Gas is used to go on missions to play the game Gas can be obtained by the following methods:
- Time: Gas is generated from your Mission Car every 10 minutes.
- Watching Ads in the Cinema
- Trade Good Silver Crates
- Purchased for Gold: 1 Gas costs 2 Gold, but must fill our entire Tank
- Gas Booster: Unlimited Gas for 24 hours that costs $1.99 USD.
 Radios (Phones) Radio.PNG Radios are used to call new Survivors to add to your squad, and to get Hero Tokens. Radios can be seen as the most “premium” Resource in the game. Radios can be obtained by the following methods:
- Wall Walkers – Tapping Wall Walkers has given Radios 2-3% of the time according to my samples.
- Mission Crates – After successful missions, Radios can be found in the Reward Crates. I have found Radios in Reward Crates 5% of the time.
- Trade Goods Store – Radios can be found in Gold & Silver Trade Good Crates. There are also options at times to purchase Radios for Trade Goods.
- Guild Rewards – Some shared team rewards for guilds are Radios.
- Gold – You can buy Radios when trying to make a Radio call (and you don’t have enough Radios) for 50 Gold for each Radio.
- Real $$ Bundles – Bundles with Radios can be purchased for real life $$.
![]() Trade Goods (TGs) Screen Shot 2016-11-25 at 2.20.37 AM.png Trade Goods are used to buy items in the Trade Goods Store, and to upgrade Walkers in your Walker Pit. Trade Goods may be the most important Resource, IMO, as it can buy almost everything. Check here to see how I earn Trade Goods. Trade Goods can be obtained by the following methods:
Trade Goods (TGs) Screen Shot 2016-11-25 at 2.20.37 AM.png Trade Goods are used to buy items in the Trade Goods Store, and to upgrade Walkers in your Walker Pit. Trade Goods may be the most important Resource, IMO, as it can buy almost everything. Check here to see how I earn Trade Goods. Trade Goods can be obtained by the following methods:
- Outpost building – you can collect Trade Goods from your Outpost.
- Raiding Outposts – you get Trade Goods for successfully raiding an opponents Outpost.
- Guild Rewards – earning individual Stars in Guild Challenges gives Trade Goods as Rewards.
![]() Food (Supplies/Tomatoes) Food - White.PNG Food is used to upgrade the Buildings in your camp. Food can be obtained by the following methods:
Food (Supplies/Tomatoes) Food - White.PNG Food is used to upgrade the Buildings in your camp. Food can be obtained by the following methods:
- Wall Walkers
- Farm Plots – These buildings produce food. Upgrading your Farms ASAP is a good method for building your camp up. Once you get to Level 8 or 9 Farms, it’s probably best to focus on other buildings as the returns diminish.
- Mission Reward Crates – You get food when opening Reward Crates after a Mission. Food Exploration Missions give a higher % (60%+) of Food as rewards.
- Food “Scavenge” Mission Reward – When you play a Food Exploration Mission, you are given extra Food as a Reward.
- Gold and Silver Trade Good Crates
- Using Glenn as a Leader in Missions – Glenn’s Leader Trait gives you Food as well as XP when you kill Walkers in missions.
- Watching Ads in the Cinema
![]() Experience Points (XP) XP - White.PNG XP is used to upgrade your Survivors and Equipment. XP is a Resource that you can always use, but becomes even more important later in the game after you max your camp and Survivors. XP can be obtained by the following methods:
Experience Points (XP) XP - White.PNG XP is used to upgrade your Survivors and Equipment. XP is a Resource that you can always use, but becomes even more important later in the game after you max your camp and Survivors. XP can be obtained by the following methods:
- Killing Walkers/Raiders in Missions – You get XP for every kill in a Mission. The higher the level of the enemy, the more XP you get. After you reach 75 kills in one mission, you only get 1 XP per kill. “Micro Farming” the end of missions is a great source of XP; stand by the exit and keep killing Walkers until you can’t kill any more, or you reach the point where the Walkers only give 1 XP per kill.
- Wall Walkers
- Mission Reward Crates – You get XP when opening Reward Crates after a Mission. XP Exploration Missions give a higher % (60%+) of XP as rewards.
- XP “Scavenge” Mission Reward – When you play an XP Exploration Mission, you are given extra XP as a Reward.
- Gold & Silver Trade Good Crates
- Scrapping Equipment – When you scrap Equipment, you are given XP. You also get about 25% of the XP you invested in upgrading equipment.
- Retiring Upgraded Survivors – When you have invested XP into upgrading a Survivor, you get a portion of that back if you Retire that Survivor (about 25%).
- Watching Ads in the Cinema
Class Tokens – Class Tokens are used to improve your Survivors. Class Tokens are “class specific.” This means that Hunter Tokens can only be used to upgrade/promote Hunters, Shooter Tokens only used for Shooters, and so on. To find out everything about Class Tokens, check here. Class Tokens can be obtained by the following methods.
- Rejecting/Retiring Survivors – When you make a Radio Call, and you don’t want to keep a Survivor from the Radio Call, you get Class Tokens for rejecting the Survivor. You also get Tokens when you retire a Survivor on your roster.
- Trade Goods Store – Class Tokens are available to purchase in the TG Store.
- Token Crates – The Token Crate reward from Challenges has a 50/50 chance of giving Class Tokens (10-32).
Hero Tokens – Hero Tokens are used to unlock and improve the Hero Survivors. Hero Tokens are “Hero specific.” This means that Daryl Tokens can be used to unlock/upgrade/promote Daryl, and so on. To find out everything about , check here. Hero Tokens can be obtained by the following methods:
- Radio Calls – Hero Tokens are given as a reward in Radio Calls.
- Trade Goods Store – Hero Tokens are available to purchase in the TG Store.
- Token Crates – The Token Crate reward from Challenges has a 50/50 chance of giving Hero Tokens (8-24).
![]() Gold - White.PNG Gold is used to buy extra Survivor Slots, buy Outfits, speed up building times and Survivor/Equipment upgrades, speed up the healing of Survivors in the Hospital, and purchase other currencies when you don’t have enough to do an action. Gold can be obtained by the following methods:
Gold - White.PNG Gold is used to buy extra Survivor Slots, buy Outfits, speed up building times and Survivor/Equipment upgrades, speed up the healing of Survivors in the Hospital, and purchase other currencies when you don’t have enough to do an action. Gold can be obtained by the following methods:
- Wall Walkers
- Post Mission Reward Crates
- Gold and Silver Trade Good Crates
- Real Life $$
- Completing Achievements and Quests
- Watching Ads in the Cinema
Survivors
Let’s take a look at what we can do with our Survivors that we will take in to battle!!! Start by clicking on the “Survivor” button.

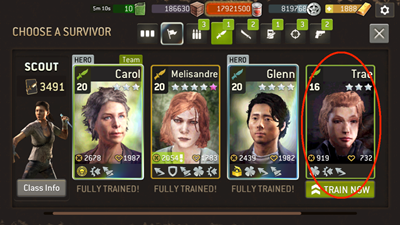
This will take us to our Survivor screen where we can see all of our Survivors. The first 3 Survivors will be those that you used on your last Mission. Then the Survivors will be listed from highest level to lowest, with Heroes being listed first, and any Survivors defending the Outpost at the very end of the list.
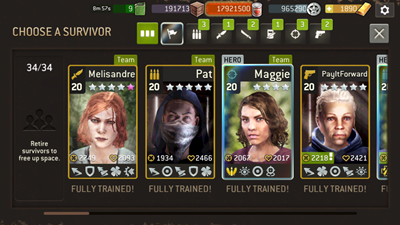
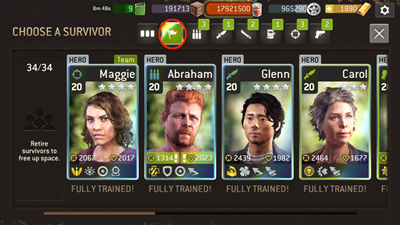
You can sort your Survivors by Heroes…
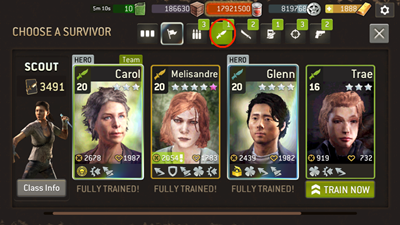
Or you can sort your Survivors by Class.
To view a specific Survivor, click on their picture. This will take you to their Survivor Profile.
From the Survivor Profile, you can…
1. See your Survivors Information
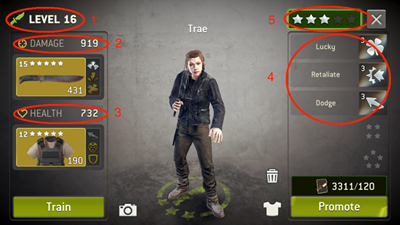
- There are 5 factors that help make your Survivor Unique:
- Level of the Survivor – This level helps determine what strength of enemies you can defeat, and also what Equipment you can use on the Survivor.
- Damage Rating of the Survivor – This is how much damage you can do to enemies.
- Health Rating of the Survivor – This is how much damage you can take from enemies
- Traits of the Survivor – These special skills differentiate your Survivors from each other.
- Prestige Level of the Survivor – This “star” rating can go from 1 Star to 10 Stars.
2. Change the Survivor’s name!
Tap on their name…
Then type in their new name!

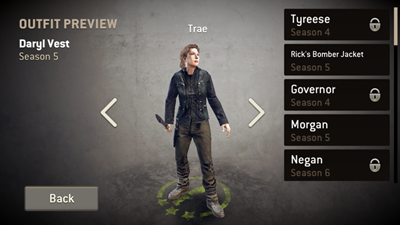
3. Change the Survivor’s Outfit
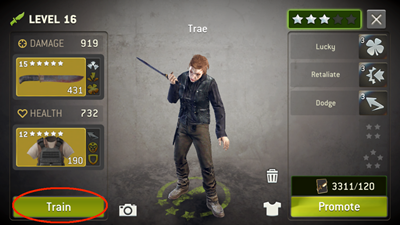
4. Train the Survivor to a Higher Level
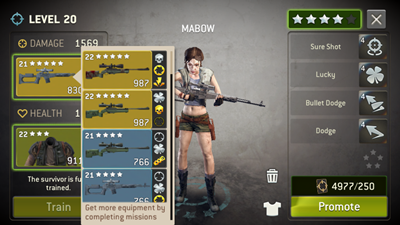
 From this screen, you can see the cost to Train your Survivor, the time it will take to Train, and the new Damage and Health Values for your Survivor after the Training.
5. Change Survivor’s Equipment
Start by tapping on your Survivors Weapon.

If there is a Weapon or Armor in your inventory that has a higher Damage or Health Rating than what is equipped on your Survivor, you will see the green exclamation point letting you know there is a potential replacement. Sometimes you will already have the best option equipped because the upgraded Traits on the Equipment isn’t factored in when the game makes a suggestion.
After you tap on the weapon, you will see your options. Click on the Weapon you’d like to equip.
Next, let’s pick some new Armor!

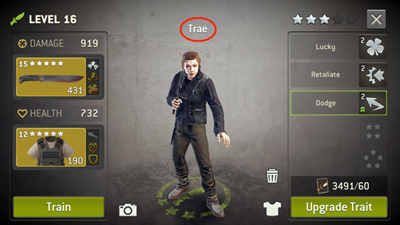
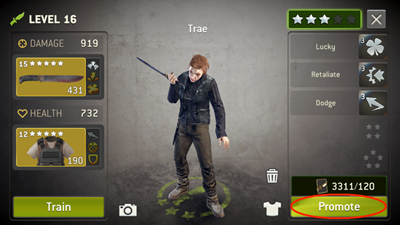
6. Upgrade Your Survivor’s Traits, or Promote to a higher Prestige Level with Class Tokens.
Upgrading your Survivor’s Traits is the first step towards Promoting a Survivor to a higher Prestige Rating.
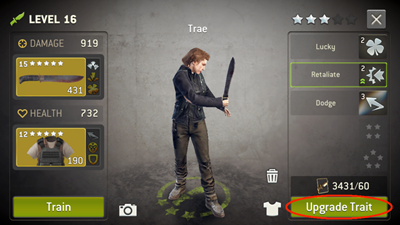
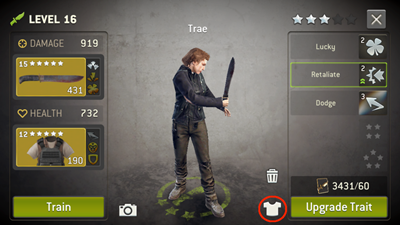
You will notice that the “Retaliate” Trait is highlighted in green, so it will be the Trait to be upgraded. You can see your total # of Class Tokens on the left (3431), and the number of Class Tokens needed to upgrade the Trait (60).
After all Traits have been upgraded to the same level as the Survivor’s Prestige Level (3 in this case), you can then Promote the Survivor to the next Prestige/Star Level.
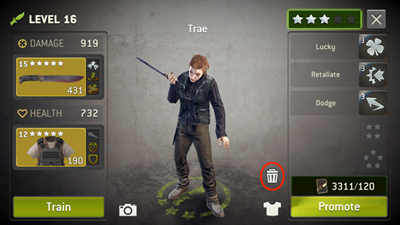
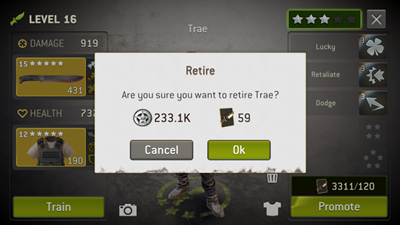
7. Retire the Survivor
At some point, you may not want your Survivor anymore. You can Retire them for Class Tokens and some of the XP you invested in the Survivor.
Survivor Classes
These are the 6 different Classes of Survivors you can get in the game.
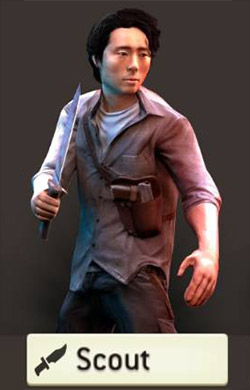
- Scout class has low health, but excels against single targets.
- Type: Melee
- Unlocks: Immediately
- Strengths: Scouts can move further than every other class!! Very high Damage to one enemy, very strong against Armored & Tank Walkers.
- Weaknesses: Low Health Rating and can only attack one enemy; don’t put your Scout in too much danger
- Charge Ability: Brain Stab
- Extra Damage on charge attack
- # of kills needed: 2
- Unique Weapon Traits: Swift Strike, Threat Reduction
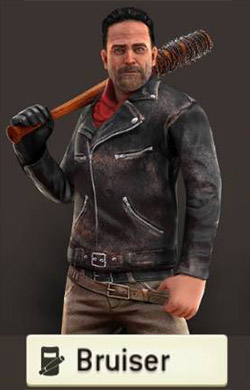
- Bruiser class has high health and excels in crowd control.
- Type: Melee
- Unlocks: Immediately
- Strengths: Very high Health Rating. Can stun enemies.
- Weaknesses: Very low Damage Rating. Stunning enemies stops once the enemies get higher levels than your Survivors.
- Charge Ability: Smash
- Can stun and damage multiple enemies.
- # of kills needed: 2
- Unique Weapon Traits: Concussion
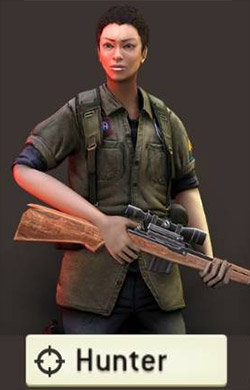
- Hunter class has low health, but excels against crowds.
- Type: Ranged
- Unlocks: After completing Chapter ??
- Strengths: High Damage to multiple enemies.
- Weaknesses: Lower Health Rating.
- Charge Ability: Critical Attack
- Automatic Critical Attack (higher damage)
- # of kills needed: 3
- Unique Weapon Traits: Large Caliber

- Shooter class has medium health and excels against single targets.
- Type: Ranged
- Unlocks: After completing Chapter 4
- Strengths: High Damage to a single enemy.
- Weaknesses: Can usually only attack one enemy.
- Charge Ability: Free Attack
- Extra attack. First attack is always a Critical Attack.
- # of kills needed: 2
- Unique Weapon Traits: High Powered

- Warrior class has medium health and excels against tight packs of enemies.
- Type: Melee
- Unlocks: After completing Chapter 7
- Strengths: Can attack multiple enemies at once.
- Weaknesses: Medium Health and must attack from close range.
- Charge Ability: Bonus Attack
- Extra Attack
- # of kills needed: 3
- Unique Weapon Traits: Wide Arc
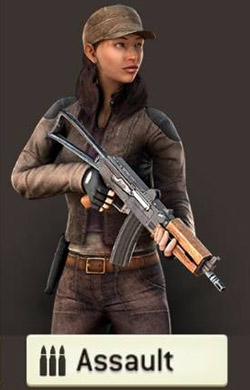
- Assault class has high health and excels against crowds.
- Type: Ranged
- Unlocks: After completing Chapter 9
- Strengths: Can attack multiple enemies and has high Health Rating.
- Weaknesses: Does not have high Damage Rating.
- Charge Ability: Stun Attack
- Stun multiple enemies for one turn with a Normal or Critical Attack
- # of kills needed: 3
- Unique Weapon Traits: Wide Spread
Heroes
- You can unlock and play with characters from the Show.
- To find out everything about Heroes, check here.
Now that you’ve seen what you can do with your Survivors, let’s go kill some Walkers!!!
Game Modes
You can access all types of Missions from the “Missions” Button
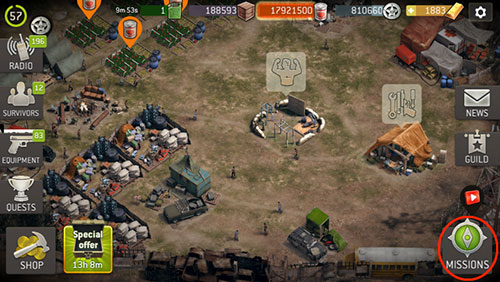
You can then choose between the 4 types of main Missions (or 5 types of missions in this picture):
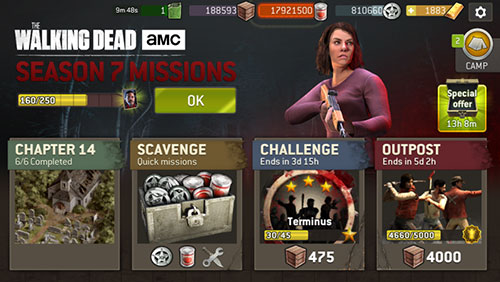
- Chapter/Episode Missions – Chapter missions are the storyline aspect of the game. Completing these Missions unlock new Survivor Classes and give Equipment as Rewards. Some missions also give Survivors and Daryl Hero Tokens. For Video Walkthroughs to help beat tricky Chapter Missions, check here.
- Scavenge Missions – These missions help you focus on earning specific Resources or items.
- XP Scavenge Missions: These give more XP rewards.
- Supply (Food) Scavenge Missions: These give more Supply/Food rewards.
- Equipment Scavenge Missions: These give more Equipment as rewards. Currently, only these missions give Epic/Legendary Gear in the Gold post-mission crates.
- Challenge/Guild Missions – Completing these missions award Stars used for gaining Challenge Rewards (Individual and shared Team Rewards) and for Leaderboard competition.
- Outpost Raids – This is the PvP aspect of the game, sort of. Raiding opponents gives Trade Goods to spend on items, and Influence Points that are used for the Outpost leaderboard. For more information on Outposts, check here.
- Season 7 Missions – To coincide with each TV episode of Season 7, there are special missions.
Battle Mechanics
When you play a mission, you will encounter different types of enemies:
- Normal Walkers – Normal Walkers are the easiest to kill, regardless of the Survivor Class used against them.
- Tank Walkers
 – Tank (or “Fattie”) Walkers have huge Health and are resistant to being stunned by Bruisers or Assaults.
- Armored Walkers
 – Armored Walkers are more resistant to bullets, so Melee Survivors are much better at killing them.
- Burning Walkers
 – Fire Walkers are like Normal Walkers, but if you attack them with a Melee Survivor, you will be hurt from the fire. Use Ranged Survivors against them. Even if you use Scouts equipped with the Kingdom Spear or Pitchfork you will still get burned if attacking. The damage done to your survivor when you attack a Burning Walker is less than if the Burning Walker attacks you.
- Exploding Walkers – Exploding Walkers “explode” when shot by bullets. They damage anything within the explosion range. Exploding Walkers don’t explode if you kill them with a Melee Survivor.
- Spiked Walkers
 – Spiked Walkers are resistant to being stunned by Assaults and Bruisers. If you are hit by a Spiked Walker, your Survivor will start Bleeding, and you will continue to lose Health and won’t be able to use your Charged Ability until you Bandage yourself. If you go into a Struggle with a Spiked Walker, the Wrestler Trait won’t work and your Survivor will die.
- Raiders/Saviors/Free Men – Raiders are basically like your Survivors. They come in the same 6 Survivor Classes. Raiders have two “Health Bars”, a green health bar and a red health bar. You can only kill a Raider when their Health Bar is red. So, you must attack a Raider at least twice to kill them. Currently, Raiders are very strong once they get around Level 17.
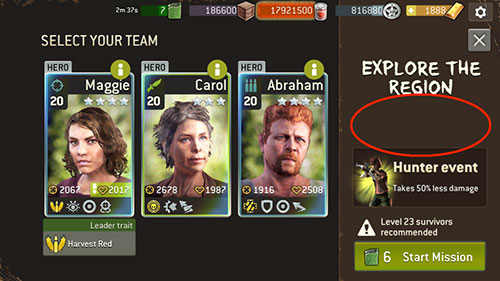
You can see what types of enemies you will encounter on the starting screen for your Mission:
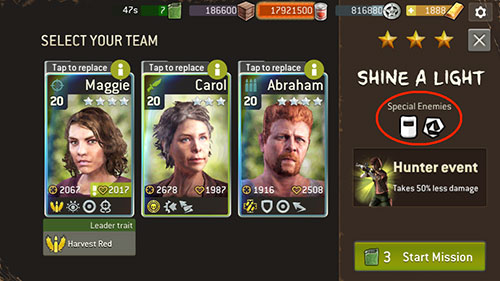
This is what it looks like when you will only encounter Normal Walkers.
- When you attack an enemy, there are three outcomes that your attack will result in.
- Normal Attack – This attack results in a damage value around the damage shown in your Survivor Profile.
- Critical Attack – This is the best attack! Critical attacks do extra damage, and typically kill the walker.
- Body Shot – A body shot results in a damage value around half of a “normal attack.” Body Shots increase as the Walker Levels increase, and once a Walker is 5 Levels (or more) above your Survivor, every attack will result in a Body Shot (not including Charge Ability Attacks, or attacks with the Piercing Weapon Trait). Body shots also occur on Walkers with a level lower than your Survivor Level, but it won’t display as a “Body Shot” if you kill the Walker.
- The type of attack is influenced by the following factors:
- Level Difference between your Survivor and the enemy. As the Walker’s level gets higher than your Survivor’s level, the chance for a Critical Attack decreases, and the chance of a Body shot increases.
- Traits: The Piercing Trait is the only one that can reduce the chance of a Body Shot, which is why it is so important. Other Traits like Accurate and Sure Shot will increase the chance of a Critical Attack when a Body Shot doesn’t happen.
Player Level
An important aspect of the game is your Player Level. This is found in the upper left section of your home screen. Your Player Level is determined by the buildings you’ve built and upgraded, as each build/upgrade gives you Building Points. Your Player Level is important because it helps determines what levels of Equipment you get from Trade Good Rewards and Challenge and (Deluxe Challenge) Crate rewards.


Buildings
You can find out more information about Buildings here.
- Council – Your Council is the main building in your camp. The level of your Council determines what other buildings you can build and/or upgrade. Each Council upgrade requires a specific Player Level to have been reached. The level of your Council also determines how much XP you can store. Most players will upgrade the Council as soon as they can.
- Training Grounds – This is where you level up your Survivors. The higher you upgrade your Training Grounds, the higher you can upgrade your Survivors. Most players will upgrade the Training Grounds immediately after the Council.
- Workshop – This is where you upgrade your Equipment. The higher you upgrade your Workshop, the higher you can upgrade your Equipment. This building is often upgraded after the Training Grounds, but many will upgrade Farms first.
- Farm Plots – These produce Food/Supplies that is used to upgrade your buildings. It is wise to upgrade your Farm Plots to around Level 7 or 8 as quick as possible, then delay the upgrading of the Farms as upgrading them to Level 9 & 10 doesn’t offer a great return on Investment. The higher the level, the more Food you can produce and store.
- XP Tents – These produce XP that is used to upgrade your Survivors and Equipment. Most players don’t prioritize upgrading the XP Tents since they don’t give a lot of XP, so other upgrades are more useful. The higher the level, the more XP you can produce and store.
- Supplies Storage – These determine how much Food/Supplies you can store in your camp. Most people will only upgrade these buildings to provide just enough storage for your next buildings.
- Mission Car – This produces and stores Gas that is used to run Missions. The higher the level of the Mission Car, the more Gas you can store when you are logged off the game.
- Hospital – This is where your Survivors heal after being damaged in Missions. The higher the level of the Hospital, the quicker your Survivors can heal, and the more Survivors you can heal at once.
- Radio Tent – This is where you make Radio/Phone calls to get new Survivors and Hero Tokens. The higher your Radio Tent, the higher the starting level of the Survivors you get from Radio Calls.
- Outpost – This produces Trade Goods. The higher the level, the more Trade Goods it produces and stored. Also, higher levels allow you to use different maps for your Outpost Defense.
- Walker Pit – This is where you upgrade Walkers for Outpost Defense, and acquire more Walkers for your Outpost Defense. The higher the level, the higher you can train the Walkers in your Outpost, and the more you can capture.
- Equipment comes in two forms:
- Weapons – Weapons are slightly more important than Armor, since you will (hopefully) be attacking more than you will be attacked!!
- Armor – Armor will help you take less damage and reduce your time in the Hospital.
- Equipment can be found in these places:
- Reward Crates after Missions:
- 1 & 2 Star gear can be found in Bronze Crates.
- 2 & 3 Star gear can be found in Silver Crates.
- 3 & 4 & 5 Star gear can be found in Gold Crates.
- 3/4/5 Star Equipment can only be found in Gold Crates after Guild Challenge & Equipment Scavenge Missions. It can’t be found after Food & XP Scavenge Missions.
- Trade Goods Store
- Rewards from Chapter Missions
- Challenge and Deluxe Challenge Crates
- Watching Ads in the Cinema
- Purchased for real $$ in Bundles.
- Reward Crates after Missions:
- Currently, Equipment can only be upgraded 3 levels above it’s original level. Two important notes about this:
- Because Equipment currently has a maximum level, you will quickly outgrow your equipment as you level up your Survivors.
- Because of this, it’s best to use your XP on upgrading Survivors over Equipment. You should still upgrade some equipment for your best Survivors, but don’t go crazy upgrading equipment early in your gameplay unless you are swimming in XP!
- NG stated long ago that they are thinking about removing the level cap on equipment in the future. For this reason, you may not want to scrap lower level equipment with great traits. The amount of XP you get for scrapping Epic or Legendary equipment isn’t much, so holding on to that equipment doesn’t hurt you very much, and could help you in the long run. This change isn’t planned as of yet, but we can hope!
- Because Equipment currently has a maximum level, you will quickly outgrow your equipment as you level up your Survivors.
- Finding great Equipment is hard. There are really only three ways to get Epic & Legendary Equipment:
- Trade Good Store: This is the most reliable way to get great Equipment. To see what levels of gear are in Trade Good Crates based on your Player Level, check this page here.
- Legendary Crates (Cost 7,500 Trade Goods)
- Epic Crates (Cost 3,000 Trade Goods)
- Gold Crates (Cost 500 Trade Goods
- Gold Reward Crates from after these Mission Types:
- Equipment Scavenge Missions
- Guild/Challenge Missions
- Chapter Missions (also Season 7 missions)
- Challenge and Deluxe Challenge Crates
- Trade Good Store: This is the most reliable way to get great Equipment. To see what levels of gear are in Trade Good Crates based on your Player Level, check this page here.
- Traits enhance and differentiate Equipment. Please check out the Traits section of this site for more info, and here’s my view on what Traits are best for each class. Here’s some other important information.
Radio Calls
Radio Calls are the best way to get great Survivors and Hero Tokens. You make Radio Calls through your Radio Tent. To make a Radio Call, you need Radios (Phones). You can see how many Radios you have in the upper left part of your Home Screen.

To make a Radio Call, you can either click on “Radio” button, or tap on your Radio Tent building. You will be taken to this screen:

- Once you upgrade your Radio Tent to level 2, you will always have 3 call options.
- Within each Radio Call type, you will get either a Survivor or Hero Token choice.
- If you get a Survivor, you can either accept the Survivor to your squad, or you can reject the Survivor and get Class Tokens instead.
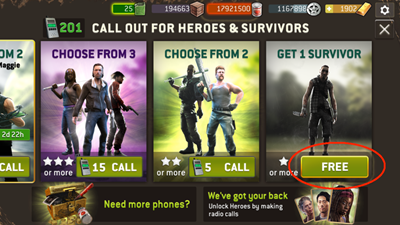
Let’s look at the different types of Radio Calls.
“Bronze” Radio Call (costs 1 Radio per call)

- With the “Bronze” Radio call, you will get one random option (either a Survivor or Hero Tokens).
- You can get any Prestige Level of Survivor, but Common is the most likely.
- You can get 10, 8, 32, 128 or 256 Hero Tokens, but 2 Hero Tokens is the most likely.
- You have about a 5% chance of getting Hero Tokens from these calls.
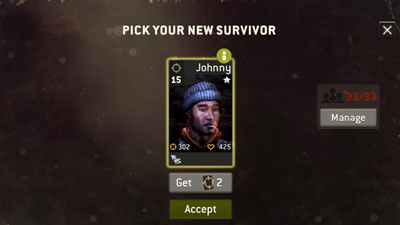
As you can see, you have the choice to “Accept” the Survivor, if you have Survivor Slots available, which I don’t. You can see on the left that I have all of my 33 Survivor Slots occupied.
If you get Hero Tokens, you will see this:
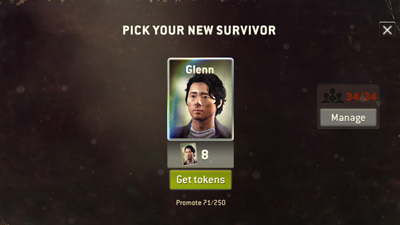
As you can see, the game will tell you how many Hero Tokens are needed for the next Trait Upgrade or the cost to Promote the Hero to the next Prestige Level.
“Silver” Radio Call (costs 5 Radios per call)
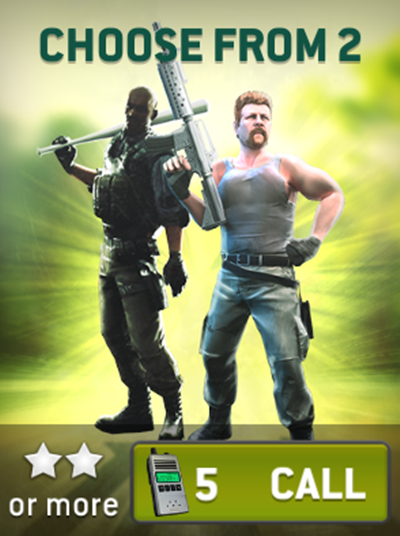
- With the “Silver” Radio call, you will get two random options (either Survivor or Hero Tokens).
- You can get Uncommon, Rare, Epic or Legendary, but Common is the most likely.
- You can get 10, 32, 128 or 256 Hero Tokens, but 8 Hero Tokens is the most likely.
- You have about an 8% chance of getting a Hero Token option for each choice.

“Gold” Radio Call (costs 15 Radios per call)
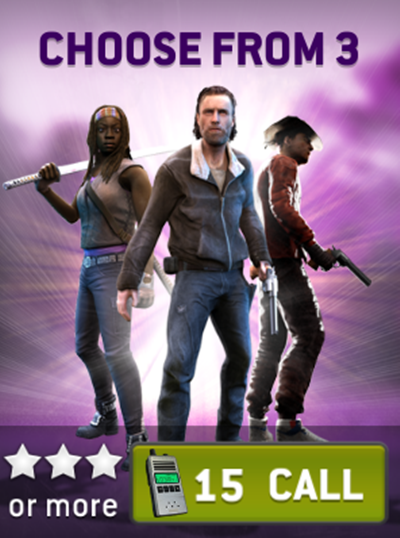
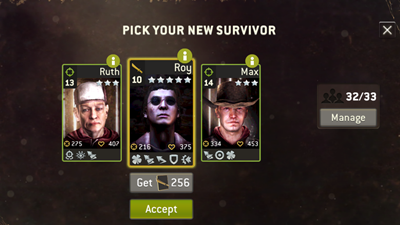
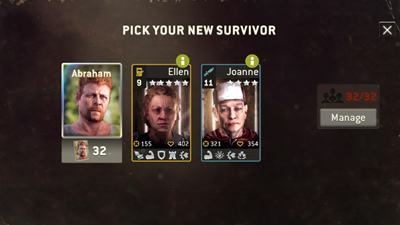
- With the “Gold” Radio Call, you will get 3 choices of Survivors or Hero Tokens to choose from.
- Your Survivor Choices will always be Rare, Epic or Legendary, with Rare Survivors the most likely.
- Your Hero Token Choices will always be 32, 128 or 256 Hero Tokens, with 32 Hero Tokens the most likely.
- You have about a 10% chance to get Hero Tokens for each choice.
- This is the best call choice if you are looking for regular Survivors (or Class Tokens) and a balance of different Hero Tokens.
Special “Hero” Calls

The special “Hero” calls are offered quite frequently, and only offer increased odds for one Hero (Maggie is pictured above, but every other Hero has had a “Hero” call). Currently, they are basically a “Silver” Radio Call that costs 10 Radios. You get two options to pick from. The “Hero” Call does not guarantee Hero Tokens; it only offers increased Hero odds for the specified Hero. We have found that the specific Hero is found about 18% of the time, with 10 Hero Tokens being the most common. These calls offer the best option to get Hero Tokens for the specific Hero in the call. However, these calls do very little to help your regular Survivors.
Free Radio Calls
You also get one free “Bronze” Radio call every 20 hours. You will see a timer on your Radio Tent building that tells you how long until your free call. When you have a free call available, you will see it in two places.
Tap on either of those places, and you will be taken to your free radio call option.
Please check around the site to see what else you can find out.
เครดิต
Credit
ตัวละคร.
CHARACTER.
-
 Aaron
Aaron -
 Abraham Ford
 -
 Armored walkers
 -
 Beth Greene
 -
 Carol
Carol -
 Connie
 -
 Daryl Dixon
 -
 Dwight
 -
 Eugene
 -
 Ezekiel
 -
 Father Gabriel
 -
 Fighter Rosita
 -
 Glenn Rhee
 -
 Guardian Caral
 -
 Hershel Greene
 -
 Hilltop Maggie
 -
 Huntsman Daryl
 -
 Jadis Stokes
 -
 Magna
Magna -
 Mercer
 -
 Michonne
 -
 Normal Walkers
 -
 Outlaw Negan
 -
 Princess
 -
 Quinn
Quinn -
 Rick Grimes
 -
 Rosita
 -
 Rufus
Rufus -
 Sasha Williams
 -
 Shane Walsh
 -
 Sniper Morgan
 -
 Survivalist Rick
 -
 Tank Walkers
 -
 The Governor
 -
 Tyreese Williams
 -
 Yumiko Okumura


