")
")
Final Fantasy 5
ไฟนอล แฟนตาซี 5


Introduction
 |
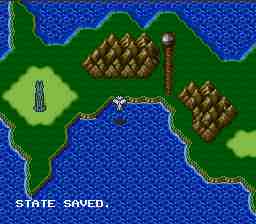
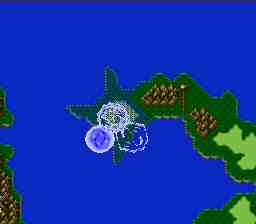
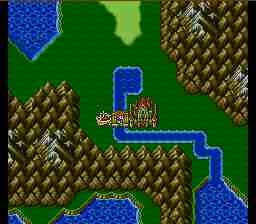
The game opens at Castle Tycoon. Lenna's father is preparing to ride to the wind shrine on his Hiryuu, when Lenna comes out to talk to him. King Tycoon explains that something about the wind bothers him and that he must go. He also tells Lenna not to follow him. With that, he departs. |
| On the way there, Galuf and Faris notice that the wind stops. King Tycoon arrives just in time to have the crystal explode in his face! |  |
 |
And then the intro cuts to Butz, who is with Boco, his chocobo. He hears an odd sound and looks up, and sees a meteor falling from the sky. It lands near Castle Tycoon. He hops on Boco to go check it out, and the game begins. |
Introduction to the Wind Shrine
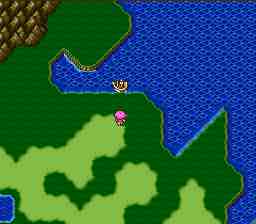
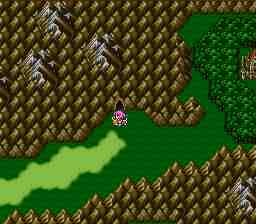
| After the game begins, go due east until you reach the Tycoon Meteor. | 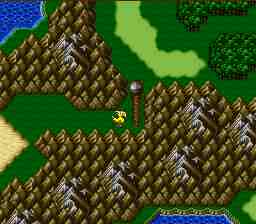 |
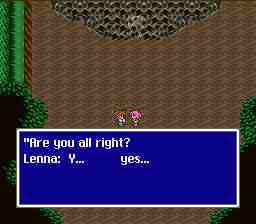 |
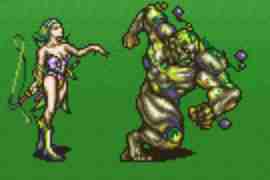
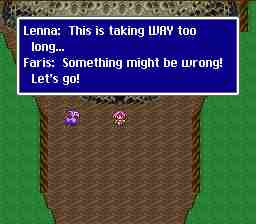
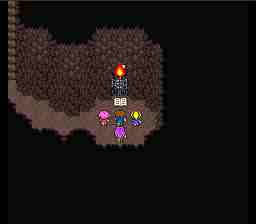
Work your way through the bushes until you reach Lenna, who is lying unconcious. It looks like she didn't to her father :). Two goblins will rush up to attack you. They're wimps and will fall with but a single blow apiece. After they are defeated, go help Lenna get up. She will tell you she is very busy, and must go on to the Wind Shrine. Just as she is getting ready to leave you will hear Galuf yell for help. |
| Go help Galuf get up. He has amnesia! He doesn't remember anything except his name and the fact that he has to get to the Wind Shrine. Lenna and Galuf decide to travel together. Butz decides to continue his journey. | 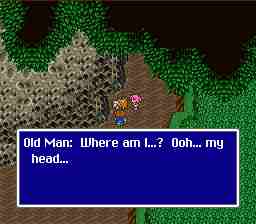 |
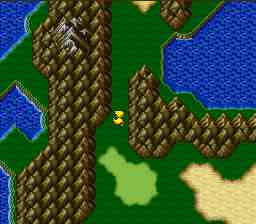 |
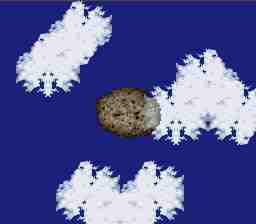
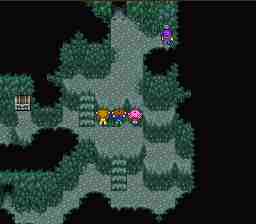
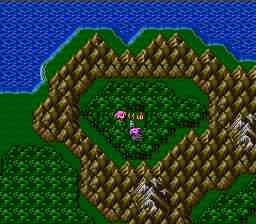
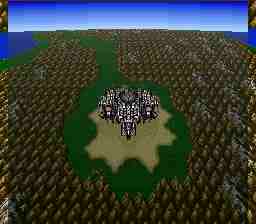
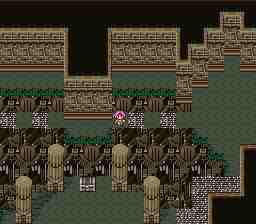
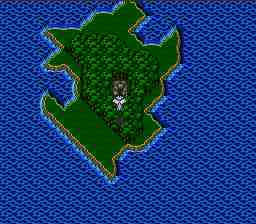
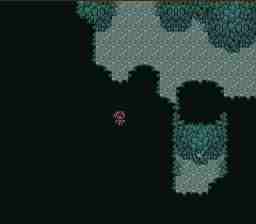
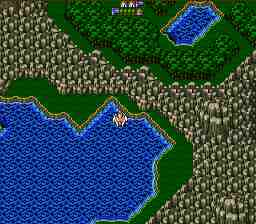
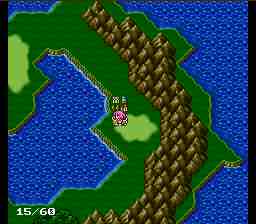
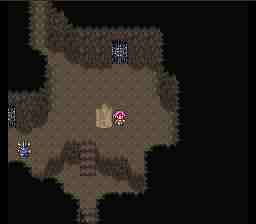
After leaving the Tycoon Meteor go west and then north until you reach this valley. |
| The valley is full of more wimpy Goblins! Work your way north through the valley until you reach Galuf and Lenna, who don't seem to have been able to fend them off. After rescuing them (again), Butz will decide to go with them to the Wind Shrine. Galuf has his doubts about Butz's motives though... "I bet you just want to be with this girl!" | 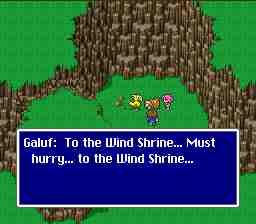 |
 |
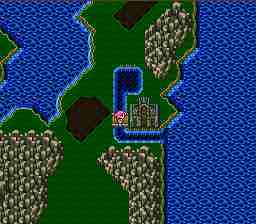
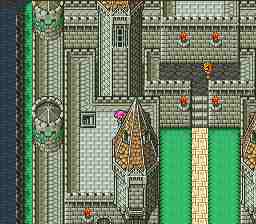
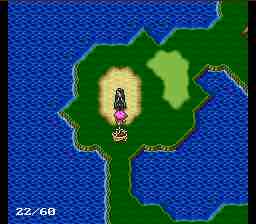
Go north until you reach the Pirate's Cave. |
| Upon entering, Butz will tell Boco to stay at the entrance, as it is dangerous ahead. Leave Boco behind and work your way through the cave. Be sure to stop at the healing spring to heal your wounds. | 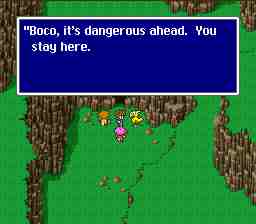 |
 |
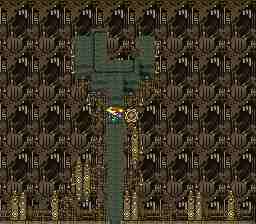
About halfway through the cave, you will see a pirate! The party wisely decides to hide, and the pirate shows you how to open a door. Go through the door and you'll see an odd thing, a ship that sails without wind! Continue through the cave until you reach the pirate's hideout. |
| When you reach the pirate's hideout, the party debates about how they are going to use the pirate's ship, as they need it to get to the Wind Shrine. Lenna wants to ask the pirates for a ride, but Galuf has a more bold idea, steal it! | 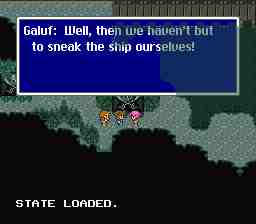 |
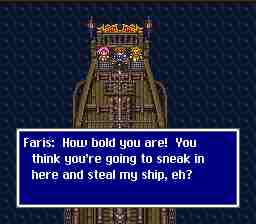 |
Sneak onboard the ship, and cast away. The ship doesn't move. Uh oh... here comes Faris and his group of pirates! They tie the party up and throw them in the cellar, despite the fact the Lenna begs them to let the party have a ride to the Wind Shrine. Something bothers Faris though... Lenna has the same pendant as he does. |
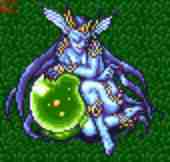
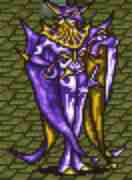
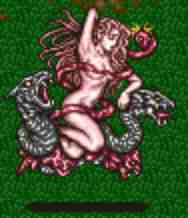
| The next day Faris lets them go and says he will accompany them to the Wind Shrine! He doesn't tell the party why, but he wants to find out why Lenna and he would have the same pendant. He also introduces the party to Syldra, a sea dragon that pulls the ship around and lets it move without wind. Faris and Syldra grew up together, and are "basically brothers". | 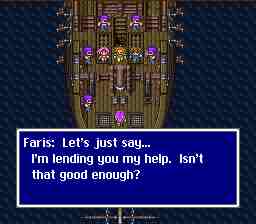 |
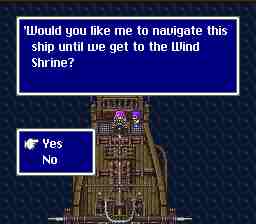 |
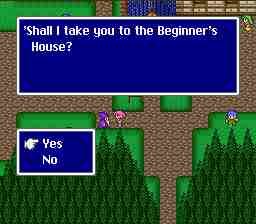
A pirate will offer to navigate to the Wind Shrine. Save yourself some time and tell him "yes". |
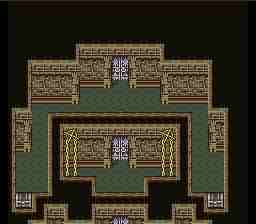
| When you enter the Wind Shrine, the people there will tell you that a short time ago, monsters rushed into the shrine! King Tycoon went up to the top floor (where the crystal is) and hasn't come back. Be sure to talk to the man next to the recovery spring water pot, he will give you 5 potions. You'll need them. | 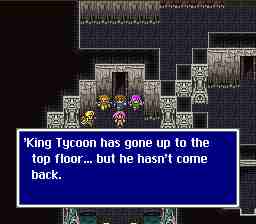 |
 |
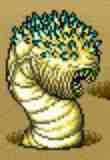
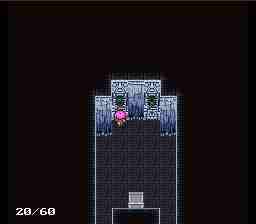
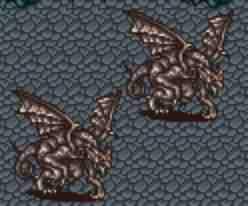
Work your way up to the top floor, being sure to grab all the treasure on the way by. When you get to the 3rd floor you will be confronted by the WingRaptor. Grab the broadsword from the room on his left before fighting him and give it to Galuf so he'll have a weapon. |
| While fighting the WingRaptor, hit him hard while his wings are open. When his wings close, don't hit him or he'll counterattack. Use this time to heal instead. |
|
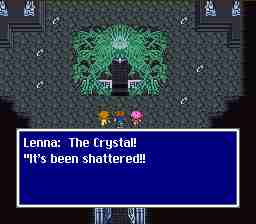 |
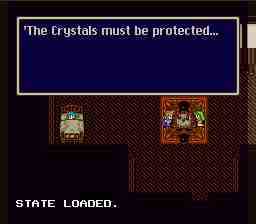
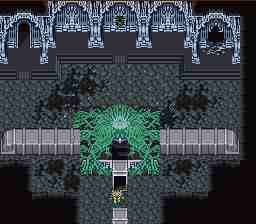
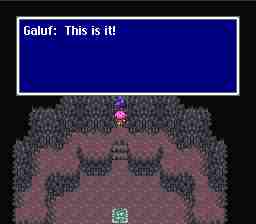
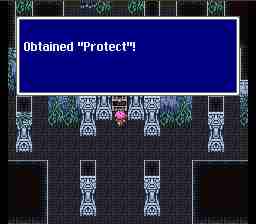
After defeating the WingRaptor, continue to the top floor. The crystal has been shattered! |
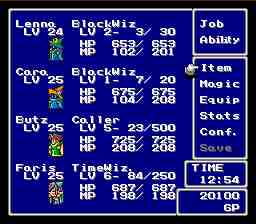
| Lenna's father will appear and tell the group to protect the crystals. After that the crystals will give the party their power. At this point you can select and change the classes of your party members. Before continuing, you should assign all of your party members to a class. You should have at least 1 Knight and 1 White Wizard. If this is your first time playing FF5, listen to Boco's explanation of the Ability System. |

The Wind Shrine to the Ship Graveyard
| After you exit the Wind Shrine, there won't be many places you can go. If you look around you will find the Torna Canal, but the door is locked. When you are ready, go to the town of Tule. | 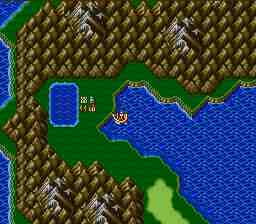 |
 |
After you enter Tule, Faris and his group of pirates head straight to the pub to have a few drinks. Even if you're not a beginner, you should go to the Beginner's House to get all the treasure out of it. After that, go shopping! You should try to get all the spells if you can afford them, as well as some better weapons and armor. |
| When you're all done shopping, go to Zokk's house, which is the northernmost building in the town. Lenna will ask Zokk for the key to Torna Canal. Zokk tells Lenna that the Canal has been overrun with monsters. Plus, he seems to have lost they key. After that, he invites the party to stay the night. |  |
 |
Later that night, Butz wakes up, goes outside, and has a flashback to a conversation his mother and father had before they died about the crystals. He remembers that his father said they must be protected. |
| When he goes inside to go back to bed, Zokk gives Butz the key to the Canal! He also tells Butz to protect Lenna. |  |
 |
After the party gets up the next morning, do any last minute shopping you need to do and leave the town. Faris tells his pirates that he is going on a long journey and that they should go back and protect the hideout. They don't want to but won't disobey Faris. |
| Go to the Torna Canal. Unlock the door and sail on through, whacking the monsters on the way by. | 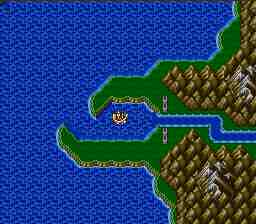 |
 |
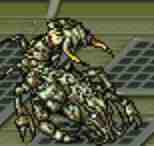
While you are passing through the Canal, a whirlpool will appear and pull your ship in! When you get to the center of the whirlpool you will be attacked by Karlabos. |
| While fighting Karlabos, have your Black Wizard repeatedly cast Bolt on him. Have your Knight cover the weaker party members while your White Wizard heals people. He hits hard don't fall behind on healing! |
|
 |
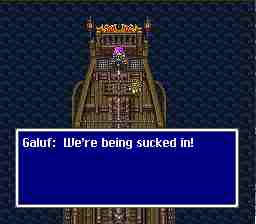
After Karlabos is defeated, your ship breaks free of the whirlpool, but Syldra doesn't. While the rest of your party hold Faris back, there is nothing you can do but watch as he is sucked beneath the water. |
| Without Syldra, your ship simply drifts away. | 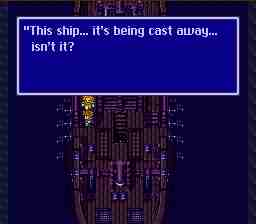 |
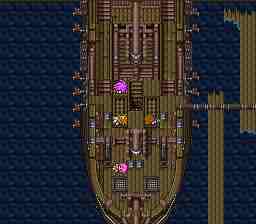 |
And comes to rest in the Ship Graveyard. Get off your ship and begin working your way through the graveyard. All the monsters here are undead, hence they are weak against fire, healing spells, and holy power. |
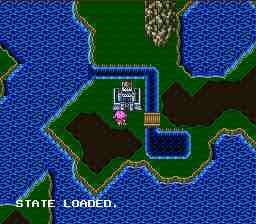
| When you reach this point, STOP! If you do not have transparencies enabled, save your state and enable them, as you will not be able to see under the water. When you edited your Zsnes.cfg file (or just typed -v 5 at the command prompt), return, load your state, and continue. | 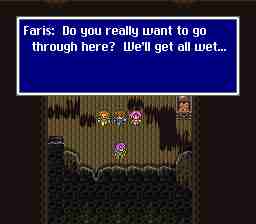 |
 |
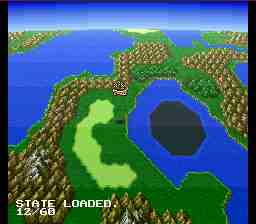
After walking through lots of water, you're party will stop to dry their clothes. Faris seems rather hesitant to remove his clothes and Galuf notices that Faris is... a girl! After some discussion the party decides that it really doesn't matter that he's a girl though and continues on. |
| Be sure to grab the world map on the way by. |  |
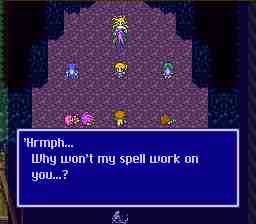 |
When you finally reach dry land, you will be confronted by the Siren. She will steal everyone but Galuf's souls. Due to Galuf's amnesia, he is unaffected by the spell and will revive your other party members. When he does this, the Siren will attack. |
| While fighting Siren, fight defensively until she changes to an undead. When this happens, her defense power drops and she becomes weak against all the normal undead stuff (cure, fire, holy power). Hit her with everything you've got until she's either dead or turns normal again. Repeat until you defeat her. When she's dead, walk north to exit the graveyard. |
|

The Ship Graveyard to the Water Crystal
| After you leave the Ship Graveyard, go east and then south until you reach Carwen. You're really in a jam now, without a ship how will you ever reach Worus? | 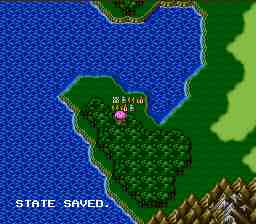 |
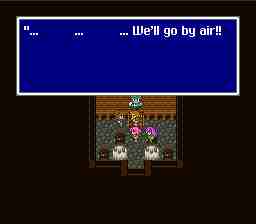 |
While in Carwen, the party will wonder several times how they are going to get to Worus. Do any shopping you may need to do and head up to the 2nd floor of the pub after talking to the woman just south of it. A man there says he saw Lenna's father's Hiryuu going towards the north mountain! If you can't go by sea, you can go by air. |
| After leaving Carwen, go due north until you reach North Mountain. |  |
 |
Work your way up the mountain. The encounters are tough and often here, be sure to use a tent when you reach the save point and do a sram (normal) save of your game. After you save, you will encounter Magisa, who will shoot Lenna with a poisoned arrow and collapse part of the ledge! She came hunting the Hiryuu, but he was too tough though, so she says she'll just take Lenna instead. Of course, this doesn't sit well with the rest of the group. Faris jumps across and he and Butz make a hasty rope bridge. With that, Magisa attacks. |
| While fighting Magisa, have Lenna use an antidote on herself and have your white wizard cast Safe on all your party members. You'll need it, a few rounds into the battle Magisa calls Fortsa, and he hits hard. They are both weak against Ice magic. Concentrate all your firepower on one until they are defeated, and then concentrate on defeating the other. |
|
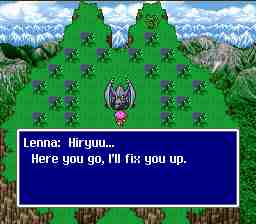 |
After you defeat Magisa and Fortsa, continue to the top of the mountain. The Hiryuu will be lying on the ground. Lenna will walk through the poisonous weeds to get the weed to heal the Hiryuu, and then the Hiryuu will heal Lenna's poison in turn. After that, everyone hops on the Hiryuu. Butz seems a little hesitant... it turns out he's afraid of heights! |
| Ride the Hiryuu to Worus. Be sure to stop in the town first to upgrade your spells and equipment. | 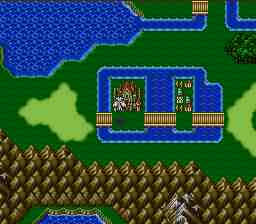 |
 |
When you arrive in Worus castle, explore a bit (there's some good stuff in here) before you see the King. If you have a thief, be sure to equip the "Escape" command, use it if you run into a Garkimasra or it'll kill you.
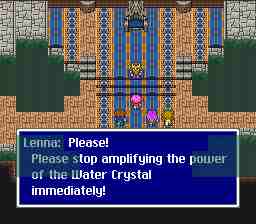
When you see the King, Lenna will ask him to stop using the Water Crystal before the machines he is using to amplify its power cause it to shatter. King Worus doesn't like that idea much. |
| Before Lenna and Worus can discuss it much, a meteor crashes near the Tower of the Water Crystal. King Worus tells Lenna the discussion will have to wait till later and runs out the door with his soldiers to go check it out. | 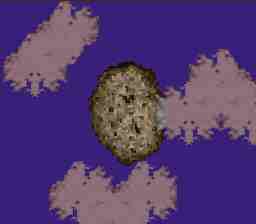 |
 |
Hop on your Hiryuu and go follow King Worus to the Tower of the Water Crystal. |
| When you enter the tower, some hurt soldiers will inform you that Galura went crazy a short while ago. The King chased him up the tower. He'll tell you pretty much the same thing when you find him (also hurt) up in the tower. |  |
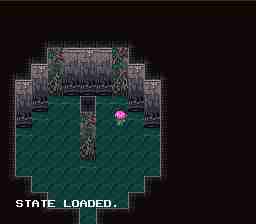 |
You can climb the vines here. Climb the one Lenna is in front of to continue. The one on the left leads to a treasure chest, the center one is a dead end. |
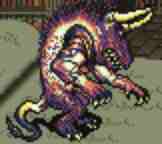
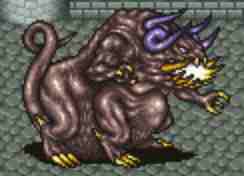
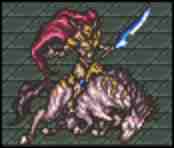
| When you reach the crystal, a mysterious warrior is fighting Galura! He tells you that Galura is being controlled and is trying to destroy the crystal! Galura defeats the warrior and turns to attack you. | 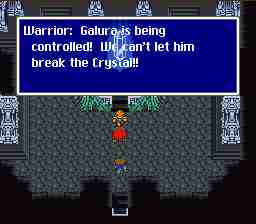 |
|
|
Galura is tough. Period. Although he has no magic, he hits hard, fast, and often. Be sure to cast safe on all your party members, as he will counter every attack you make against him. |
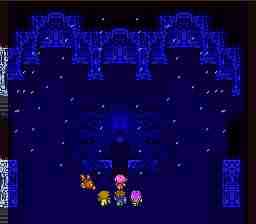
| Galura may be defeated, but the crystal shatters anyway. The warrior tells Galuf to protect the Fire Crystal and dies before he can tell Galuf who he is or how he knows him.
Pick up the pieces of the crystal to gain new character classes! There's one you can't get... yet. |
 |
 |
No time to worry about it though, because the tower starts sinking into the sea! Syldra shows up just in time and uses the last of her power to rescue you. |

The Water Crystal to the Fire Crystal
| After Syldra spits you out on dry land, hop on your Hiryuu and head back to Worus. | 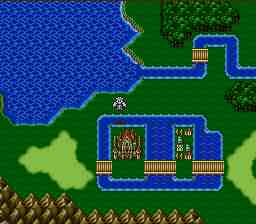 |
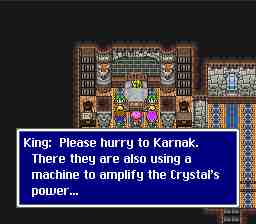 |
Go see the king, who is in his bed recovering from his wounds. He tells you that Karnak is also using a machine to amplify the power of the crystals and that you should go there. That could be a problem though, the inland sea you've been running around inside of is completely bounded by mountains, which your Hiryuu can't cross. How will you ever get to Karnak? |
| The soldiers in Worus Castle talk about a wounded Karnak soldier who is recovering from his wounds. Maybe he can help... unfortunately all he tells you is that he was exploring near a meteor that fell near Karnak and ended up next to the Tower of the Water Crystal. Looks like you should check out the meteor. | 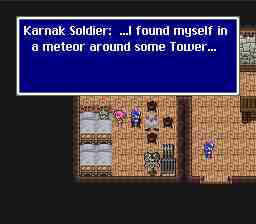 |
 |
Go to the Worus Meteor. |
| A hole has appeared in the meteor! Inside you will find a portal that will warp Butz. The rest of the group decides to follow. | 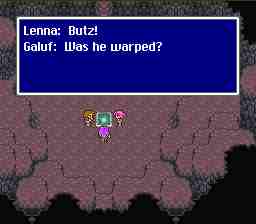 |
 |
You'll find yourself in the meteor that landed near Karnak! Go outside. |
| It's a long way to Karnak. Go north, around the mountains, and back south. You may have to use a tent to make it all the way. |  |
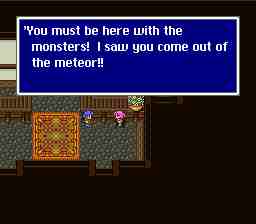 |
If you try to enter the castle, they won't let you in! Go into the town instead. A surprise is waiting for you at the weapon shop, when you try to buy something, a man comes in and says he saw your party come out of the meteor! Some soldiers come and throw the party in the dungeon. |
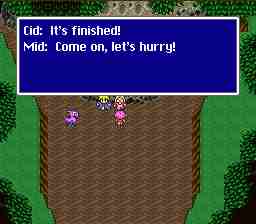
| In the dungeon you'll meet Cid, who built the machines to amplify the crystals' power. He realized that they were causing the crystals to shatter, so he tried to shut down the one in the steamship that was amplifying the Fire Crystal, but he got caught. The Minister of Karnak will come and let Cid out, saying he was right! A crack has appeared in the Fire Crystal. They want Cid to come check it out. Cid asks for your help at the steamship, but tells you only to come when you are totally prepared. Don't take him lightly! | 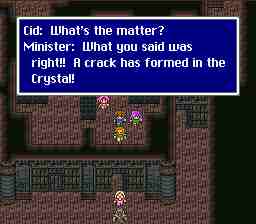 |
 |
Except for the fact that the Queen is missing, you won't learn much of anything useful in the castle. All the treasure boxes are blocked by flames though. Strange. Leave the castle and head back to the town. Be sure to grab Ice2, you'll need it in the steamship. Make sure you have at least 2 tents and plenty of FenixDowns also. When you're all stocked up, head off to the steamship. |
| Dr. Cid is waiting on the steamship. He will explain that the engine is still sucking the power of the Fire Crystal and that it must be shut down. Monsters are in the way though! Looks like it up to the party to save the day. | 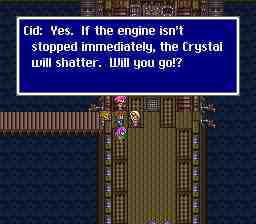 |
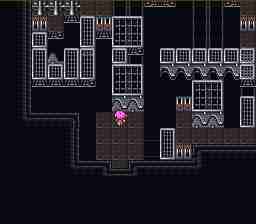 |
Work your way through the ship. Be sure to grab all the treasure, there are some good weapons and items in here, including the Thief Ring.
This is a not-to-difficult puzzle room. The explanation will be on its map (when I get to making it) |
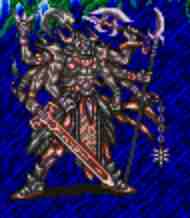
| When you reach the engine, the queen will appear and inform you that you stand in the way of her plans. With that, she summons LiquiFlame. | 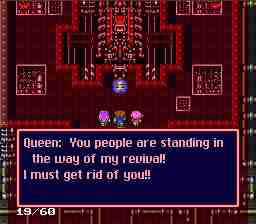 |
|
|
While fighting LiquiFlame, have your Black Wizard repeatedly cast 'Ice2' on it. Have your White Wizard cast 'Cure2' on the whole party while your Knight uses Fenix Downs to revive wounded party members. Have your extra character heal or fight as needed. He only has 3000 HP but one blast of Fire2 will usually kill whoever is the target and physical attacks don't hurt him much. |
| After LiquiFlame is defeated, the Queen collapses. She explains that she was being controlled by something evil. Hurry through the pipe to the crystal room. | 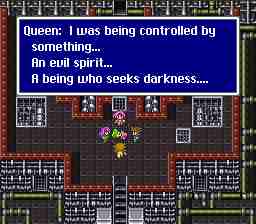 |
 |
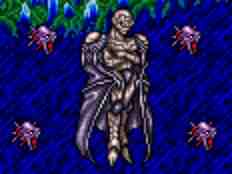
When you arrive at the Fire Crystal, a werewolf arrives through another entrance! He's not an enemy it seems, he's here to protect the crystal also. He also recognizes Galuf! Before you can inquire into this, a soldier runs in and restarts the machine! The party runs up to turn it off, but the lever is broken. The werewolf holds the machine back and tells your party to escape. The party tries to save him, but they fall through some holes that appear in the ground. Then, the crystal shatters, and the werewolf dies, taking some secrets of Galuf's forgotten past with him. |
| Your party runs back up to the crystal room too late. It doesn't look like you'll get to collect the crystal pieces either, because the castle is about to explode! You have ten minutes to work your way back through the castle and out the door. This isn't a problem unless you go for the treasure, which is all guarded by monsters. All the flames that were blocking the path are gone now. |  |
|
|
When you reach the exit, you will be attacked by a Sergeant and a few wolves. After you defeat the wolves and do a few hundred HP of damage to the Sergeant, he will show his true form, the bounty hunter IronClaw. He shouldn't be any problem at all unless you only made it to the door with seconds to spare. |
| After you leave, the castle explodes. Lucky for you, the crystal pieces all land in you vicinity. Pick them up to learn new character classes. |  |
The Fire Crystal to Crescent Island
| After you collect the crystal pieces, go see Cid on the steamship. He will run off to Karnak. When you see him on the 2nd floor of the inn, he will tell your party to go away. Apparently he thinks that the crystals shattering is all his fault. The townspeople say his son, Mid, is at the Ancient Library. Maybe he can help. |  |
 |
Leave Karnak and go west, then south, until you reach the Ancient Library. |
| The scholars at the Library tell you that Mid went to go look for a particular book in the basement, which is full of monsters! | 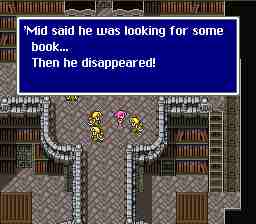 |
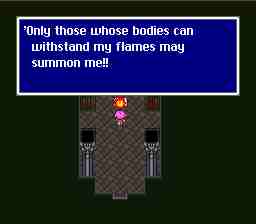 |
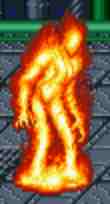
After filling up on HP and MP with the recovery pot, go into the basement. Some of the bookshelves seem to be haunted! Get them to move out of your way (There are particular places you must stand), until you reach the one that tells you it won't let you pass. If you go out of the room, you'll see a ladder going up into the books. Its a secret passage. Go up the ladder, tap the A button, and a passage will appear that leads to Ifrit. |
| While fighting Ifrit, be sure to keep everyone's HP up. His Fire2 spell is devastating, and his High Kick attack will paralyze whoever it hits. Have whoever has Black Magic ability repeatedly hit him with Ice2. Be sure not to let a character's HP fall too low, he tends to target those near death. |
|
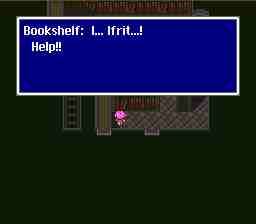 |
After you defeat Ifrit, you will be able to use him as a Call beast! Go back to the bookshelf, and Ifrit will scare him out of the way. |
| Save on the savepoint, and go forward. There's Mid, but he doesn't seem to see you. Byblos does though. | 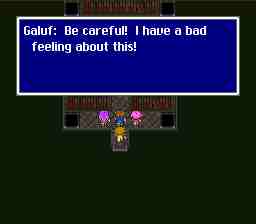 |
|
|
While fighting Byblos, have your Caller and Black Wizard (or people with those skills) blast him with Ifrit and Fire2, and have your Time Wizard cast Slow on Byblos and Fast on all your party members. He casts Safe on himself early on, so physical attacks will do little. Be sure to recover quickly from his Gale Cut, two of those in a row will finish you. |
| It looks like Mid has been reading a book the whole time! He even knows a secret exit! Follow him back into the main part of the library. |  |
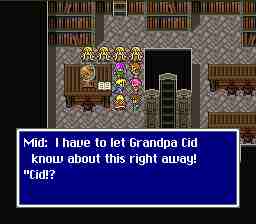 |
In the library, Mid tells everyone that he found a book that will allow him and Cid to get the steamship working again! He hurries off to tell Cid. |
| Go back to Karnak and see Cid. Mid will show up and beat some sense into Cid. Cid says the last crystal, the Earth Crystal, must be protected. With that he and and Mid go off to repair the steamship. | 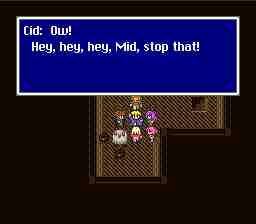 |
 |
Go to the steamship. While Cid and Mid repair it, Galuf has a flashback! He remembers that he is from another world, and he came to prevent the return Exdeath, and evil being from another world. He and 3 others sealed Exdeath here 30 years ago. |
| After he and Mid repair the steamship, go to Crescent island. It is far to the east (use the map you found in the Ship Graveyard.) Cid also tells you that if you ever get into any trouble, to just go back to the Ancient Library. | 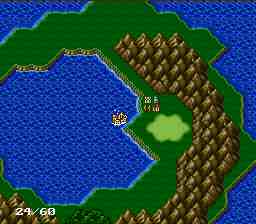 |


Crescent Island to the Airship
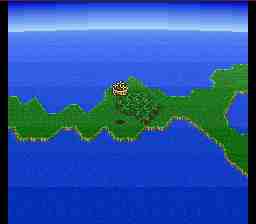
| Go into the Town of Crescent. An earthquake will strike the island. Your ship sinks into a whirlpool! Looks like your stuck... |  |
 |
In the town, the people will talk about the incredible bounty of the land. Even though it never rains, there is always plenty of water, and the harvests are always good. Hmmm... the Earth Crystal?
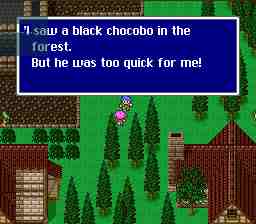
But, they also talk about a species of chocobo that can fly! They seem to be extinct, but one person says he saw one in the forest to the south. The crystal can wait, you need a way to get around first! |
| Go to the forest south of the Town of Crescent. |  |
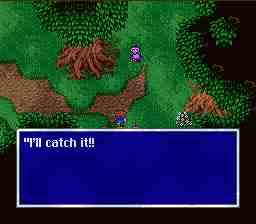 |
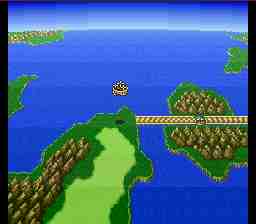
There's the Black Chocobo! Butz runs after it. When you catch it, it won't be able to fly too well though. It looks like it's been weighed down by 2 of the crystal pieces from Karnak! You'll pick them up and learn new classes. After that, hop on the chocobo and fly away. You'll need to tell Cid you just wrecked his new ship! |
| You can go anywhere in the world now. Before heading back to the Ancient Library, you may want to stop by Lix to learn some secrets of Butz's past.
If you haven't got Shiva yet, now is an excellent time to stop by Worus and get her. She's easy to defeat now that you are higher in level. |
 |
 |
If you forgot where the library is, its south of Karnak :). |
| In the library, Cid and Mid aren't too upset about the steamship. They are excited about the fact that King Tycoon was seen in Karnak! He was also spotted going into the Quicksand Desert and then into the Ancient City south of it. | 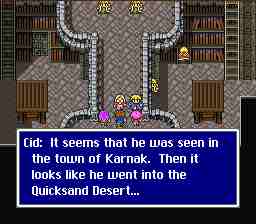 |
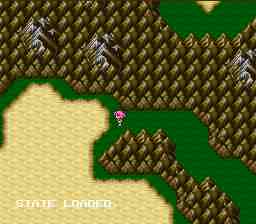 |
Leave the library and go west until you reach the Quicksand Desert. |
| In the desert, the quicksand will prevent you from going through! But, Cid and Mid arrive with an idea, they will disturb the Sandworm, your party will kill it, and then use its corpse as a bridge. Galuf's words pretty much say it all, but there doesn't seem to be any other way. | 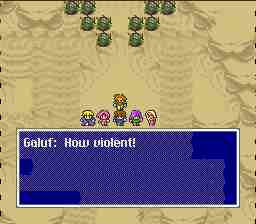 |
|
|
Cid says a book said that using magic against the Sandworm was unwise. The book lied. Use your Time Wizard to cast Fast on all your party members. Be sure to hit the worm, not the holes it jumps between, or the hole will counter with Demi. Have your Caller use Chocobo Kick against it, and your Black Wizard blast it with Ice2. Don't worry so much about missing with your magic, nothing will happen if you do. |
| After the Sandworm is dead, walk across his body and into the desert. | 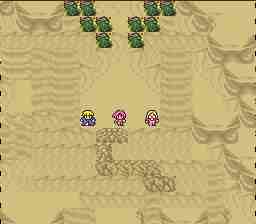 |
 |
Work your way south through the desert. When you make it out, go south until you reach the Ancient City. |
| When you enter the city, you will see King Tycoon! He doesn't seem to want to talk though. After you chase him around for a while, you eventually corner him and he will drop the floor out from under you! | 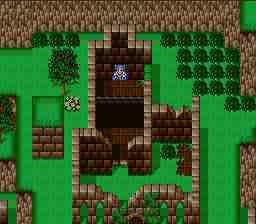 |
 |
After you fall, Faris recognizes the King as his father! He and Lenna are sisters it seems. No time to worry though. Wander around until you find a teleporter. It will work once and then blow itself up from not being used in so long. |
| Continue on through the area. You'll reach a door that opens when you pull a lever. Cid and Mid (who just returned the black Chocobo the Crescent Island) will fall in a hole that appears! Keep going until you get to your old steamship, and go on until you get to an airship! Cid and Mid fall in, and after a short discussion with your party, fix the airship. When they are done, your ship will try to rise up out of the Ancient Base into the sky, but CrawClaw holds it down. | 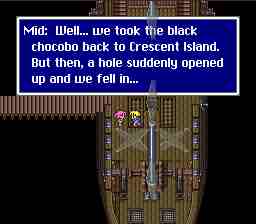 |
|
|
CrawClaw only has a measly 2000 HP, but he has very strong physical defense and his TailScrew attack will reduce whoever it hit's HP down to single digits. Hit him with Bolt 2 and Ramuh a couple of times to make this a short fight. |
| After he is defeated, Cid and Mid will land the airship in the Ancient Base and tell you they will keep researching the location of the Earth Crystal. You must protect it. The sky is now yours. |  |
The Airship to the Earth Crystal
| After getting the Airship, fly around and get whatever stuff you missed back in the game. When you are ready, go back to the Ancient City. |  |
 |
As you approach, the city rises up into the air! Better go tell Cid and Mid about this. |
| Go back to the Ancient Base. |  |
 |
In the Ancient Base, Cid and Mid will explain that the city is floating in the air using the power of the Earth Crystal! Someone (King Tycoon?) has started the machine that makes the city float. Your airship can't go that high, you'll need some Adamantium to give your airship the boost it needs.
Luckily, Galuf remembers seeing some in the meteor he came down in. |
| Go back to the Tycoon Meteor. |  |
 |
Go inside the meteor. Sure enough, there it is.
On the way out, Adaman T. appears out of nowhere and attacks you. |
| Like CrawClaw, Adaman T. has very high physical defense. He hits a lot harder and goes much faster though. Have your White Wizard cast Safe on your party while your Black Wizard and Caller hit him with Ice 2 and Shiva. |
|
|
After Adaman T. is defeated, take the Adamantium back to Cid and Mid. |
| While your party sleeps, Cid and Mid will install the Adamantium. Those guys sure work fast! | 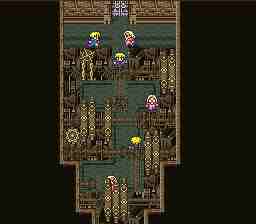 |
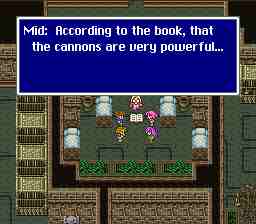 |
After your party wakes up, Cid and Mid will explain how to use the Adamantium (press A and then up). They also warn that the city is guarded by several cannons that will have to be defeated before you can enter. |
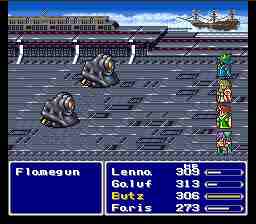
| Go up to the Ancient City. You must fight 4 groups of 2 cannons before you can fight the main cannon to get in. The cannons aren't too tough and only do moderate damage, but they sure are fast! I recomend using this type of party to try to keep up.
They are also vulnerable to Stop but it will only stop them for a round or two. |
 |
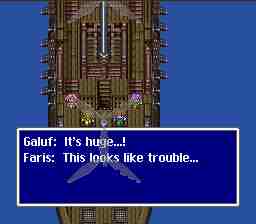 |
After the last group of cannons is defeated, the main cannon will appear. Go rest before you attempt to fight it. |
| While fighting the Sol Cannon, destroy the two launchers quickly, before it has a chance to hit you with its Multi-Surge Beam. The launchers will fire rockets that will cause their target to age. Use Esna (found in the village of Lix) to cure this.
After the launchers are destroyed, the only weapon the cannon will be able to hit you with is the Multi-Surge Beam. It will do about 160 damage but only fires about every 3 or 4 rounds. Heal between shots. This guy is slow but has enough HP to fight all day, be sure not to run out of MP (I went through 4 ethers fighting this guy) |
|
 |
After you defeat the Sol Cannon, go rest and come back. Then head into the city. Be sure someone is either a thief or has the Passages ability, or you won't get far. |
| Go through the ruins, being sure to pick up the gold armor, shield, and Ancient sword on the way by. When you reach the bottom, you will see King Tycoon! He acts a bit funny but asks you to defeat the monster guarding the machine. |  |
|
|
ArcheoAvis starts out being weak against magic in general, Wind attacks in particular. After you beat him up some he'll die and revive, but now he'll be weak against physical attacks and magic attacks won't hurt him at all most of the time. |
| After ArcheoAvis is dead, follow the King into the crystal room. Something is controlling him! Just as it looks as if you will have to fight him, a meteor crashes into the city and Cara comes running in. She casts a weak Bolt on the King, stunning but not really hurting him. | 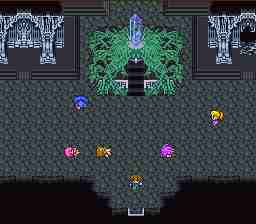 |
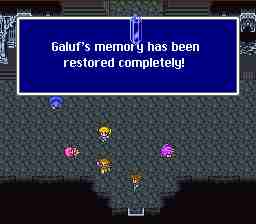 |
Galuf recognizes Cara as his granddaughter. And then, his memory fully returns! |
| But, there isn't any time to be happy about it because the crystal shatters! | 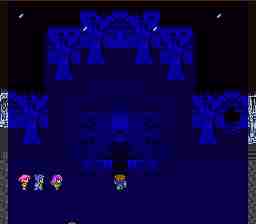 |
 |
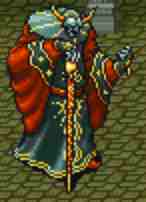
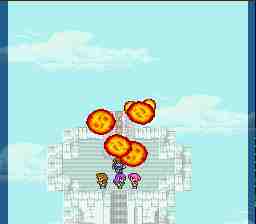
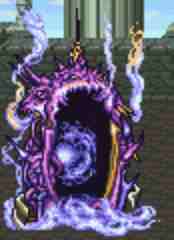
And Exdeath is released. King Tycoon tries to put the crystal back together but fails, and dies from the being at the center of all its energy. |
| Lenna picks up the crystal pieces and you learn new classes. Without the crystal to hold it up, the city starts to fall! The party runs back through the city, just making it before the city hits the ground. |  |


The Earth Crystal to the Second World
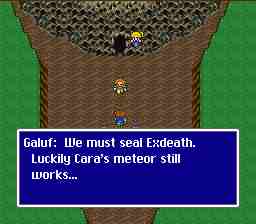
| After the Ancient City crashes into the ground, Galuf will tell Butz that he and Cara must go back to their own world to fight Exdeath. He also tells you the story of why Exdeath was sealed in Butz's world. | 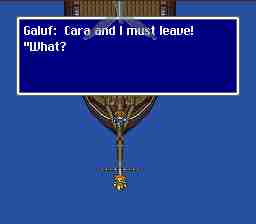 |
 |
Cara's meteor is the only one that still works. Galuf and Cara bid your party goodbye. Butz wants to go along but Galuf won't let him because he wouldn't be able to return. |
| After everyone says their goodbyes, Galuf and Cara leave. |  |
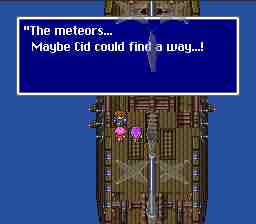 |
Land your airship anywhere. Butz, Lenna, and Faris will all decide to go to the other world to help Galuf fight Exdeath! But how? Maybe Cid could find a way... |
| Go back to the Ancient Base. |  |
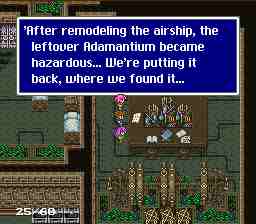 |
Go to the lab. Hmmm... Cid and Mid don't seem to be home. But they left a note! It says that the Adamantium leftover from your airship upgrade has become hazardous, so they went to go put it back. |
| In case you forgot where you got the Adamantium from, it was in the Tycoon Meteor. | 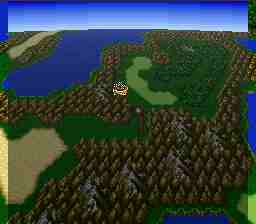 |
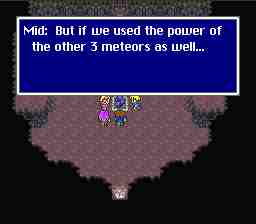 |
Inside the meteor, Cid and Mid tell you that the Adamantium started emitting a strange energy. When they put it back on the portal, it starts sucking energy out of it. It looks like the Adamantium can be used as fuel for the meteors! But the Adamantium from just this one is too weak, you'll need all of it from the other three as well. |
| Go to the Worus meteor. | 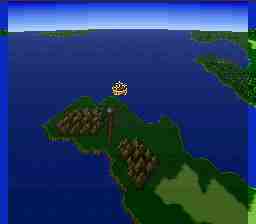 |
 |
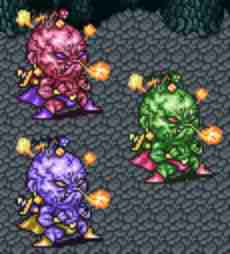
Cid and Mid will go inside the meteor and get the Adamantium out while your party waits. Just as you are leaving, your party will be attacked by six Pueroboroses |
| This can be a difficult or an easy fight, depending on how you choose to fight them. If you fight normally, they will attack with weak attacks, heal themselves, and cast Arise on all their fallen allies (reviving them at full HP) when you kill them, and will do a devastating explode attack once in a while. This makes for a very tough fight.
However, it's lots easier if you sit there and defend. They will only do weak physical attacks and then explode once in a while. When they explode, quickly revive the (most likely) dead target. The last Pueroboros won't explode, cast Quiet on him till it works, and then kill him. Singly, they are not very tough. |
|
 |
After you defeat the Pueroboroses, Cid and Mid will leave for the next meteor. Follow them to the Karnak meteor. |
| Cid and Mid will go in to get the Adamantium, but it seems a monster has taken up residence in the meteor. Go figure. |  |
|
|
Go inside the meteor and attack Titan. This can be an easy fight if you have your Time Wizard (or person with Jikuu skill) keep casting Stop on him every round. It will work every time and he won't be able to do a thing! If you stop casting Stop he will only stay stopped for a single round however. |
| After you defeat Titan, you will be able to use him as a call beast! Cid and Mid will collect the Adamantium and head off to the next meteor. Follow them to the Ruins Meteor. |  |
 |
Cid and Mid go in to collect the Adamantium, but they don't come back out. The party goes to check it out. Not surprisingly, there is another monster holding them captive. |
| Chim. Brain is vulnerable to Demi. Hit him with a few Demis, backed up with a few solid hits to make this a short fight. Be sure to keep your HP up he attacks with area damage spells such as Flame and Aqua Breath. |
|
 |
After you defeat Chim. Brain, Cid and Mid will collect the last piece of Adamantium, and then show you on the map where their power is gathering. Then they tell you to go there (duh) and they leave. |
| Go to the spot marked on the map. |  |
 |
The energy of the Adamantium has collected into a portal. Butz makes sure everyone is ready, you may not be able to come back. |
| After saying their goodbyes, the party jumps in. Next stop, Galuf's world! | 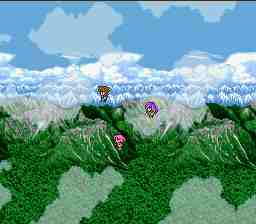 |

Galuf's World to the Big Bridge
| After a brief trip through space, you will land on a small deserted island. | 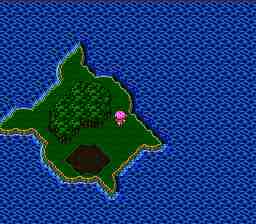 |
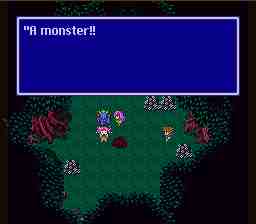 |
Wander around and beat up some Paos. Hey, free tents! When you are ready, use one of them. You will go to a campfire scene and listen to Lenna and Faris discuss their mother. While they are talking, the Abductor flies in and carries them off! Of course, this doesn't sit well with Butz, who attacks the Abductor solo. |
| Don't sweat it if you get killed by the Abductor. If you lose, you'll be captured also. If you win, you'll be rewarded with an Ether and a treasure chest with a gas trap in it! You can't leave the area, so the only thing you can do is open the chest and get captured anyway. |
|
 |
When you come to, you'll be in a prison cell. Exdeath will walk up and welcome you to his castle. After that, one of his monsters will bring a mirror, and cast your party's image far up in the sky. He will then announce "You have a decision to make", to Galuf, who is on the Big Bridge. |
| Galuf will quickly tell his army (???) to retreat. | 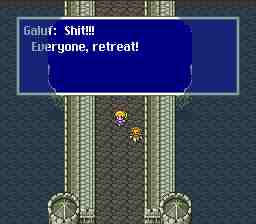 |
 |
Meanwhile, Exdeath tells Gilgamesh to guard your party. |
| After Galuf's army has pulled back some, Galuf will tell Cara that he is borrowing the Hiryuu to go rescue your party. He hops on, and rides to Exdeath's castle. |  |
 |
After landing on a balcony and picking up your stuff, Galuf heads off through the castle to rescue you. |
| Proceed through the castle, after stopping at the save point and restoring yourself with the Recovery Spring. When you get to the cell room, Gilgamesh notices Galuf. | 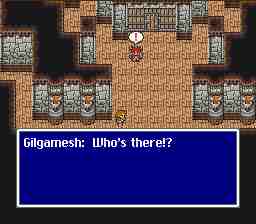 |
|
|
While fighting Gilgamesh, keep your HP up while delivering a solid punch. Depending on Galuf's skills this can be easy or hard. After you do about 2000 HP of damage Gilgamesh runs away. |
| After defeating Gilgamesh, Galuf lets the others out. Work your way back through the castle and out the front door. | 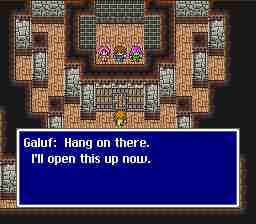 |
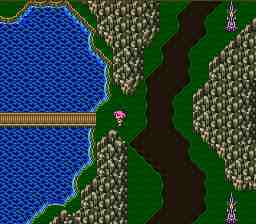 |
Go west until you reach the Big Bridge. |
| The Big Bridge is full of monsters! Fight your way north (on a bridge that goes east-west?) until you reach Gilgamesh, who is hiding behind a door in the center of the bridge. |  |
|
|
While fighting Gilgamesh, be sure to cast Slow on him and Fast on all your party members. After you beat him up some, he will cast many protective spells on himself and then gain the Jump attack. Cast Slow on him again and beat him up some more. After a while, he runs away. |
| After defeating Gilgamesh, continue fighting your way north until you reach Cara. Just as you are leaving the bridge, a barrier forms around Exdeath's castle! The shockwave sends you flying. | 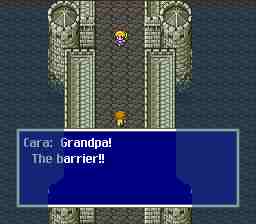 |
 |
You land on the remote continent of Grociana, where ferocious monsters live. What lies ahead now? |


The Big Bridge to Castle Bal
| After your party picks themselves up, go east until you reach Rugor. It's a long way and monsters here are very tough. You may have to use a few tents to make it all the way. | 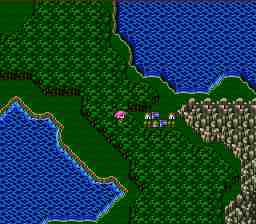 |
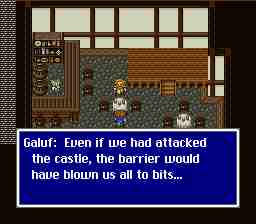 |
In Rugor, do some shopping and then go stay at the inn. It's been so long since they had visitors, the innkeeper will let you stay for free! During the night, Galuf gets up and goes to the pub. Butz follows him, and they talk about why Butz came to Galuf's world knowing he wouldn't be able to return. He also thanks Butz for keeping his army (is he a king or something?) from advancing over the bridge. He thought the barrier wasn't done yet, and if he had activated it while he was attacking Exdeath's castle, they all would have been blown to bits. |
| Other people in the town speak of the Seal Castle of Kuzar, where there are 12 legendary sealed weapons. Some people say to stay away from it, but there doesn't seem to be anywhere else to go. |  |
 |
Go south until you reach the Seal Castle of Kuzar. |
| Go straight north until you reach the Room of the Seal. If you are attacked run away (trust me!). Galuf will explain that the weapons were all used in a battle 1000 years ago. But, they all seemed to have turned to stone. |  |
 |
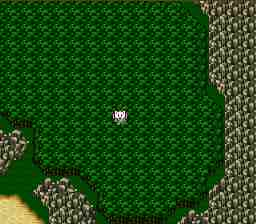
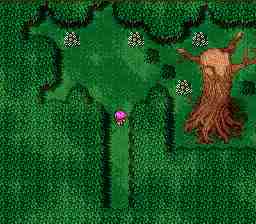
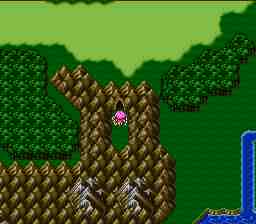
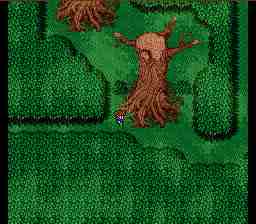
You can't really do anything here (yet), so head out the door, then go south, then east, then north, then east again until you reach this forest. |
| Go into the forest, and you'll see a moogle! He runs away and falls in a hole. Lenna wants to help him, so your party follows him in. |  |
|
|
Work your way through the cave until you reach the moogle. He's being attacked by a Tyrasaurus! Feed him a Fenix Down to easily defeat him. |
| After you defeat Tyrasaurus, the moogle will start to run away again, but Lenna will calm his fears and get him to realize that she's his friend. | 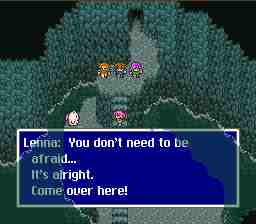 |
 |
The moogle runs out the door, after acting like he wants you to follow him. He runs to a spot in a forest to the north. |
| When you walk into the village, all the moogles, not surprisingly, run away. | 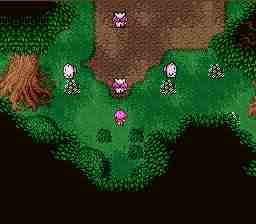 |
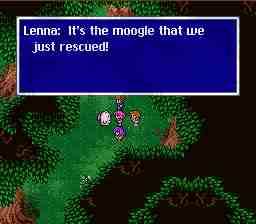 |
Go to the northeast corner of the village and talk to the moogle you just rescued. He will reward you with some treasure and the other moogles will stop hiding from you. Go talk to them and then come back and talk to the rescued moogle again. He will telepathically communicate with a moogle next to Cara in some castle. |
| Cara hops on a Hiryuu and flies off to the moogle village. | 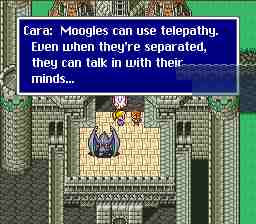 |
 |
She lands. The moogles don't seem afraid of her, and the party hops on. |
| When you arrive back at the castle, the soldiers address Galuf as King Galuf. It looks like he's a King after all! |  |
 |
Galuf goes to his throne room, and his soldiers report that their army was all but wiped out fighting Exdeath's monsters. |
| After they leave, Galuf tells you that he is the King of Bal. After a short arguement over whether to call him "Galuf" or "King Galuf" Galuf says to just call him "Galuf". | 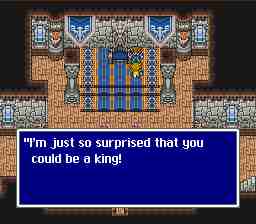 |

Castle Bal to Guido's Cave
| Before heading up the stairs to talk to Cara, explore Castle Bal and upgrade your equipment and magic. There are a couple of secrets hidden in the castle. Don't worry about the basement, you can't get in there (yet). |  |
 |
There are stairs hidden behind this tower. Go down them to get an AngelGwn and a Hero potion. |
| When you're ready, go up to the top of the castle and talk to Cara. She tells you that the Hiryuu is dying. Lenna knows that Hiryuusou will heal him, but doesn't know where to get any, but does konw it grows where Hiryuu live. |  |
 |
Galuf says Hiryuu live in the Valley of the Hiryuu, but no one who has gone in there has ever come out. And, there are lots of monsters outside the castle. But, it doesn't look like you have much of a choice.
Galuf says the Valley of the Hiryuu is north beyond the werewolf village of Kelb. |
| When you're ready, head out the door. The soldiers guarding the door argue, saying that Exdeath's monsters are outside. Galuf tells them to open the doors, then close and lock them again. If you're sure, go ahead and leave, but you won't be able to get back in. | 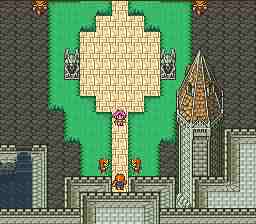 |
|
|
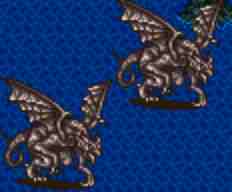
When you get out the door, you will be attacked by the Abductor again. Now that you can fight him with your whole party, he's a wimp. |
| After defeating the Abductor, go north to the village of Kelb. | 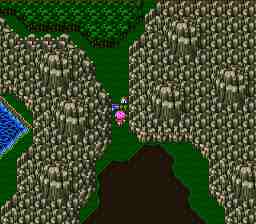 |
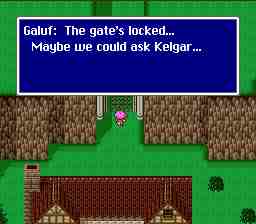 |
When you into Kelb, no one seems to be home. If you try to go through the north gate, its locked. Galuf suggests you go see Kelgar, who lives in the house directly south of the gate. |
| Galuf introduces you to Kelgar, who was one of the four warriors who fought against Exdeath 30 years ago. |  |
 |
He doesn't seem to like Butz too much though. He challenges Butz to a match. Butz clobbers him all the way into the next room! |
| After helping Kelgar to his bed, Kelgar tells Butz some information about his father. After that he tells the townspeople to open the gates. |  |
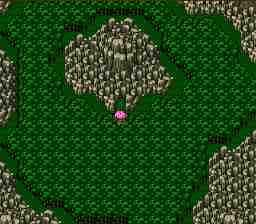 |
After leaving Kelb, go north until you reach the Valley of the Hiryuu. |
| Go through the valley. Be sure to rescue Golem (wander around until you wander into him being attacked), he is one of the most valuable call beasts in the game. |  |
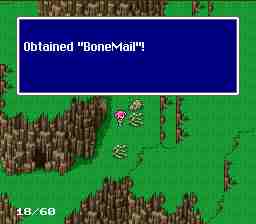 |
Grab the BoneMail on the way by. It's cursed, but still very powerful. |
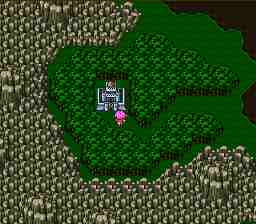
| When you get to this dead end, fall in the hole. You won't be able to see it unless you have an elementalist in your group. |  |
 |
Continue working your way through until you reach the Hiryuusou. It bites Lenna and Faris! No wonder the Hiryuu are going extinct! |
| While fighting the Hiryuusou, kill the Hiryuuka it generates with Bio or Titan. It won't do anything except make more. Pummel it to death with your fighters. |
|
 |
Go back to castle Bal after picking up the dead Hiryuusou. |
| After a misadventure trying to get in, go see Cara, who has taken ill. She says that Guido is calling. Guido lives in a cave on an island northeast of the Valley of the Hiryuu. You'll need the Hiryuu to get to him. Hurry and give him the Hiryuusou. |  |
 |
After healing the Hiryuu, ride him to Guido's Cave. |


Guido's Cave to Guido's Sunken Cave
 |
Right as soon as you walk up to Guido's Cave, the whole island drops into the sea! Your party hops on the Hiryuu just in time to keep from drowning. |
| You then cut to Exdeath, who laughs at Sage Guido. | 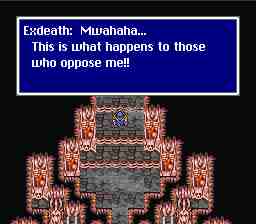 |
 |
After the island sinks, go to Surgate Castle. |
| The guards there will tell you that King Zeza (a friend of Galuf's) took his fleet to the east coast of Exdeath's continent. |  |
 |
Do whatever shopping and rest you need to do, then head off to the fleet. You can land on the large ship. |
| After you land, Galuf will introduce your party to King Zeza, who was one of the four warriors who fought against Exdeath 30 years ago. The fleet is still preparing to attack, he suggests you go rest for a while. | 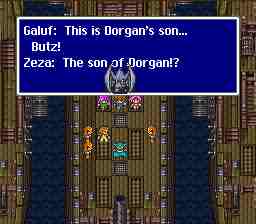 |
 |
During the night, the sounds of battle wake your party. Exdeath's monsters are attacking the fleet! Run up to the deck to help, working your way south to where Gilgamesh is. |
| After you beat up on Gilgamesh some (This is the 3rd time), Enkidou will come to help. Kill him quickly. He has no special weaknesses except a measly 4000 HP. After he is dead, beat up on Gilgamesh until he runs away (again). | 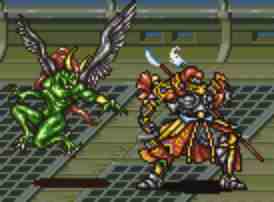 |
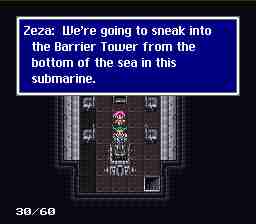 |
After defeating Gilgamesh and Enkidou, Zeza will have you help him move some crates that are disguising the entrance to a submarine! The fleet is a decoy, the real attack is to be against a barrier tower, which you are going to sneak into with a submarine. |
| After you get inside, Zeza will go down to the power room, and you will go up to the antenna on the top floor, and destroy it. | 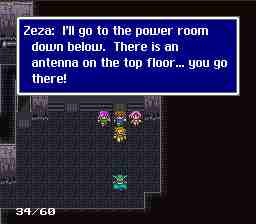 |
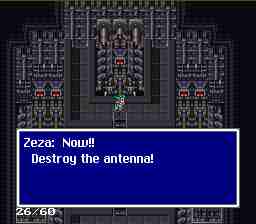 |
When you reach the top, Zeza will shut off the power and tell you to destroy the antenna. Only problem is that it is guarded by Atomos. |
| Atomos attacks differently than any other enemy in the game. He will attack with a devastating Comet spell until he manages to kill someone, then he will slowly drag them into his maw. The best way to counter this is to kill your weakest member yourself and then Fast everyone else. Hit him with your biggest, baddest attacks, he has 20000 HP and doesn't take too long to drag the dead member in. If he manages to drag him/her in, he will kill someone else and drag them in too. |
|
 |
After you defeat Atomos, the antenna explodes. |
| Zeza tells you to leave. He is trapped in the power room but promises to follow. Your party jumps on the Hiryuu and escapes, but Zeza never makes it out of the power room before the tower explodes. | 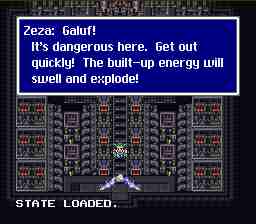 |
 |
Galuf waits a long time to see if Zeza will come, but he eventually gives up. |
| Faris gets the idea that you may be able to get to Guido's sunken cave with the sub. |  |
 |
Go to Guido's Sunken Cave. It's tough to spot, use your map. |
Guido's Sunken Cave to the Forest of Mua
|
|
Hop out of your sub and start working your way through Guido's Sunken Cave. |
| In this room, you have to move the weight in the center chests to the other chests to get the doors to open. | 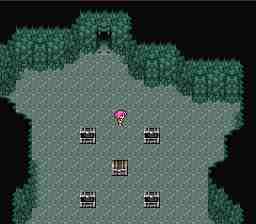 |
 |
This area is full of hidden passages. Even characters with the 'Passages' ability can't see them. If you really need to, turn off background layer 1 (with the 1 above the Q, not on the keypad) and they're easy to spot. |
| When you reach Guido, Butz will think he is an ordinary turtle and smack him around. After Guido tells him to stop, he does and Guido doesn't hold it against him.
He tells you the story of how Exdeath was born, and that he is going to the Forest of Mua. He gives you a branch that will get into the Great Tree, and bids you farewell. |
 |
 |
Getting to the Forest is kind of tricky. Go here, then dive. There is an underwater channel you can go through, and then surface in the pool in the center of the island. |
| Go to the town of Mua before heading to the forest. The forest is really big, and full of tough monsters. Prepare for a long journey and upgrade all your spells and equipment. | 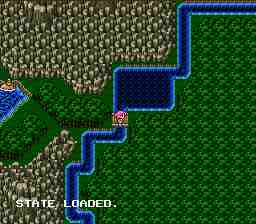 |
 |
As soon as you go into the forest, turn off background layer 2. This will kill the treetops, and you'll be able to see your path better (as well as see a lot of hidden treasure chests, and improve your framerate). If fighting without a background is too weird for you, just turn it back on in battles. |
| Don't miss the savepoint on the way by. | 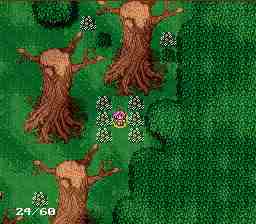 |
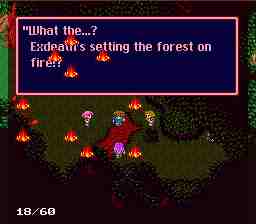 |
After go get deep into the forest, Exdeath will set it on fire! Good thing you made friends with the moogles earlier, they come to rescue you. Follow him into the hole he makes. |
| Wait till the fire is out, then go back up to the surface. | 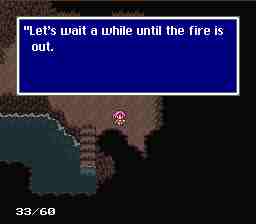 |
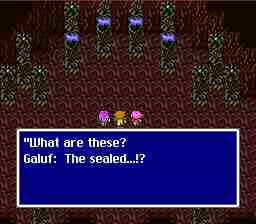 |
After the fire is out, continue through the forest (you can turn the background back on now). You will eventually go into the Great Tree, where you will be attacked by the Sealed. |
| The Sealed all have different weakpoints, and are very fast. They only attack with physical attacks until they are low on HP, so start off with a Golem, then a Fast2, then a Slow2. Golem will soak up the damage while you White Wizard casts Shell on all your party members. Concentrate all your firepower on one at a time until it is defeated. When they get low on HP they attack with devastating area-damage spells (hence the Shell). |
|
 |
After you defeat the sealed, Exdeath will walk over and thank you for dissolving the seal. He is now able to harness the power of this world's crystals!
Using the crystal's, he plasters your party to the wall. |
| Just when it looks like you're done for, Cara feels that something is wrong. She hops on her Hiryuu and heads to to the forest. | 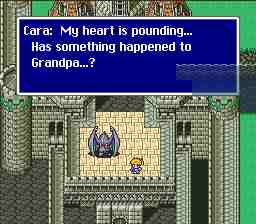 |
 |
Cara breaks the power of the crystals, but Exdeath gets pissed off at her and tries to kill her.
Galuf gets up (shattering one of the crystals in the process) and attacks Exdeath solo. |
| Don't worry about healing fighting Exdeath. Even if you have HP left at the end of the battle, the outcome is still the same.
Galuf will continue to fight even at 0 HP. |
|
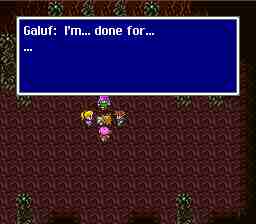 |
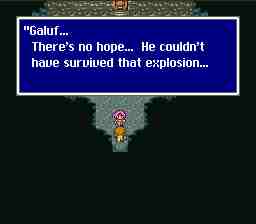
After Galuf defeats Exdeath, Exdeath picks up the 3 remaining crystals and teleports out.
Galuf dies from his wounds, despite your party casting their greatest healing spells on him. |
| After Galuf dies, he gives all of his powers to Cara. Cara tells your party that she will fight with them. | 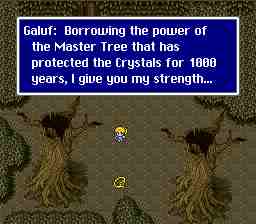 |
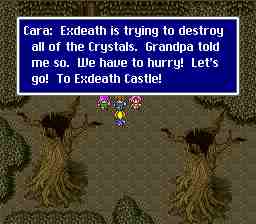 |
Cara tells the rest of your party that Galuf told her to go to Exdeath's castle. She calls her Hiryuu, and you fly off. |

The Forest of Mua to the Third World
 |
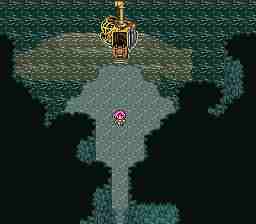
After leaving The Forest of Mua, stock up on Cabins and HiPotions and go to Exdeath's Castle. |
| Inside, you'll see some injured soldiers. They tell you that Exdeath went upstairs. |  |
 |
This is a seeming dead end, but when you try to leave the way you came, Cara recognizes it as an illusion. |
| Kelgar uses the last of his strength to help Cara, Galuf, and your party overcome the illusion. It shatters, revealing a castle of twisted flesh. You can exit to the north. |  |
 |
Here is an interesting puzzle room. When you step on the skull, the bridge will begin moving back and forth. If you mess up and stop it where it leads to a wall, monsters will pop out and attack you. |
| When you reach this room, turn one of your party members into an elementalist so you won't fall through the floor. |  |
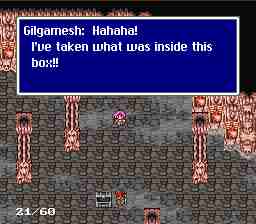 |
When you get here, you'll encounter Gilgamesh (again). He takes what's in the treasure chest and attacks. |
| Gilgamesh learned a few tricks since the last time you saw him, and is a lot faster. He's still not that hard though, and after you beat him up some he will attack with the Excalipur. He seems to think it's the Excalibur though, and is surprised when it doesn't hurt you much.
After you fight for a little while, Exdeath will pronounce Gilgamesh worthless and throw him into the Cleft of Dimension. |
|
 |
Go back to the save point, use a cottage, and save your game. |
| When you reach Exdeath, he will tell you he is trying to return the world to its original form, to a world of darkness! Of course this doesn't sit well with your party. | 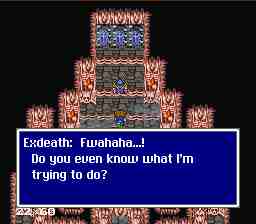 |
|
|
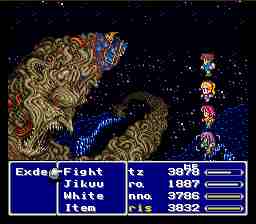
While fighting Exdeath, try to stay away from physical attacks. He will use Displ as a counterattack, and you'll need some high-powered defensive spells to stand up to what this guy throws at you. Use Golem and recast as neccessary to suck up his Vacuum Wave attacks, and keep a Fast2 and Shell on everyone to deal with his Fire3, Ice3, and Bolt3, and Level 3 Flare attacks. He has more than 30,000 HP, so this could be a long fight. |
| After Exdeath is defeated, the crystals shatter, knocking your party out cold. | 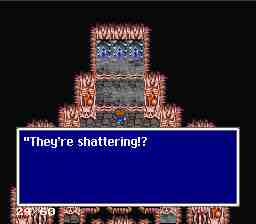 |
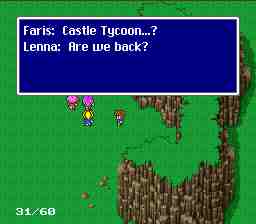 |
When they wake up, they are lying in a field. Faris can see Castle Tycoon in the north. Are you back on your own world? |


The Third World to the Quicksand Desert Pyramid
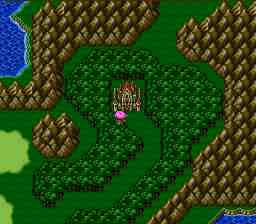 |
Go north to Castle Tycoon. |
| Inside you'll be greeted by the Chancellor, who will insist on having a banquet in Lenna and Faris's honor. | 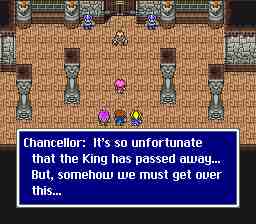 |
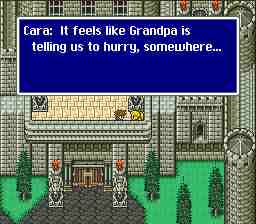 |
During the banquet, Cara will say she feels as if Galuf is telling your party to hurry somewhere. Butz agrees, but Lenna and Faris stay behind. |
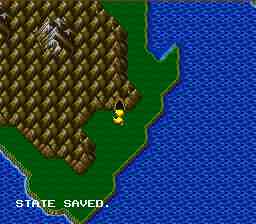
| On the way out, Butz wonders if Boco (your chocobo) is still where you left him way back at the beginning of the game. | 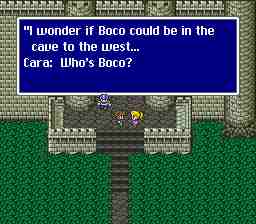 |
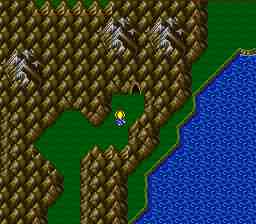 |
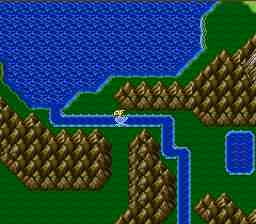
Go west and then north until you reach this cave. |
| Inside, you'll be greeted by Boco, who will introduce you to his wife Coco. He's been busy! After bidding his wife goodbye, he will come with you. | 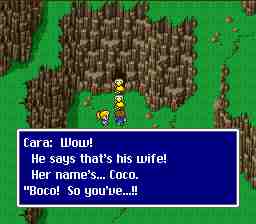 |
 |
Go east, back past Tycoon, north, and then west again until you come here. Go south the enter the valley. |
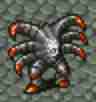
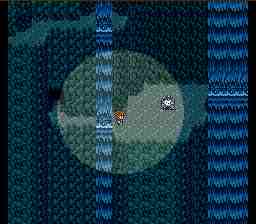
| While you're going through the valley you'll fall into a hole, where you will be attacked by the Antlion. |  |
|
|
The Antlion isn't very tough, but there's only 2 of you and his Dark Shock attack (which halves your level) really takes its toll on your attack power after he does it enough times. If neither Butz nor Cara has any Black skill you should change one of them before heading in here and hit him with Ice3 repeatedly. |
| The Antlion may be defeated, but you're still stuck! Not too worry, Faris shows up and helps you up a rope... after you promise not to leave him behind again. | 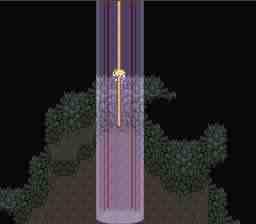 |
 |
After leaving the valley, keep going south until you reach Guido's Cave. |
| When you go inside, Guido will be upside down! Butz helps him get on his feet, and then he explains that 1000 years ago, the world were once one, but a great evil arose that used the power of the Void. After he was defeated, the people sealed the Void by splitting the crystals, which also split the world. The space between worlds was called the Cleft of Dimension, and the Void was sealed there. | 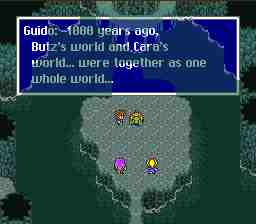 |
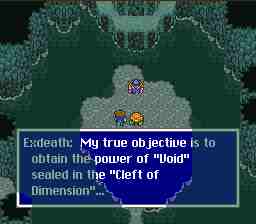 |
Exdeath, who had been disguised as a splinter stuck in Cara's leg, suddenly appears and tells you that his true objective is to obtain the power of the Void. |
| He then causes the Cleft of Dimension to appear in the world! It sucks Tycoon Castle (and Lenna) into it. After that Exdeath pummels your party and is about to kill you all when Guido counters his spell. The backblast sends everyone flying. |  |
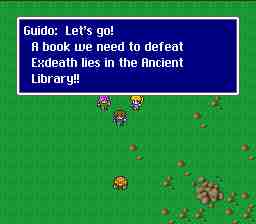 |
You land by the Ancient Library. Guido tells you that a book you need to defeat Exdeath is in there. |
| In the library, Guido tells you that you must go into the Cleft of Dimension and defeat Exdeath once and for all, but first you'll need the power of the twelve legendary sealed weapons. The scholars then combine the 2 halves of the sealed book, and its speaks, telling you what you must do. | 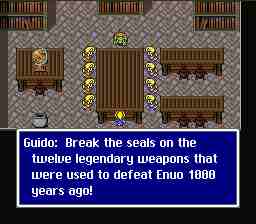 |
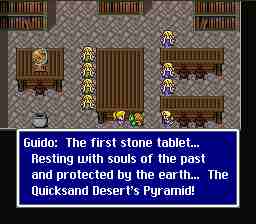 |
Guido tells you that the first stone tablet is in the Quicksand Desert's Desert Pyramid (now that was a mouthful). |
| Leave the library and go west until you reach the Quicksand Desert Desert Pyramid. Without the power of the Earth Crystal, the quicksand doesn't flow anymore, so it's pretty easy to get there. | 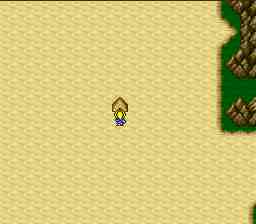 |

The Quicksand Desert Pyramid to Odin
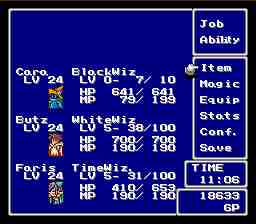 |
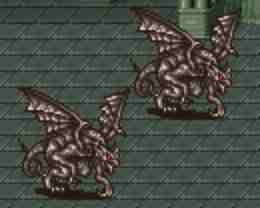
Before heading into the pyramid, make sure all of your party members can use area damage magic. You'll need it to fight the Gargoyles that guard the door. |
| At the entrance you will be attacked by two Gargoyles. They aren't very tough, damaging, or fast but if you kill one the other will cast Arise on it. Counter this by attacking with area damage spells and killing both of them at once. | 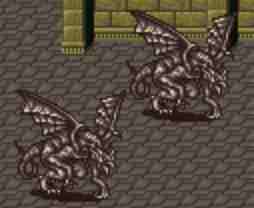 |
 |
After defeating the Gargoyles, a page out of the Sealed Book will remove itself, float to the door, and burn up, opening the door. |
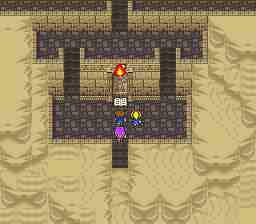
| Work your way through the pyramid. Watch out for the monsters you can see running around, they're tough. | 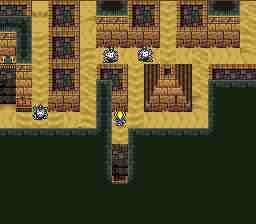 |
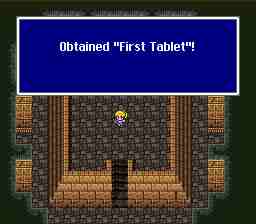 |
After working your way through the pyramid, pick up the first tablet. The floor will rise up and take you to the top of the pyramid. |
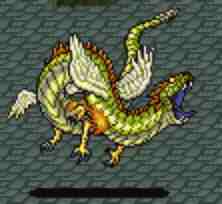
| Up on the roof, you'll see the bird-shaped island reform into Bahamut, the king of dragons! He flies your way. | 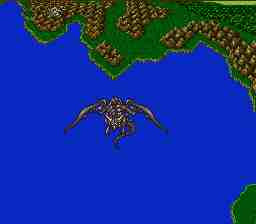 |
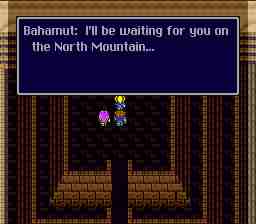 |
Your party braces for an attack, but Bahamut just flies on by, saying he will be waiting at hte North Mountain. This battle will wait. |
| Free of the island it was stuck on, your airship drifts here. | 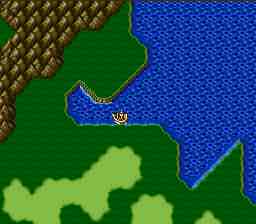 |
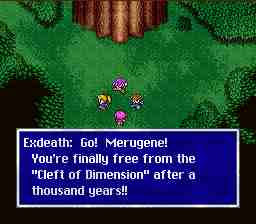 |
Go back to the Oldest Tree, and remember to use a cabin and save. When you go in, a Hiryuu will drop off Lenna! She doesn't seem to happy to see you though, as she blasts your party. Exdeath shows up and tells you that she is possessed by a monster. He then leaves you to your fate, as he is sure the monster will kill you. |
| After Exdeath leaves, the Hiryuu will attack Lenna in desperation. The shock separates Lenna from the monster, Merugene. | 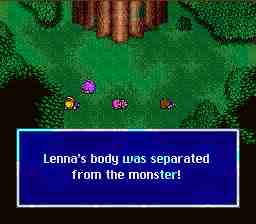 |
|
|
While fighting Merugene, cast Fast2 quickly, and then Shell on all your party members. She attacks randomly with Fire3, Ice3, and Bolt3. Hit her Fire3 repeatedly and have everyone else heal.
Do NOT use Wall in this fight. If you bounce a spell back at her, she will do a Wallchange and become strong against it. |
| After you defeat Merugene, Lenna will join your party at 0 HP. |  |
 |
After resting at Surgate Castle, get on your airship. |
| When you get on the airship, the game cuts to Exdeath, in the Cleft of Dimension. He tells the Void to go destroy the world! It doesn't destroy the whole world, but it does suck several towns into the Cleft of Dimension. | 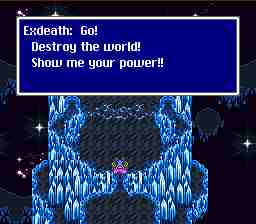 |
 |
At this point, the game really opens up and you can pretty much do what's left in any order you want. This walkthrough will go through the game the way I do.
After Exdeath destroys the towns, go back to the Pirate's Cove. |
| In there, Syldra will appear, but only be visible to Faris and Cara. She will say that she wants to help Faris, and will join your party as a call beast. | 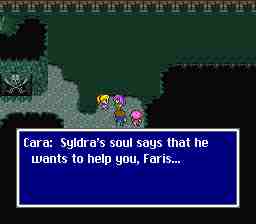 |
 |
After obtaining Syldra, go to Jacole Dungeon. |
| Work your way through and climb up the wall in the back. You'll find yourself behind the locked door in Castle Bal! Open the door, go upstairs, save your game, and then work your way north until you reach Odin. |  |
|
|
Hurry and cast Break on Odin before he gets a hit in on you (one will finish you at this level).
After defeating him, you will be able to use him as a Call beast also. |
Odin to the Fork Tower
 |
After resting and buying any equipment you may need, go to the Island Shrine. |
| More Gargoyles up ahead! Make sure everyone can use area damage magic. | 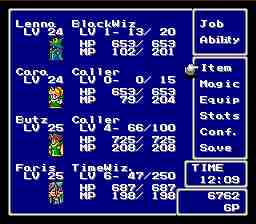 |
|
|
Fight these two just like you fought the two at the Quicksand Desert Desert Pyramid, being sure to kill them both at the same time. |
| After the Gargoyles are defeated, another page will remove itself from the Sealed Book and burn as the door opens. | 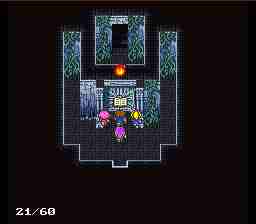 |
 |
When you reach this room, flip the switch on the right and go back through the duct to get an Elixir. Come back and flip both switches (the one on the right to put it back and then the one on the left) to go on. |
| Don't open this chest unless you have a death wish. | 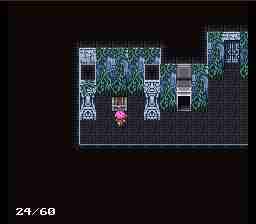 |
 |
If you feel like fighting a MachinHead, there is a Protect Ring in this treasure box. A Crystal Helm lies to the right and an Ether to the left of this spot. |
| When you reach the tablet, Stalker will appear behind you and attack. | 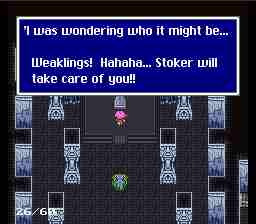 |
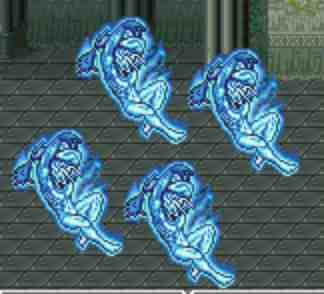 |
It may look like there are four of him, but in reality there is only one. He will change his position whenever you manage to hit him, and his shadows will counter with Blaze if you hit them.
I suggest you take advantage of the fact that you are playing on an emulator when you fight this guy. Use save/restore state to avoid hitting his shadows. It's slow, but all he'll do if you 'never miss' are physical attacks (easily countered with Golem) and a Mind Blast once in a while. |
| After you take the Second Tablet, the barrier blocking entrance to the Fork Tower will disappear. You can now get the ultimate Black and White spells, Flare and Holy. | 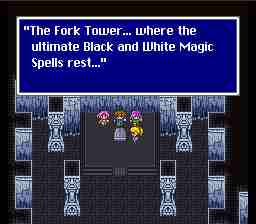 |
 |
Go to Crecent Village. The Fork Tower is nearby. |
| Load up on any equipment you may need, and ask around the village. They will speak of a mysterious town in the forest (more on that later), and will also tell you a few secrets of the the Fork Tower. |  |
 |
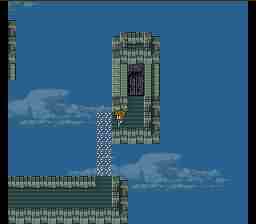
After you are done in Crescent, go to the Fork Tower. It's right where the Ancient Base used to be. |
| Before you go in, make two of your party members into strong fighters and the other two into strong magic users. | 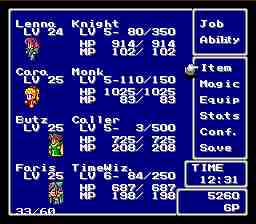 |
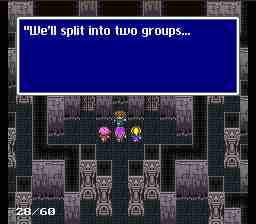 |
Inside, you will have to split into two groups so you can take the spells at the same time. If you do not take them at the same time, the tower will explode! Send your fighters up the right tower and your mages up the left tower. |
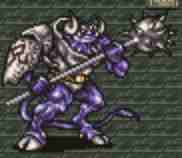
| At the top of the right tower, you will encounter Minotauros. Magic will not function at all here, so just pound on him till you defeat him. Hope you brought lots of HiPotions. After you defeat him you will recieve the Holy spell. |
|
|
|
At the top of the left tower you will have to fight Omniscient. If you Fight this guy he will cast Return and take you back to the start of the battle. Watch out when he gets low on HP, he will start attacking with nasty Fire3, Ice3, and Bolt3 spells, and when he dies he casts Flare. The easiest way to counter this is to cast Wall on yourself when he starts casting the high damage spells. After you defeat him you will recieve the Flare spell. |
| After you get the two spells, the tower disappears, leaving you standing next to the Ancient Base. Time to see Cid! | 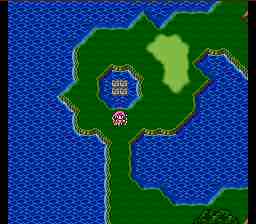 |
The Fork Tower to the Cleft of Dimension
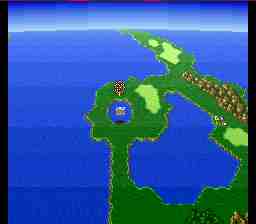 |
After the Fork Tower disappears, the Ancient Base will be accessable again. Fly your airship to it and land on top of the pad. |
| Inside, Cid will tell you he found a new technology that will allow you airship to go underwater! | 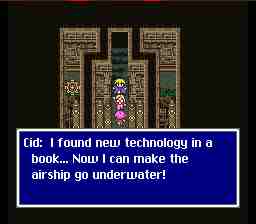 |
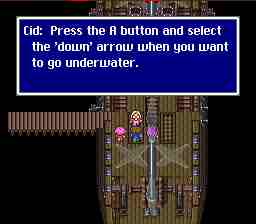 |
Cid and Mid quickly install the new device and tell you how to use it. You can now go after the Third Tablet. |
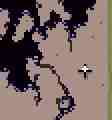
| Go to the Great Trench. It can be kind of hard to find, here is where it is on the underwater map. |
|
 |
More Gargoyles ahead! Be sure to prepare your party. |
| Fight the Gargoyles the same way you have all the others. |
|
 |
After you defeat the Gargoyles, a page will remove itself from the Sealed Book and burn up, opening the door. |
| Eventually, you'll have to walk across the lava. Lava hurts (duh) so you'll want to change one of your party members to an Elementalist to avoid taking damage. | 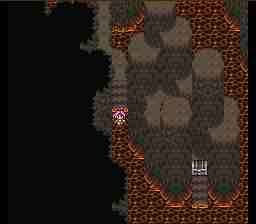 |
 |
In the middle of the dungeon you'll run across a dwarven village! Be sure to rest, save and upgrade your equipment, coming back later is usually more trouble than its worth. |
| This little piggy went to market, this little piggy stayed home, and Exdeath told these three piggies to go kick your ass. | 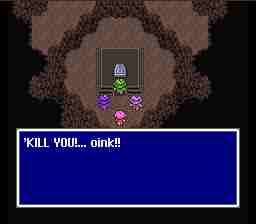 |
|
|
These three can dish it out, but they sure can't take it. I suggest changing all your people in callers for this battle and then casting Odin on him till it works (worked for me on my second try). Living through their opening combo can be interesting, if you just barely have 1000 HP like me when I go here you may have to try a couple of times. |
| After you defeat the three pigs, you will obtain the Third Tablet and the ultimate Jikuu spell, Meteo. | 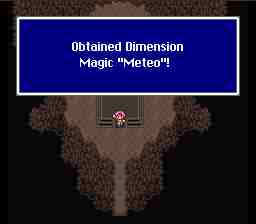 |
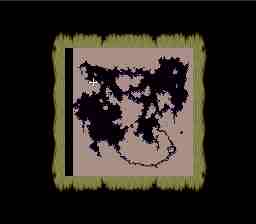 |
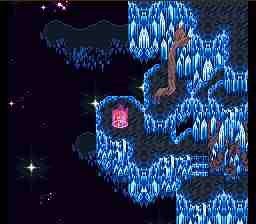
Cast 'Exit' to quickly get out of the cave, and then go to the cave that is here. |
| Go through the cave (it's not very big), and the walk behind the waterfall. | 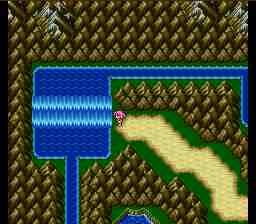 |
|
|
Yup, you guessed it. More Gargoyles. These guys should be a piece of cake by now. |
| After you defeat the Gargoyles, a page will remove itself from the Sealed Book and burn up, opening the door. | 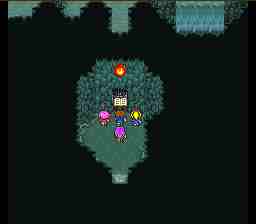 |
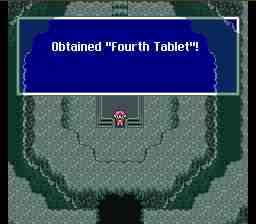 |
Nothing will happen right when you pick up the Fourth Tablet. |
| But on the way out, Leviathan will attack you, saying he will give you his power if you can defeat him. | 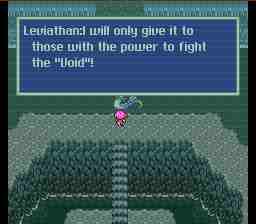 |
|
|
Leviathan is big, bad, and tough. Cast Golem and Fast2 right off, and then cast Shell on everyone. When he attacks with Clean Sweep, heal immediately. In the mean time, blast him with Bolt3 and Meteo. |
| After you defeat Leviathan, you will be able to use him as a call beast. | 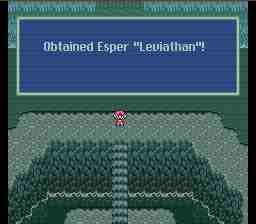 |
 |
After you obtain the Fourth Tablet, go to Seal Castle Kuzar. |
| Inside, take the 12 legendary sealed weapons. | 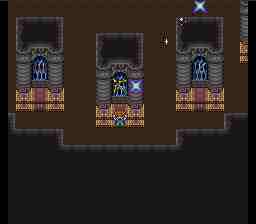 |
 |
Congratulations, you are now ready to go to the Cleft of Dimension. But, there are still many things left to find. I highly suggest you visit Mirage (if you can't find it head over to the secrets page) and get all the stuff from there at the very least before continuing. |

The Cleft of Dimension
 |
When you think you're ready, head to the Cleft of Dimension. The entrance is right where Castle Tycoon used to be.
Your party should be at least 40th level and have several jobs mastered before you even think of going in here. Also, at least one of your characters should have GP Toss equipped, it works well on all the enemies in here. |
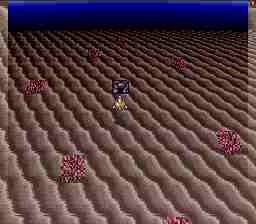
| The area you go through is a small desert. Exdeath and a bunch of his minions will have a few words to say to you at the end of this area. | 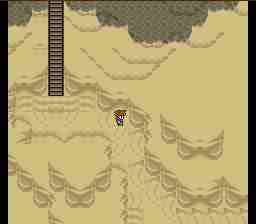 |
 |
After you leave the desert, you will be in an area that looks a lot like the Ancient Base. Be sure to get all the Elixirs out of here. |
| The next area you come to is Mirage! Time is stopped here, so you can't talk to anyone or buy anything, but you can still recover your stats at this pot. Leave Mirage by its normal entrance. |  |
 |
When you leave Mirage, you will be in a forest. Like the Forest of Mua, it is a lot easier to find your way around if you turn off background layer 2 (use the 2 key). |
| At then end of this area, you will be attacked by Carfisteri. | 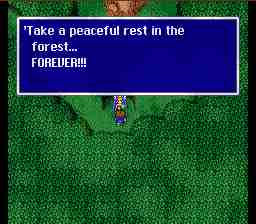 |
|
|
A quick XFight/Meteo combo will make this a short fight. |
| After you defeat Carfisteri, go into the tree to go into a cavern area.
Do NOT fight Omega. Go around him. |
 |
 |
After you go through the cavern area, you will be inside a small bedroom. Open the book to fight Apanda. |
| XFight, Meteo, GP Toss. Look! He's dead! |
|
 |
Leave the book open and go back out of the bedroom. You're in a floating castle! Be sure someone has the Passages ability so you can see the paths between platforms. |
| After the floating castle, you'll come to Dimension Castle. Look around, get all the treasure, then go downstairs. |  |
 |
Go to the cell in the southwestern corner to fight Apocalypse. |
| Apocalypse randomly casts Blue spells. As a matter of fact, if you let him, he'll cast every blue spell in the game! Unless you need to build up your Blue spell list, just toast him and go on, he isn't very hard to beat. When he's dead, he'll leave a save point behind. Use a Cottage and save. |
|
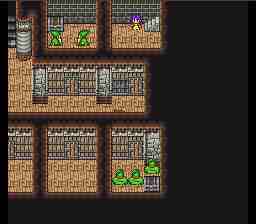 |
There are three Juno Avis's in each cell guarding some treasure. You only have to fight them one at a time and only if you want the treasure. |
| Talk to the Beholder-looking monster on the other side of the bars, and he'll come out and attack. | 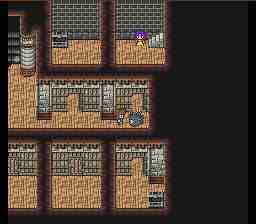 |
|
|
Catastoph only has about 20,000 HP but he hits very hard. Heal quickly with Cure3 when he attacks, and hit him back with your strongest attacks. Win or lose, this fight is very short. After you defeat him, the woman in the cell thanks you, gives you a kiss, and leaves. |
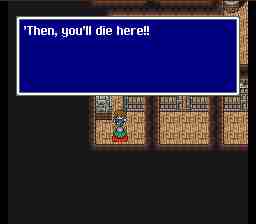
| Continue working your way through the castle until you reach the throne room. There, you will see the woman you rescued. Turns out she's the King of Dimension Castle, and you took her Kiss of Death! | 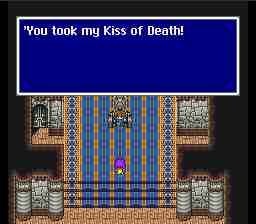 |
|
|
Be on lookout for Halicarnas's Kururu attack, which will turn your party into toads. He also attacks with devastating water spells, so be sure to recover quickly from Frog status so you can heal and keep dishing out damage. Hit him repeatedly with your strongest attacks (Bolt3 works especially well) |
| After you defeat Halicarnas, go up to the roof, where you will be attacked by Twin Tania, who guards the entrance to the Void. | 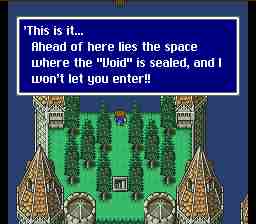 |
|
|
This guy is big, bad, and tough. With no obvious weakness, all you can do is hit him with your most powerful attacks and be sure not to fall behind on healing. |
| After you defeat Twin Tania, you will be able to go into the Void. Guess who the first person you run into is? That's right, Gilgamesh! | 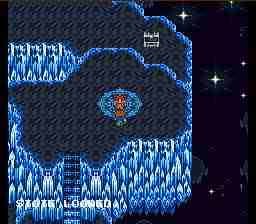 |
|
|
Beat up on Gilgamesh some and he'll recognize you and leave. |
| Work your way through the void. Shinryuu guards this chest, don't open it unless you have a death wish. | 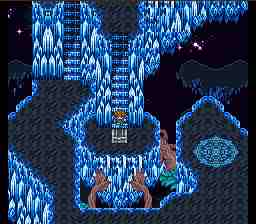 |
 |
Exdeath is just ahead! Go to the savepoint and prepare to do battle with it's guardian. |
| To defeat Necrofobia, you will have to kill all of his barriers. They have a Wall on them so don't attack with magic that will bounce (Meteo and call spells work fine). They will bounce Flares and Holies off of themselves, so be sure to heal quickly.
After you defeat the barriers, Necrofobia will summon Gilgamesh to his aid. But, Gilgamesh turns on him, and after a long dialog kills him with Explode (killing himself in the process) |
|
 |
After Necrofobia is dead, use a cottage and save. |
| Go north to confront Exdeath. | 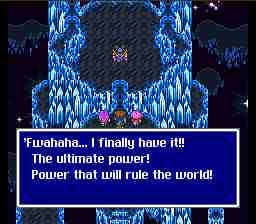 |
 |
Exdeath's first form is that of a giant tree. XFight and Flare work well against him, as does Holy. |
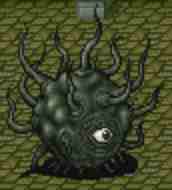
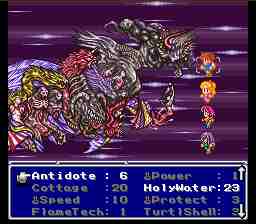
| After you defeat Exdeath, he will transform into NeoExdeath. He has four parts and they are all tough. He attacks mainly with spells and Vacuum Wave, both of which usually do at least 2000 HP of damage.
Also be on the lookout for his Grand Cross attack, which inflicts random status ailments on your party. He also attacks with 'The Laws of Physics are Broken', which nullifies any spells that have been cast (such as Fast and Golem). After you defeat NeoExdeath... well... that would be telling! :) Beat him yourself to see the ending. |
 |