
")
")
Final Fantasy 6
ไฟนอล แฟนตาซี 6
บทสรุปเกม
WALKTHROUGH
-
 Final Fantasy 6 Pixel Remaster [By LunaEleven]
 -
 Final Fantasy 6 [By Soi13 WM]
 -
Final Fantasy 6 [By Mink]
-
 Final Fantasy 6: [1.World of Balance - By rpgclassics.com]
 -
Final Fantasy 6: [2.World of Ruin - By rpgclassics.com]
-
Final Fantasy 6 [By อิ๊
This email address is being protected from spambots. You need JavaScript enabled to view it. ] -
Final Fantasy 6 [By shonocha]
-
Final Fantasy 6 [By ป๋าเปี๊ยกอยากแคสต์]
-
Final Fantasy 6 [By Zande]
-
Final Fantasy 6 [ EndlessChannel TH]


World of Balance
1) Introduction: The Identity of a Girl
2) Destination Figaro Castle
3) Figaro Castle and Ted Woolsey's One Liners
4) To South Figaro and Beyond!
5) Mt. Kolts
6) Rebel Scum
7a) The Fearless Trio: Terra, Edgar, and That Other Guy
7b) Locke: Ain't Nothin' Gonna Break My Stride
7c) The Final Scenario: Is Shadow Black?
7d) The Never-Ending Scenario
8) One Night in Narshe and the World's Your Oyster
9) Why the Hell is that Castle Moving?
10) I Love This Place! Really!
11) Gamblers and Bad Love Poetry
12) Three Little Piggies and an Ugly Duckling
13) Born Free, Died Not so Free
14) Terra's Past, Talking Chocobos, and a Wee Bit of Magic
- Optional: Getting Mog
15) Passage to the Sealed Gate
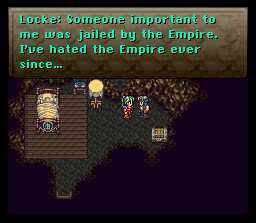
16) Locke Therapist
16a) Theee Empire Shull Nevah Perrrrish!
16b) I'd Like to Ass You a Few Questions
17) Was Ted Woolsey a Foreigner Fan?
18) I Love the Smell of Napalm in the Neighbor's House
19) Uncle Ulty's Portrait Session
- Optional: I Tells Ya Hows Ta Learn Da Magic Quickahly
- Optional: Water Rondo
- Optional: Rage, Rage Against the Dying of the Light
20) God Bless You Octopus Friend
21) Hate Hate Hate Hate Hate
 |
Ah yes, the lovely opening cinemas to FF6. We love them, we hate them, we REALLY wish we could skip them, but we can't. You have to love this last little phrase. I mean, come on, EVERYBODY in power is always on the verge of making a senseless, deadly mistake. Do they really have to ask this? Sheesh. |
| Its a good thing these guys know their mission well. They've just travelled hundreds, maybe thousands of miles to get to the town of Narshe, and they don't even know why the girl is with them. You can tell these guys are real winners. | 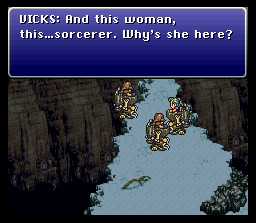 |
 |
Damnit, this isn't the name I am looking for. Get off the screen loser! |
| Now that's what I'm looking for. You are my God Uematsu! My God! |  |
 |
Before we begin the real walkthrough, I just thought I would share with you my favorite background. Its so pretty. Its like playing FFVI on a stone slab. Now just try and tell me you haven't thought about playing FFVI on a stone slab. This is a true dream come true. Bravo Squaresoft. Bravo. |
| Needless to say, if you use this background, I don't want to talk to you. Ever. |  |
 |
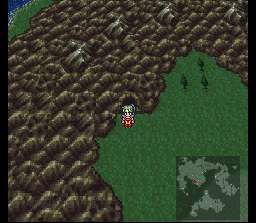
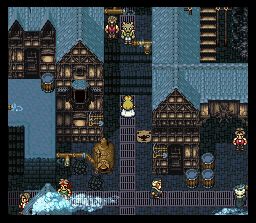
And so we enter the town of Narshe. Your true mission is still a mystery, but you now know you are looking for an "esper". It also appears you aren't wanted in the town of Narshe. You'll fight a few incredibly pansyish enemies. If you get hurt (I don't know how you would), your magitek suits have a heal function. |
| After pounding on the poor town guards (you almost feel sorry for the bastards), you will enter a cave filled with more pansy enemies. Joyous. Beat em up, gain some levels, and move on. | 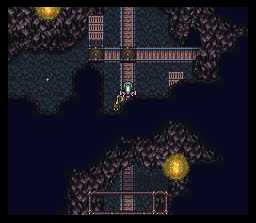 |
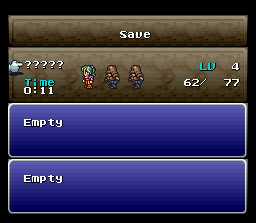 |
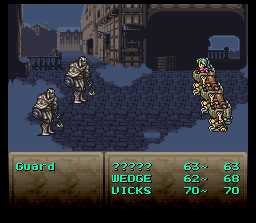
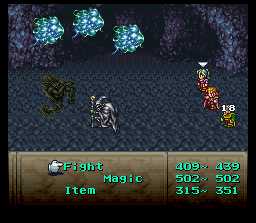
You get your first chance to save at the little glowing thingy in the cave. Wow, isn't it a great time to be alive? Look at me! My name is ????? Ph33R ME! |
| Its the first boss of the game, and he is just as pansyish as the enemies you fought, provided you do as the picture says and don't attack the shell. Or attack the shell, its not like it matters, you can just heal for free anyway. See Below for boss info.
Reccomended Level: 5 |
 |
 |
After defeating the whelk, continue on until you come to this funny lookin` thang. Hey maw, whas` that there shiny thing? Mother may have told you to leave stuff you don't know alone, but in this case, you want to play with it. |
| Well I'll be hogtied in a shoehorn, its an esper! But this is one unhappy esper, and we all know what unhappy espers do don't we? |  |
 |
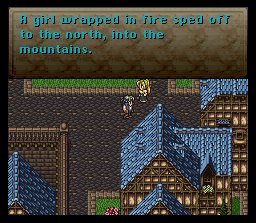
Well, it looks like ????? has now transformed into GIRL. Things are looking up. And will you look at that? You have been rescued by OLD MAN. Gotta love these names. Anyway, listen to OLD MAN, because OLD MEN are wise and always have lots of info. But OLD MEN also seem to like GIRLS, so if you see him drooling, then run. |
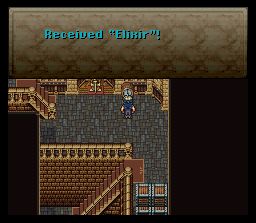
| Make sure to grab the elixir in this clock. Elixirs are rare, so you can bet your booty I'll be telling you where you can find them all. Anyway, after that, head out the house and into the cave, where you will fight some more wussy enemies. | 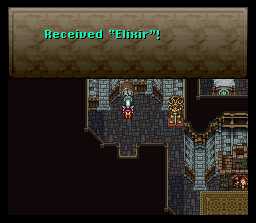 |
 |
After leveling up, head as far up into the cave as you can, where you will be assailed by some Narshe soldiers. What will happen next? Dear me, you'll just have to find out.
Reccomended Level: 7 |
 |
Here is our first introduction with the lovely character Kefka. We are introduced to him by a lovely little sadistic comment - I never realized Kefka was such a perv. I think he's been reading to much Marquis de Sade. |
| Isn't he just beautiful folks? | 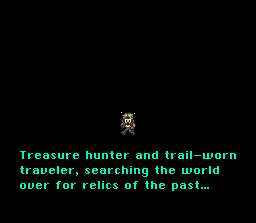 |
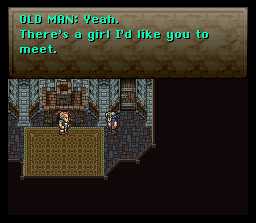 |
Oh damn! OLD MAN be pimpin the Narshe women! OLD MAN has got the connections, let me tell you. You know how girls go for those OLD MEN. |
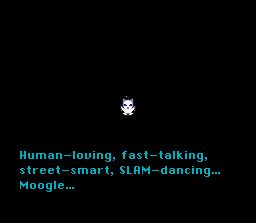
| Anyway, after you are introduced to your good friend Locke, OLD MAN sends you on a rescue mission to find Terra. It is your job to escort her safely to the confines of Figaro Castle. Locke, being the pansy "treasure hunter" that he is can't do it himself, so he must enlist the help of...kupo? | 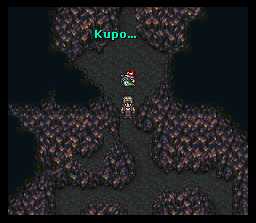 |
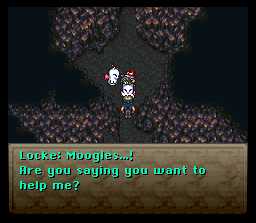 |
Moogles! Hell yeah! Time to kick some guard butt. |
| What can I say? How can you lose when you have a moogle named Kumama in your group? |  |
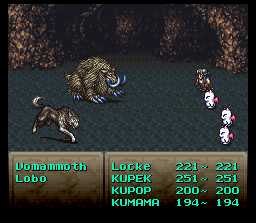 |
The enemies here aren't too difficult. The only thing to watch out for is the Blizzard spell that the mammoths use. Try and kill the mammoths as fast as possible. There are six mobile units you must fight. Have Locke's group fight 3 of them, Mog's group fight 1, and your other moogle group the other 2. Use Mog's group to attack the stationary unit. |
| Before attacking the stationary unit, unequip all of Mog's stuff, cause he has a good shield and pike you won't be able to get until much later in the game. It will come in handy. |  |
 |
This fight isn't that hard. Just have Mog use "Dance" and the other moogles attacks. You won't die. I guarantee it! Disclaimer: This is not a real guarantee. It is only a silly ploy to make you feel more confident about your pathetic lives. If you would like to complain about the use of this guarantee, go cry to your mama. Thanks. |
| Once you win the fight, Locke being the gentleman he is will exchange thanks with the moogles and carry Terra off in his husky Treasure Hunter arms to safety. Boy, what a stud. |  |
 |
Locke will then, in his infinite cunning, find a secret passage out of this cave! Ta da! Remember this switch and this cave, because you will need to use it again later on in the game. |
| I didn't know Locke was from Fargo. See, your mom was right, you DO learn something new everyday! |  |
 |
And we all know how good the words of a thief are, don't we? Err, I mean, treasure hunter, of course... |
| And so the two young heroes gallantly march out of the town of Narshe into the lush world of mode 7 graphics. Remember when mode 7 used to be the coolest thing in the world? Now its all big flashy gigapixels and FPUs. But mode 7 will always hold a special place in my heart. |  |
 |
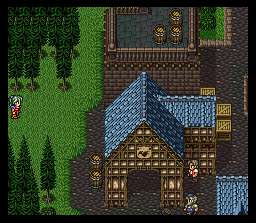
After fighting some weird leaf/bush enemies, you will arrive at the castle of figaro, which is to the southwest from the town of Narshe. It is time to enter the castle and meet thine destiny.
Reccomended Level: 10 |
Figaro Castle and Ted Woolsey's One Liners
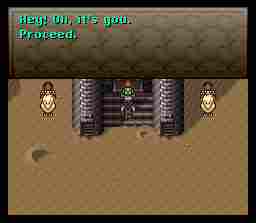 |
Upon entering Figaro castle, you find that they are glad to see you. Or maybe not. "Oh, its you." Ouch, Locke gettin' burned. You can't do much except buy stuff at the moment. The only things worth buying are the Bio Blaster and Noise Blaster. Don't spend your money on the auto crossbow, because you will get one for free soon. |
| Hail to the king baby. He seems a bit surprised to see Terra. Who wouldn't be? I mean, green hair is a turn on to me, isn't it with you? | 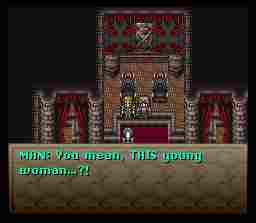 |
 |
A few quick words about Edgar...isn't that a lovely expression on his face? |
| Locke and Edgar exchange a few words, then Locke runs off to do..whatever it is characters do when they aren't on screen. *cough* He won a contest, folks. Anyway, here we get one of the first one (three?) liners of the game. Edgar layin on the charms! He racks up a few points for this one. | 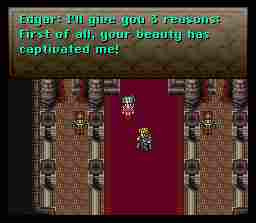 |
 |
A few more points. |
| ....Shot down. |  |
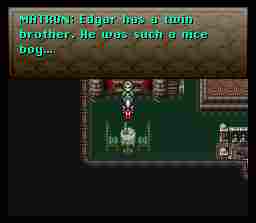 |
Edgar will then leave, allowing you to freely roam around the castle. You can go out and gain a quick level or two with Terra (since she quickly falls behind Locke and Edgar, and when you are done search out ol` man Matron to hear yet another exciting flashback story. |
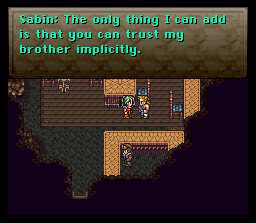
| You'll hear a very interesting story from ol` Matron, and you will also be introduced to Sabin, a buff young man related to Edgar. Hooray. When the story is done, head on back to the throne room. | 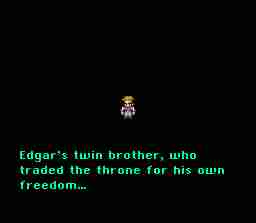 |
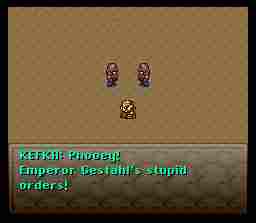 |
You'll then be introduced to Kefka for a second time with the classic line "Phooey". Ah yes, Ted Woolsey, you really know how to captivate the audiences. |
| Kefka and Edgar exchange some sublimely abrasive comments to each other regarding Terra. It appears Kefka and the Empire are after her, in a different way from Mr Pervert Edgar. | 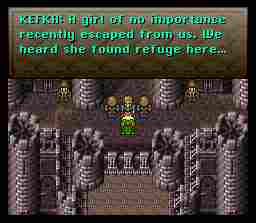 |
 |
Follow Locke back to "your room". This confused me a lot the first time I played it, cause you can only follow Locke for the first two screens, when he suddenly races ahead of you for some odd reason. But just go out the door to the tower to the right of the castle. And I still don't understand Terra's comment of "You're Locke, right?" She travelled with this Bozo all the way from Narshe, then she acts like she doesn't even know him! Translation error? Or is Terra just a blonde at heart? |
| One of the best one-liners in the game, IMHO. You better not call this wild man a thief! |  |
 |
Locke will then leave Terra again (lovin' em and leavin' em) to her own devices. Then, the scene switches to Edgar, whom awakes with a start to find the castle afire. |
| Who knew Beavis and Butthead would show up in FF6? | 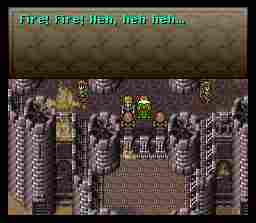 |
 |
This message bought and paid for by Yahoo corp. (http://www.yahoo.com) Do you YAHOO?! |
| Kefka won't let you get away that easily, however, and he'll send some of his easily destroyable friends after you. Use your new autocrossbow and Terra's fire to easily destroy these morons. | 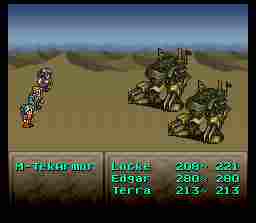 |
 |
If you use Terra's fire in this battle, you'll get an amusing little cut scene. And yet another delicious one liner. She's loaded for bear, aw yeah! |
| Okay, I was wrong. THIS is the best one-liner in the game. No one liner will ever top SON OF A SUBMARINER! Except maybe the Spoony Bard. its hard to tell. |  |
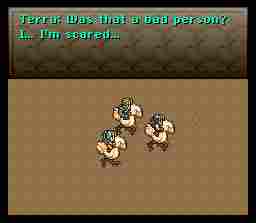 |
After horribly burning her enemies to death, Terra will then ask if they were bad people. I'm sorry, but these guys either made some really bad mistakes in translation, or Terra is just the stupidest girl to ever be born. She roasts those guys to a crisp without even a blink, then says she's scared of the bad men? I just don't get it. Its an utter paradox. |
| You will next be introduced to the Returners, an underground resistance organization. Its time to meet these returners. And thus, our heroes head off to South Figaro to discover what adventure lays in wait. Tune in next time, same bat time, same bat channel. | 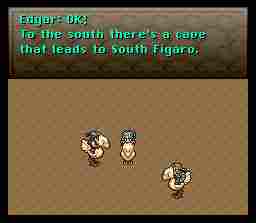 |
 |
You won't fight too many difficult enemies in this cave. Just have Terra fight, Locke steal, and Edgar use the auto-crossbow, and you will make it out relatively unscathed. |
| If you do get scathed, you can always come back to the Recovery Spring and heal your HP and MP for no cost. Not a good business decision on South Figaro's Cave, if you ask me. | 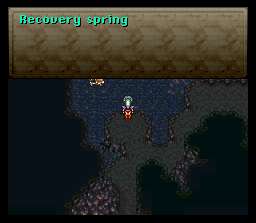 |
 |
Do NOT take any of the treasures in the cave yet. The items in them currently are not worth it. If you wait about 5 hours, you will come through this cave again, and you will get much better items, so I would wait if I were you. |
| Anyway, you should make it out of the cave pretty quickly, and back to civilization, or something. Just head a bit to the southeast and you will come to the town of South Figaro.
Reccomended Level: 11 |
 |
 |
And a lovely little town it is, at that. Why, what is this building in front of me, do I hear a wark? Its a chocobo stable. Ah, the chocobo, symbol of Final Fantasy games worldwide. But if I were you, I wouldn't waste your money now. You really don't need a chocobo to get where you are going, so just proceed to taking a stroll through the town. |
| When you get to the relic shop, the only thing worth buying is the sprint shoes, and let me tell you, these things are great. Your play time will be shortened many hours just by being able to run everywhere. You will use these for the rest of the game, so you might want to buy two or three. Of course, only one person in your group need equip them at one time. |  |
 |
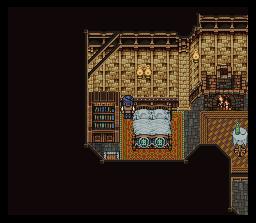
Anyway, next head for the house on the north side of town. Go in the house and exit out the door just to the right of it, and head all the way back here like so, and head left and down to enter a secret door. |
| Inside the room you will find an elixir in the clock. Head back into the house and up the stairs. |  |
 |
Go in the first door upstairs. |
| There is another secret room if you go behind the bookcase here in this house. Man alive, this house has more secret passageways than the mansion in Kenneth Brannagh's Hamlet. |  |
 |
Once again, if you keep going down this passageway here, you will come to another secret place that has some nice relics. Give the hyper wrist to Terra and the RunningShoes to Edgar. Then, go back to the relic shop and buy star pendants for everybody who has an open relic slot. You will need them in the level to come. |
| You are almost done with this town, but not quite yet! Next, head on over to the cafe and try to talk to the weird looking purple guy at the counter. Yes, you guessed it, its the typical doesn't-talk-has-no-emotions cold-blooded killer. FF6 version, nonetheless. |  |
 |
And just to keep the tradition alive, you can all recite with me "Isn't he beautiful folks?" |
| "He'd slit his mama's throat for a nickel." Now there is a quality Woolsey one-liner if I've ever seen it. Don't mind me, I'm just obsessed with pointing out all the one-liners in this game. But don't worry, there aren't *that* many, at least you can all hope not. |  |
 |
ONE last thing before you leave town. Only one, I promise. Of course, you'll want to head on over to the weapon/armor/item shops. Buy the best equipment for everybody, and stock up on tonics and antidotes, and a tent if you have one. Then, make sure to grab the warp stone hidden in the barrel over here. Now, head out of town and go to the little house north of South Figaro. |
| Inside this house you will gain some info regarding Sabin and his whereabouts. Talk to the weird guy outside the house and he will tell you Sabin and some guy named Vargas have run off to Mt Kolts. Well, guess what, that means its your time to go too! Head on out of town and back to the ol` world map. |  |
 |
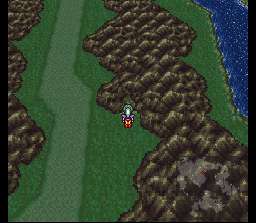
Head due east from the house you just left, and you will come to the entrance to Mt. Kolts in no time! What can I say about this place? Not much. It is very straightforward. Just go through it, watch out for the damn tuskers (they have a strong counterattack) and you will be fine. |
| When you get to this room, go underneath the big rock to enter a hidden area where you can receieve a... | 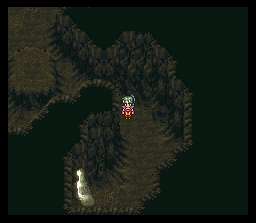 |
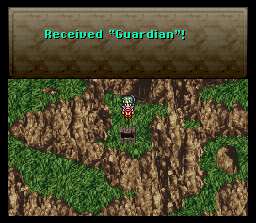 |
Guardian dirk, which is a much better Dirk for Locke that will also increase his speed. |
| In the same room, if you go up and around this cliff you will come to another secret area where you will receive an... | 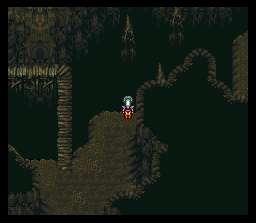 |
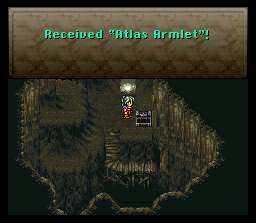 |
Atlas Armlet, a nice little relic that will increase attack power. Give it to Edgar to increase the power of his Autocrossbow. |
| That is it for the secret areas. Head up across the bridge to get out of that room, and keep going. You will see a mysterious shadowy figure bouncing around, so if it makes you feel any better, you can just follow that around. When you get here, you can use a tent, if you are feeling like a pansy or something. |  |
 |
Keep going...blah blah blah. Once you get to the bottom of the mountain here you will finally discover the identity of the mysterious figure. Not like its that surprising or anything. |
| Looks like this guy knows Sabin. Yes, that's right, its time to beat the information out of this poor bastard. | 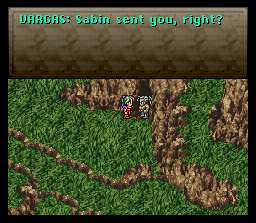 |
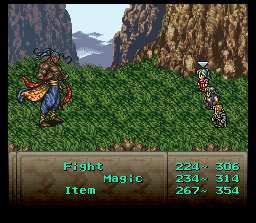 |
First things first. Take out the bears that are guarding Vargas (the bears are named Ipoohs. Ipooh, where the HELL do you get a name like Ipooh?). After the Ipoohs are dead, start tackling Vargas. Use fire with Terra, steal with Locke until you've gotten whatever you can, then attack, and use Edgar's autocrossbow. The battle won't last long before an interruption occurs...
Reccomended Level: 13 |
| Yes, it's Sabin to the rescue, and what a dramatic entrance at that. Anyway, Vargas will knock all your characters out except Sabin, but it only takes one hit to kill this guy. The only way to kill him is to use your blitz named Pummel. To use it, select Blitz from the attack menu, hit the left arrow, right arrow, left arrow, then the A button, and you will do the pummel. |  |
 |
After Vargas' bloody death, our heroes rejoice in the reuniting of the lost brothers. Sabin will of course join your group, and you will be off to the Returner's Hideout, but there are a few things to do first. |
| See next frame... |  |
 |
Another beautiful one-liner by the main man Woolsey. Looks like Terra is turned on by those muscular guys...which means I'd be about the last guy on her list. Oh well, there's always Locke, I guess... |
| You also might want to take a look at Sabin's blitz list, so you know what moves you can use. The aura bolt is probably the best single enemy attack you have right now, while fire dance is the best multi enemy attack. |  |
 |
When you get out into the world map, head north for a bit until you come to the returner cave. It isn't far, and the enemies are pathetic, so nothing to worry about. |
 |
BANON: Excellent work Edgar. Now toss her in the...room of delicous pleasures for perverted old men whose names start with B. |
| Banon relates a story of how evil came into the world. Needless to say, the story sounds a bit too much like Pandora's Box to be original, but you must give Square credit, for in the spirit of male chauvenism, Pandora is changed to a man. Yeah, baby, yeah. |  |
 |
After the story, everybody goes off to take a nap. When Terra awakens, she finds Locke standing around in her room. If I were Terra, I'd be a bit freaked that some guy was watching me sleep, but Terra being the pretty little fool she is decides some normal conversation is better in line. |
| Head to the northernmost room in the Hideout, which is loaded with treasures. There is also a hidden passage. Head down the wall from here to recieve a.... |  |
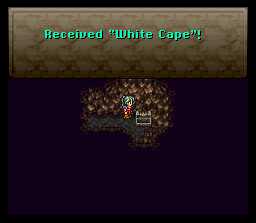 |
White cape, a nice little relic which will raise your defence a bit, and protect from imp and mute. |
| Sounds like the catholic church. |  |
 |
You can also have a heartwarming chat with Sabin. |
| ...and with Edgar, who doesn't want to "push you too hard". | 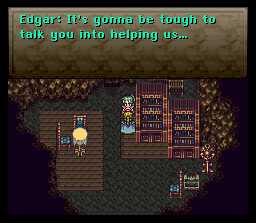 |
 |
Here you have the choice of going with the returners or not. No matter what you choose, you will end up joining, and it won't affect anything in the game besides recieving either a Gauntlet or Genji Glove. Choose "Yes" to get the gauntlet, or "No" to get the genji glove. I go with no, because the genji glove is a much better item. Choosing "Yes", however, will give you an interesting "Council" scene. Decisions, decisions... |
| If you choose no, Terra will have her little depressed episode. I might not be able to put my hope into her, but I know what I might like to put into her. *smack* Okay...yeah, I deserved that one. |  |
 |
News will come to the returners that South Figaro has been taken over by the Empire. *gasp* Anyway, Locke will leave the group to check out the situation. |
| But not before giving us gracious players a classic one-liner. "Lecherous young king." Gotta love it. |  |
 |
After this scene, you decide it best to escape the hideout before the empire finds you. You grab a raft and head down the Lete River (translated to l4m3r as 31337 River). When you come to the first split, it doesn't really matter which route you take. Going left is the longest, going up is the shortest. |
| The enemies here aren't too tough. Have Terra attack, Edgar use Auto Crossbow, Sabin use aura bolt (down left left) or fire dance (left left down right right), and have Banon use Health. |  |
 |
At the second split, going up will lead you in a circle, which allows you to gain some levels. I like to gain levels here, because you won't have another chance for a long time. I usually gain until Terra has about 440HP. |
| Once you are done leveling, head left to get out of the Lete River. But you won't escape without fighting the RPG world's coolest boss ever: Ultros. He's a rabid octopus, he's got a million wisecracks, and he's a gonna whomp your ass. Well, not really. Actually, he's a pansy, and his wisecracks suck. "Game Over". Real original. |  |
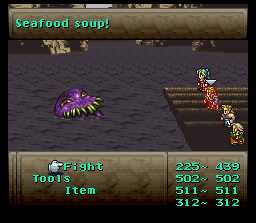 |
If you use Terra's fire in this battle, Ultros will cry out "Seafood Soup." Don't ask me, I don't really know either. |
| "I guess we thrashed it." Doesn't Sabin realize that everytime you say something like that, you are just asking for trouble? | 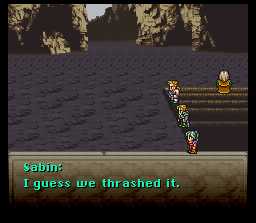 |
 |
Yes folks, she can toast 50 imperial soldiers on her own, but she can't fight off a measly tentacle. I just don't get it. |
| Yes, I know this is a mistake. I just thought it'd be funny to keep it in anyway. |  |
 |
Next up on the list to be seperated: Sabin. So there are now 3 groups out there....which means, its time for scenarios! Coming next time, the wonderful directorial debut of the FF6 scenarios. |
 |
Actually, despite what the game says about the going not being easy, this is by far the easiest of the three scenarios, which is why I like to get it out of the way first. |
| You'll go through the rapids for a couple of fights, then you'll come out on the shore up here. Well, doesn't this place look familiar? Why, it's that place I just got kicked out of a few days...guess what? Time to go back. |  |
 |
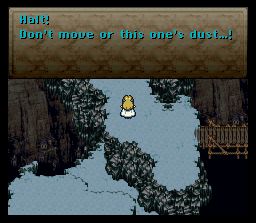
They aren't going to let you in the front door that easily, so it's time to go around. Remember when Locke told you to remember the secret entrance? You don't? Oh well, too bad, it's not like I'm going to help you or anything. |
| The path is very straightforward in the mines. There aren't any paths less taken or anything like that. When you come to this room, make sure you remember where that weird shining ball follows, cause you have to follow its path to proceed. The only thing I don't understand is why the hell they chose a shining ball as the pathway? I mean, why not just leave a person there or something to show you the way through? It'd be so much easier that way. |  |
 |
I reccomend straying from the path a few times til you fight these enemies, cause this is the only place in the game the enemies appear. Later on, when you become obsessive compulsive about collecting Gau's rages, you will thank me. |
| When you get to this point, I reccomend going into these doors to see some old friends and to get a spiffy new weapon. |  |
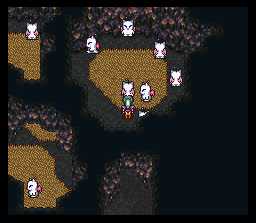 |
It's moogles! If you're anything like me, you'll spend five minutes in this room talking to them just to see the "Kupo". |
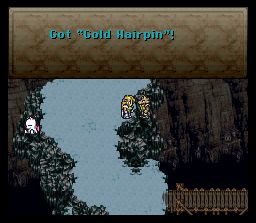
| And before leaving this lovely room, don't forget to stop by this treasure chest to pick up the Rune Edge. It's a good sword against bosses, cause it uses magic to inflict a critical hit each time. | 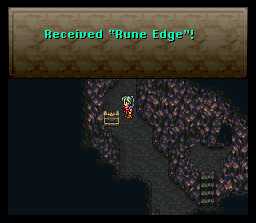 |
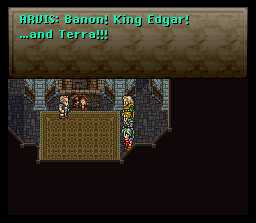 |
With that it's time to leave these forsaken mines and head back to OLD MAN's house, who we finally learn to be named ARVIS. What a god awful name, ARVIS. He is quite excited to see you though. I count five exclamation points in that message alone. |
| And some more story stuff happens...blah blah blah, and that's the end of the scenario. |  |
 |
Once done with Terra and Edgar's scenario, you will appear back at this screen with everybody's favorite Moogle. Go up to Locke and choose him to get started on the second scenario. |
| Locke will be unequipped at the beginning of this scenario, so make sure to re-equip him with optimum armor. If you've got an extra pair of sprint shoes, I'd recommend putting those on. If not, then you must have been too stupid to buy an extra pair. Well, not my problem. |  |
 |
One hint before getting into this section: Do NOT talk to the guards in the magitek armor. They will literally rip you a new asshole. While it is technically possible to kill these guards and just forget about doing most of this stuff, it's also possible to remove a large section of your brain while suffering almost no side effects. The question is: are you really willing to risk that? |
| Anyway, if you have any intelligence whatsoever, you will head for the item shop and talk to the merchant there. You need his clothes. Get in a fight with him and do nothing but steal in order to get his clothes. How Locke is able to steal clothes off the guards in the middle of a heated battle is beyond me, however. | 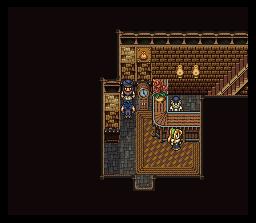 |
 |
Next, head to the house below and to the left of the item shop. Talk to the kid downstairs, and he will painlessly let you pass through to the next section of the town. Once again, you need to steal new clothes, so head up to the green guard on the path above the weapon shop to once again miraculously steal his clothing. |
| Once you've got the guard's clothing, talk to this guard in the center of the town, and he will simply assume you are there to relieve him of his post (without even asking. How rude!). So now you can travel into the last section of the town. |  |
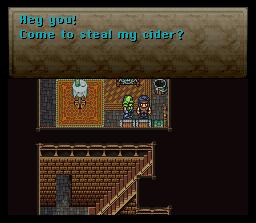 |
Next, get your butt on over to the cafe and go downstairs, where some moron merchant will assume you've come to steal his cider. There is lots of assuming going on in this scenario. As my history teacher once said, assuming makes an 'ass' of oneself. Hahaha...ha. Anyway, take the moron's cider (and his clothes). |
| Now you'll want to go back to the house by the item shop and give the cider to the old man (who doesn't even pay you. What a cheapass!). He'll tell you that you need to give his son a password, but he forgot. And no, the password isn't "I forget". It is courage. Go through the secret passageway that leads to the big mansion. | 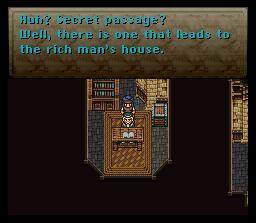 |
 |
Funny how none of the guards inside this house find it strange you've made your way in, besides the heavy duty guards at the front. Oh well, easier for you. Head on upstairs to the secret passageway you took earlier in the game. If you forgot where it is, listen for the room with a drafty noise. |
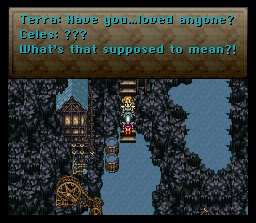
| Downstairs, you are given the option to change your clothes. It really doesn't matter if you do or not. It just has a nominal effect on the next scene. Head on up to the first door, and you'll see a little cutscene involving the next character to join your crew: Celes. She seems to be a contradiction of terms. A battle hardended knight with a spirit pure as snow. Think about it for a minute. Kinda boggles your mind, doesn't it? |  |
 |
Today's grammar lesson: this is what we call foreshadowing, kids. |
| Anyway, you'll go through a few more cutscenes, learn some more information, then a guard will exit the room. I just had to show this picture of Locke hiding in the rafters. It still amuses me after all these years for some reason. |  |
 |
Go into the room and undo Celes' shackles (unless you're into that kind of thing, y'know). Then Locke will give his schpiel about how he will protect Celes...though if you ask me, Celes could probably wipe the floor with Locke's ass. And don't even think about stealing her clothes. |
| Take the key from the guard who keeps mumbling on about bread (mmm...bread), then head over to the room farthest to the right and use the key to wind the clock in the upper right hand corner of the room. For some reason, the sound the cupboard makes when it moves scared the hell out of me the first time I played. I don't know why. |  |
 |
You'll now go through a room filled with some pretty pansy guards (make sure you've equipped Celes to the optimum). At this fork in the road, first go up to get the armor, then go down and to the left (there is a secret passageway in the wall) to get some more treasure, then go all the way down the passageway, get the earing on the left, then head up the stairs to exit the room.
Recommended Level: 15 |
| Then Celes will go off on the typical female equivalent of "why do you love me?" I'll leave this one up to you to decide. |  |
 |
Leave Narshe, and go back to the cave that you came through back with Terra, Edgar, and Locke. Make sure to pick up the treasures that you didn't open last time, because they are much better this time around. Also beware, the enemies have gotten a bit tougher since you've last been in the cave. Still nothing to worry about though. |
| Very simple. This boss is very easy if you use Celes' runic. This boss will kill you if you don't. That simple. Make sure to steal from him...he can give some good items sometimes. |  |
 |
There is only one scenario left to choose. Unless you just want to stand around and bask in Mog's utter awesomeness, I'd suggest you choose it. |
| The first thing you will see is a house above you and to the left. Go to it. First, talk to the guy on the chocobo who sells items. Buy whatever you need, and I'd strongly recommend another pair of sprint shoes if you don't have any left. Make sure to get shurikens too, because they will be handly very soon once you get Shadow. |  |
 |
You don't have to do this, but if you go in the house, you'll see a really absurd scene with an old man. There is lots of weird, abusrd, wacky humor (most of which is foreshadowing to something) in this scenario, which is why it is my favorite. |
| Now, make sure you talk to Shadow. You're not going to want to go through the scenario without him, cause he's all cool and stuff. He says he'll show you the way to Narshe. He has the tendency to run away on you, however, so if you like him (And it's hard not to), save often, so you can restart if you lose him. | 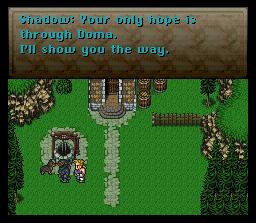 |
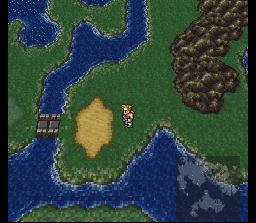 |
The next part is pretty straightforward. Just head south and east from the house, fighting scourges of pathetic enemies, until you get to this little patch of desert. Walk into the patch of desert (bet you didn't see that coming). |
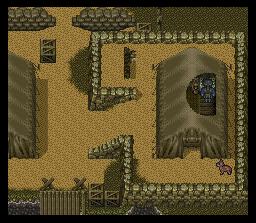
| Ah ha! It's an imperial hideout. You'll listen to some brilliant dialogue spoken between some guards, then learn that this place called Doma is about to be attacked. Then you'll see Doma attacked. They certainly didn't spare any time. |  |
 |
This is where you will be introduced to Cyan, if you ask me, one of the most useless characters in the entire game (though I'd appreciate it if I didn't get any more flames about this...I've gotten enough, and I don't care you think that CYAN RULX0RS!). And he's barely stronger than my Grandma (and she's dead). |
| I find this fight scene particularly funny. He is the general of this huge attack group, but if you use your first swdtech ability, you will kill him in one hit. Crazy stuff. |  |
 |
Back to Sabin and Shadow. Search the tent on the right for a treasure chest. If you "hit it", you will fight the dog. If you "kick it", you will scare guards away by meowing. Yet another little absurdity thrown into this scenario. Goodness me, how I love it all. |
| "So that's General Leo. He could be my friend, if he weren't my enemy." I pray nightly that this is a translation error. |  |
 |
Lots of cutscenes in this part of the game. Kefka returns for his second appearance, and this time he's out for death. He is going to poison Doma. Well, you certainly can't let him do that. |
| So you fight him, and he'll run away after one hit. Are we noticing a pattern here? |  |
 |
It's been a few walkthrough sections without a quality "Woolsey-ism". So here is one for you. |
| You have to run after Kefka and fight him again, but before you do so, go past him to this tent. You'll fight a telstar to get a green beret (a nifty hat that raises your maximum HP). After you get that, head back to fight Kefka again. |  |
 |
Kefka will once again run off, but this time he will hide behind his lackeys. Nothing to worry about here though. A fire blitz should take care of all of them. |
| Now it's back to Cyan for more Doma action. Perhaps it's just the cynicsm that has built up during the course of my 19 years of existence on this planet, or perhaps it's my general apathy toward life, but I laugh out loud every time I see that soldier fall of the wall to his bloody death. |  |
 |
I think I've ruined enough of the story for you already, so I'll just let you experience the cut scene by yourself. Anyway, it was bound to happen that Sabin and Shadow would meet up with Cyan eventually, and what better place to do so than on the battlefield? Wipe the floor with these pathetic enemies...fire blitzes will kill them all in one hit. |
| Two wolsey-isms in one section. Damn, I'm good. High tail it out of the camp the same way you came in, mopping the floor with the magitek armor suits you used in the beginning of the game with Terra. Take advantage of the heal force technique...so you can be refreshed by the time you make it out of the camp. |  |
 |
Once you're out of the camp, there is no going back in. Head south following the river. If you somehow find your way to Doma Castle, you'll notice imperial guards are blocking the way, so there is no getting passed. |
| Finally you'll come to this forest...and you won't find out what happens til the next section! A ha ha ha...ha! |  |
 |
The first area of interest you will come upon is a recovery spring. These things always come in handy. The enemies around here aren't all that tough, but occassionally the ghosts will fry your ass with lots of fire, so you can come back to this point and use the recovery spring anytime you need to. |
| For the most part, the forest is straightforward, but there are some areas you can take a wrong turn at. If you take the wrong turn, you'll end up back at the beginning of the forest. The first area you come to with multiple roads will look like this. Go up the path where you see Sabin standing if you want to go the right way. |  |
 |
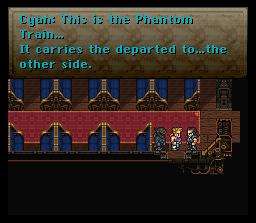
Okay, I lied. That's the only fork in the road. After one more area, you'll come to a train. Sabin and Cyan will bicker like an old married couple, and Cyan is a bit afraid to get on the train because... |
| *Gasp!*
Hold me. |
 |
 |
Now you've got no choice but to stop the blimey train. First, go out the door on the right and head into the car at the end of the train. Watch out for the enemies on the outside of the train. Whispers like to use Demi which can halve your HP. It gets pretty annoying after a while. |
| If you talk to the ghost in this car you can have it journey with you on the train. For the most part it is horribly useless, but it's pretty funny to watch him make a surprised face later in the scenario, which is the only reason I ever take him along. |  |
 |
There's a really creepy guy in this room in the last car. I still can't figure out why he's in here, or why the hell his name is IMPRESARIO. Ted Woolsey must have been a tad drunk when he translated this portion of the game. Isn't Cyan cute when he's scared? |
| Once you're done in this compartment, head back left and you'll notice there's all sorts of ghosties roaming about. Most of the ghosts are enemies, but will only attack you if you try and converse with them. Occasionally one of the ghosts will have items to sell (why?), so if you're desperate for some potions, talk to all the ghosts you can. |  |
 |
Keep moving toward the front of the train until you run into a room where you can't escape. See, you can't escape. NO E.S.C.A.P.E. I'm not sure if he means escape, or if it's an abbreviation for something, but either way you're gonna have to fight your way out. |
| I'm...not going to say anything about this. |  |
 |
Do what the man says! Run into the car on the left and hit the switch to detach the train cars. (By the way, this is where the ghost makes its surprised face. Watch for it!) |
| One more delay thwarted...keep moving left yet again. Eventually you'll reach the dining car where you can eat to refill your HP/MP. Why ghosts would have real food is beyond me. You get a different scene if you eat with different people, so if you have no life like me, you can do this scene four times (or three, if you killed off Mr. Ghost). |  |
 |
Blah blah blah. Keep going left. At the front side of the dining car is a treasure chest with an Earring. Grab it. In the next car will be a room with a treasure chest. If you try to take it, some loser named Ziegfried will attack you. |
| What the HELL does this mean? ARGGGGHHHHHH!!!!!! Anyway, one hit should kill this guy and make him run away with his head between his asscheeks. |  |
 |
Finally you get to stop the train. Just do what the book says folks. If it's in a book, it MUST be true. |
| Run to the top of the train and hit the final switch. Then, because this entire scenario was obviously LSD-induced, the train will attack you, WHILE you are running away from it. It's really funny to watch your little characters run from the train. I'm a sick, sick man. This train is weak: just use blitzes, swdtech, and shurikens. |  |
 |
Since you somehow managed to beat the crap out of a train, it will ph33r you and drop you off at the next train stop in the middle of nowhere. A cutscene with Cyan ensues...blah blah blah, when will this damn scenario ever end? |
| Not soon enough, apparently. Leave the forest, and walk east to a little cave area (it's not too far.) Shadow leaves your group here, so if you want to take his equipment (Ninja Gear is good for this part of the game), unequip him before you go to this area. Then you'll jump into the falls like a bunch of madmen and attack waterfall piranhas (I told you, LSD-induced man). Just use fire dance to roast them all. |  |
 |
Ahh! The next character introduction. This young chap discovers your tattered body on the shore, but once you try to talk to him, he'll run away. We'll get back to Gau later....first it's off to Mobliz, the city on the veldt. |
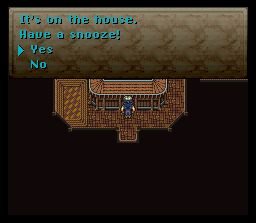
| There's a couple things to do in this town. First, stock up on equipment and the sort (this is the second to last chance to purchase equipment before everyone is reunited). Make sure to buy some Dried Meat at the item shop, you'll need it to get Gau in your party. Also, you can sleep for free at the Relic shop, so don't waste your money at the inn. |  |
 |
There's one other thing to do here. You can get a tintinabar (a very useful relic) by doing a few tasks. Here is what you do: talk to the dying soldier, read the letter, go to the carrier pigeon guy, send out a letter, then talk to the guy who shows you the map of the underwater passage. Keep doing this process about 5 or 6 times to get the tintinabar. |
| Once you have dried meat, start fighting on the veldt until Gau appears. Use a dried meat on him. A really annoying cutscene ensues. |  |
 |
This weird little guy tells you how to use Gau's special abilities. Pay attention if you don't already know how.
Aren't you paying attention? Hello? |
| Once you've gotten enough rages with Gau to whet your whistle, head down to this cave where Gau will take you to SHINY THING! |  |
 |
Which happens to be an underwater breathing device! Why, that's more convenient than the comedy setups in a Zucker movie. Guess it's time to take a dive, eh? |
| This passage is once again filled with pretty pathetic enemies. There will be two forks in the road. If you want to get the items this passage has to offer, make sure you stay right (I'd reccomend this, as you can get another Green Beret). When you come to, you'll be at the port of Nikeah. |  |
 |
There's even less to do in this town. There is the "licentous howler" scene in the bar, good for a few laughs, some items to buy, and an elixir to find at the inn. And that's it. |
| And then you're finally able to leave this damned scenario. This scenario was longer than my...well, you get the point. Go down to the port and talk to the guy at the ship to head back to Narshe. And I leave you with a Woolsey-ism. |  |
 |
Funny. I thought there were more than 3 people going to Narshe. How foolish of me. |
| You'll go through a lot of story crap next. I'll be nice and not spoil the plot. | 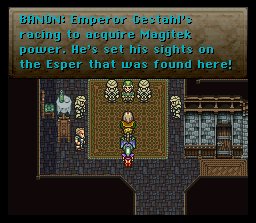 |
 |
For some reason, Ted Woolsey decided to change the language of FF6 to that of a more archaic style for just ONE FUCKING LINE in the game. |
| It's not unusual to be loved by anyone.
|
 |
 |
Finally, the action begins. Before talking to Banon, unequip all your party members of both their equipment and relics. When you're done doing that, you can save your game then tell Banon you're ready to start. |
| Who is in your party is not as important as how many are in your party. My strategy is to use a party of four, a party of two, and a party of one. Put your four best (or favorite) characters in your main party. My party was Celes, Locke, Sabin, and Edgar. A good balance of magic, speed, and power. You will only use that one group of four in this battle. The other guys can sit back and play with themselves or something. |  |
 |
Once you've done that, re-equip your main party with the best equipment you've got. Then start heading down the paths to kick some Imperial butt. If you want, you can probably put everyone in the back row to minimize damage taken, because... |
| All you need to do to win every single battle is to use either Edgar's auto-crossbow (equip him with an atlas armlet), or use Sabin's fire dance. It'll kill basically every enemy in one hit, except for the tekArmor, which I would reccomend using aura bolt on. Admittedly, this strategy is cheap as hell, but hey, this is war. |  |
 |
Once you've killed all the pansy enemies, you'll notice a soldier running back and forth in front of Kefka. You'll have to defeat this guy before you can fight Kefka. He is easy, but before you kill him (he's got about 1200HP), make sure to STEAL from him. Most of the time you'll get a mithril vest, which is good armor for this point in the game. After killing Rider, just kill Kefka. He's not hard. |
| More story...blah blah blah. Of course, like any good plot setup, it will prove to be possible. | 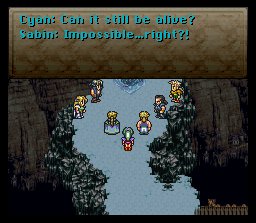 |
 |
A bird! A plane! An aeroplane in the sky! |
| Once again, time to choose parties. I definitely recommend taking Celes, Locke, Edgar, and Sabin with you on this trip. Certain plot details will only show up if you have these four characters together, while Cyan and Gau won't do a damn thing as far as the story goes. Anyway, head out into the town and upgrade any equipment you can. You can sleep for free in the item guy's bed if you want. How all four of your party members fit into one bed is, well, a story for another time and place. (Rated X) |  |
 |
There's also an elixir waiting for you in the elder's house. |
 |
It appears I accidentaly lost my first image for this walkthrough. Anyway, after finishing up in Narshe, you're going to want to head back to Figaro. If you don't remember how to get there, I'd either get your head checked or refer back to the walkthrough section here. In order for you to see the cutscene here, you must have both Sabin and Edgar in your party. When you get to the castle, Sabin will run off from the party.
Recommended Level: 16 |
| You'll notice that at the shops here, if you put Edgar in the first party slot, all item prices will be reduced by half for you. Stock up on whatever items and tools you need (the drill is a VERY powerful tool for this point in the game). | 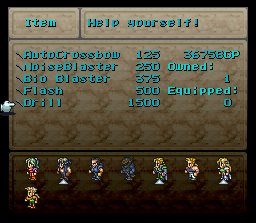 |
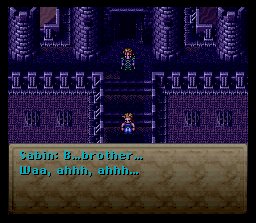 |
Next go to the bedroom of the castle and sleep. A cutscene involving Edgar and Sabin's past will then ensue... |
| Involving the famous toin coss cutscene. How moving.
|
 |
 |
If you're like me and prefer action over heart-wrenching sappy bullshit, this scenario is going to be hell for you. For now, however, you get a break, and must head down to the engine room and tell that old man to get his ass moving. |
| You'll go under the mountains and end up in a much smaller desert than you were in before. Head north a bit to reach the town of Kohlingen. Be wary of fighting in the desert right now, as you might have to fight an enemy called FossilFang. They are quite powerful and just might destroy you. |  |
 |
If you talk to the townspeople, you can learn some news about your freaky-friend Terra. If you've forgotten already why you're wandering around the world, it's because you're looking for Terra. Don't feel bad, I forget too. |
| If you go to the inn, you'll see your old masked friend Shadow. Even if you don't have Sabin, Cyan, and Gau in your party, Shadow will still somehow recognize you. If you've got four people in your party (like you should), he'll tell you to buzz off. However, if you have fewer than four because you think you're better than me and that you don't need to follow my advice, he'll offer to join your party for a 'mere' 3000GP. |  |
 |
After that, it's time for more heart-wrenching story time with Locke. Go to the house in the northwest corner of town to learn more about Locke's disastrous past. |
| What's even better than Locke's story is that here is an elixir in Rachel's house. Why they didn't just use that to cure Rachel in the first place is well, yet again, beyond me. |  |
 |
Now it's time to go to the house on the northeast corner of the town. First, there is a hidden door behind the house where you can get a Green Beret. |
| Then go in the regular entrance. Go down the steps to learn about Locke's necrophiliac nature. I wouldn't have trusted this burned-out old man with my dead girlfriend, but we don't love Locke for his brains, now do we? |  |
 |
Looks like Celes digs the dead-heads. Okay, enough necrophilia jokes for one day. That's it for Kohlingen. There is nothing else interesting to do in this town for at least 20 more walkthrough sections, so get the hell out! |
 |
Head south from Kohlingen to the equally uninteresting town of Jidoor. There is absolutely nothing to do in this town except stock up on supplies and armor. I repeat, there is NOTHING interesting to do here.
Recommended Level: 16 |
| If you are desperate to do something in this town, there is a bit of foreshadowing to what might be happening later in the game. Head up to the big house on the north side of town. | 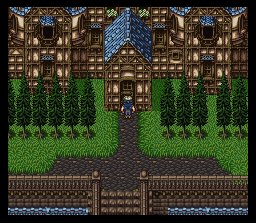 |
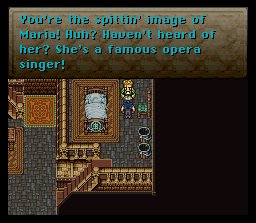 |
If you talk to this creepy looking chap he'll tell you you're the spittin' image of some bitch named Maria. He is referring to Celes. I believe he'll tell you this even if Celes isn't in your group, but I have not the initiative to find this out for myself. |
| The townspeople will also give you a hint as to where you can find Terra, but you don't need them, because I'm just going to tell you where she is. Don't you love me?
|
 |
 |
If you haven't already left this hovel of boredom, it's time to now. Just head north along the mountains, and in a minute or two you'll come upon the town of Zozo, a truly wonderful place to raise a family, like Gary, Indiana or New Jersey. |
| First you'll want to head north. As you can see, on your right is a door. You'll want to go there, but if you want a really awesome TONIC you can go left underneath this building here to a 'hidden?' part of Zozo. |  |
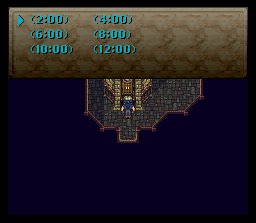 |
After you've claimed your tonic (I know you went after it), go in that door. Set the clock to 6:10:50 and a passageway will open up leading you to the Chainsaw (a very powerful tool, especially for this point in the game). |
| If you happen to run into this door in your adventures through Zozo, don't worry about it just yet. The door will be important later on. |  |
 |
Now it's time to go in the building to the South. So...head south ya nimrod. |
| This is a very annoying room. That's all I'm going to say about it. My theory is that you can somehow create an infinite amount of these thieves by blocking the door, and blow the game up, but once again, I don't have the patience to try it. |  |
 |
Head east, young man. |
| If Zozo is too tough for you, you can take this crane back down and leave with your tail between your legs. Else, climb up the staircase as far as you can until you come to a closed door. |  |
 |
In that room is the thief glove. This is basically the best relic for locke. You can steal and attack at the same time. There's no reason to just plain attack really, when you can do both at the same time. |
| Head down the stairs again until you come to an open doorway. Go in the open doorway and walk left up against the wall and you will jump across the buildings. What fun and excitement. |  |
 |
The rest of Zozo is pretty linear. Only one way to go. When you get here, there are some decent items in the bottles. |
| You'll have to fight this boss (if you can really call him that) before you reach Terra. He is pathetic. Use chain saw or drill with Edgar, Aura Bolt or Pummel with Sabin, capture with Lock, and attack with Celes. I outsted this guy in under a minute. |  |
 |
Then you'll finally get to Terra's room. Before going up to her, there are some items both to the left and right of the main hallway. |
| I won't spoil any of the story for you here. It's actually quite interesting...explains about the war of the magi, and espers, and all that crap. Okay, I'll admit, I've heard this story like five thousand times now, but if you're new, read it, or else! |  |
 |
I told you it was interesting, didn't I? Yippee Skippy. Time to reform your party again. If you're like me, you'll just keep the same party going. There's no real reason to change. Besides, Cyan blows chunks, and Gau blows Cyan. |
| It's time to go to da Empire! If you realize you've made a horrible mistake and made the wrong party, you can go back to Narshe and switch party members, if you are so inclined. Otherwise it's time to back to Jidoor, where something interesting is awaiting you this time around! |  |
 |
Before going on to the next part, make sure you give everyone in your group an esper. It's up to you who you give each esper to. Just remember that certain espers give level up stat advantages, so switch espers around as needed to maximize your stat gains. |
| Remember that town where there was nothing interesting to do? Well, it's time to go back there. You'll want to head back to the big house at the north of town. There, some guy will talk about how Celes is the "spittin' image" of Maria, whatever that means. | 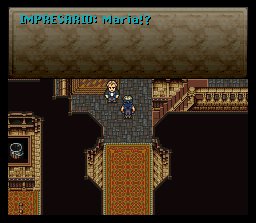 |
 |
The impresario drops a letter behind that mentions a kidnapping of Maria by "The Wandering Gambler". Who could that be? Well, I have a feeling we'll find out. |
| But not until we get a Woolsey-ism. We haven't had one of them in a while, so I thought you might appreciate it. |  |
 |
Turns out this wandering gambler is a guy named Setzer, the owner of the world's only airship. Obviously he'll be joining your group soon, because no Final Fantasy is complete without the standard airship. |
| In case you haven't figured out the obvious yet, Locke is here to help you. If you can't take a ship to the empire, wings are your only hope. |  |
 |
Time to head to the opera house! I have to admit, this is probably the most original way of obtaining an airship the Final Fantasy team ever came up with. At least it doesn't have anything to do with crystals or some crap. Just head south from Jidoor a short distance and you'll come upon it. Make sure to save your game before the next part, cause you won't have the chance for the rest of the walkthrough. |
| Here at the opera house Locke will present his brilliant plan to the impresario, who is obsessed with having a good performance. I won't bother going into the plan in detail here, I think you can figure out. | 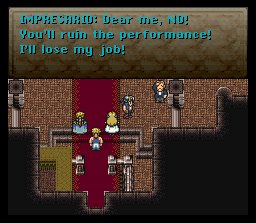 |
 |
Yes, another Woolsey-ism. This part of the game is just full of them. That's why we all know it and love it and cherish it close to our hearts. Or something. "Floozy"? |
| Of course, there is no way you're going to get ahold of that airship without going through a fight, and it looks like our favorite octopus is back to try and foil us. Don't worry about him for now. He won't come into play until later. |  |
 |
As Celes practices her lines, you get to see some of the wonderful opera being performed. It's not exactly a technological marvel these days, but back in 1994 we all enjoyed it. |
| After you see the introduction to the opera, Locke decides to go and see Celes before the play begins. If Sabin is in your party, you can enjoy his muscle-brained stupidity. |  |
 |
Head down to the room again. It appears Locke has never seen a purdy girl before. |
| You can read the lines to the script if you want, cause you're going to have to recite certain lines correctly in order to perform the opera. Or you can just look in the next box where I tell you the right lines. |  |
 |
There are three lines you have to answer correctly. 1) Oh My Hero 2) I'm the darkness 3) Must I... After you do that, dance around with a prince a bit (just move in random directions, it doesn't really matter). |
| Then walk up the stairs to finish the scene. |  |
 |
While Locke was busy doing...uh...the thing he was doing, a mysterious letter appears behind him. I always wondered why the villians even give the heroes a chance to save the situation? Why doesn't Ultros just ruin the opera and not tell anyone? It boggles my little mind. |
| Not only that, but Ultros gives you a time limit on how long you have to save the opera. He must have done some complex physics equations in order to come to the solution that it will take 5 minutes to push the weight off. |  |
 |
First, go to the room on the right and hit the button all the way on the right. |
| Then run around to the left side to go up into the rafters. There are some easy rat enemies in here. Just use blitzes and tools to eliminate them. |  |
 |
When you get to Ultros, he'll push all of you off onto the stage where the Impresario comes and cries how the play is ruined. You'll end up fighting Ultros here again. Just use drill or chain saw on him, aura bolt or pummel, and he'll die very quickly. |
| Just when you think everything is okay again, Setzer comes and carries Celes off. For some reason the Impresario is happy. |  |
 |
Celes'll drop a rope down to our heroes so they can all get up into the airship. Setzer is obviously not too happy when he finds out he has been swindled. |
| He is still willing to strike a deal with you, however. If Celes becomes his wife, he'll allow you free reign on his airship. I won't ruin the fun of the next part for you. If you don't want to know the outcome, stop reading the walkthrough here. |  |
 |
In a brilliant display of wit, Celes uses a same-sided coin to guarantee her victory. Gotta love it. |
| And I'll leave you with one final Woolsey-ism. Wasn't that fun? |  |
 |
After the ordeal with Setzer, you'll get a first-hand look at the "unwieldy-looking ship". It's off to Vector, land of the not-so-free, home of the not-so-brave. Keep your eyes peeled for a bit of Setzerian life philosophy in this part. |
| You'll land right outside a town. You can go in the ship, buy some items, talk to Setzer, but you won't be able to fly anywhere. Obviously, unless you're a little slow, the game is telling you to GO INTO THE TOWN MAN! |  |
 |
You'll notice the poor town of Albrook has been overrun by the Imperials. Though you're probably on the Empire's 10 most wanted list, you can freely talk to all of the guards as much as you want. Things to do in this town: there are some good new weapons and armors available here, such as the Epee. You'll want to pick those up. Also... |
| Inside this clock in the bar area is an elixir. That's it for this town...talk to the rest of the people to pick up some information, then head out of the town going North.
|
 |
 |
You'll pass by what looks like a castle in the middle of some mountains. This is the Imperial Fortress Vector. You can head here right away if you really want, but I suggest going around to some of the other towns and gaining levels/magic before entering here. If you really desire to enter vector now, you can go to that part of the walkthrough here. |
| If you decided to be a good little boy or girl and explore the island, first you'll want to head north to the town of Tzen. |  |
 |
As you can see, this town is also controlled by the Empire (no surprises here). This old man here is foreshadowing to some future events (that aren't all that far off). And no, he's not talking about the Gate to Hell. Things to do in this town: once again, some unique weapons and armor here. Make sure to get a boomerang for Locke. |
| The forest next to Tzen (and all of the other forests on the island) are a good place to gain levels (and especially magic). You get 2-3 magic points per battle in the forest. It's good to make sure everybody knows at least 4 or 5 spells, and to have at least 2 or 3 people with cure before entering Vector. To get to the next town, you're going to want to head due southwest. |  |
 |
Along the way you'll run into a desert with some tough enemies. Unless you're at the recommended level below, I wouldn't fight in the desert here.
Recommended Level: 18 |
| After a long hike you'll arrive at the town of Miranda. |  |
 |
Other than making sure to get anyone who can equip them Mithril Armors, if you go in the house on the far right of the town, you'll meet a lady who talks about her boyfriend in Mobliz. Remember him? He's the soldier who you sent all those letters out for. Make sure to talk to her if you like to hear little secret tidbits of story. |
| Now it's time to head to Vector. If you don't need to do any more leveling up, you can purchase a chocobo in the forest just to the east of Miranda. Otherwise, head back the way you came.
Recommended Level: 20 |
 |
 |
If you REALLY need to sleep and recover some HP, I'd do it in another town, because if you sleep here at the inn, a thief will come in the middle of the night and take a nice chunk of cash out of your wallet. |
| If you've been to all of the other towns, there are no new weapons or armors to purchase here you haven't seen elsewhere. Just go ahead and talk to this guy who is a "returner sympathiser". He'll put on the worst acting you've seen off-broadway, but it's good enough to distract the guards while you climb on the metal grates above. |  |
 |
And wah-lah, you made it past them! Head up the ramp to enter the Magitek Research Facility, where they have *cue Camina Burana*...espers! |
Born Free, Died Not So Free
 |
Welcome to the Magitek Research Facility. As long as you're around level 20 or so this place should not cause you too many problems. The only enemies in this room are Garms and Commandos, and if you have Sabin and Edgar in your group, these enemies are very weak to fire dance and flash. In fact, ALL the enemies in the research facility are weak to these abilities. If you don't have them in your group, you're screwed...or just use your other most powerful attacks. |
| Walk left from the entrance and you'll come to a pipe infrastructure. Go into the pipe all the way left, and you'll come out on a ramp, where you'll come to a treasure chest with a Flame Sabre inside. |  |
 |
Hop onto this crane Indiana Jones style here to get back across to the other side. |
| Walk right and you'll come to two pipes. First, go in the right pipe to get a treasure chest with a Tincture. Then head into the left pipe (Mario style, yo). | 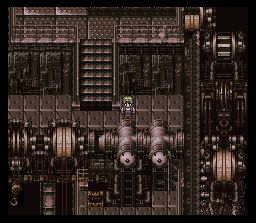 |
 |
You'll end up on a ramp which leads you to a new room. There are some other enemies in this room that are very good for gaining magic points (pipsqueaks give 3, and ProtoArmors give 4!). On the chest to your left is an X-potion. Take the ramp on your right, because there is nothing down the stairs. |
| The next chest you come to will contain a Thunderblade, a nice weapon for dealing with machinery enemies. |  |
 |
Once again, you'll come off a ramp into a new room (with the same enemies as the last room). Remember where this place is, because you'll be back a couple times. First, you are going to want to head left from here. |
| The first thing you will come to is a chest containing the relic "Dragon Boots". These a relic that let you use the ability jump (for you FF4 junkies, Kain-style. For you FFT junkies, lancer-style). Also, if you head up the stairs here, you will find a chest containing the Gold Shield. |  |
 |
Head down from the stairs where you will find two doors. Take the one on the right. The one on the left won't lead to any items. After passing through the door, if you head down from where Locke is standing you'll enter a room with a chest on the left side containing a Gold Helmet. |
| Head left from that room and you'll find another room which contains a Gold Suit on the far left (you can't see the chest in the room, but it's on the left side of the room). |  |
 |
Now head back to the place I told you to remember. Forgot where it is? Well, look up and find it you lazy bastard. Head up the stairs above the moving ramp, making sure not to get on the ramp just yet. You'll see an entrance to another pipe system. If you head into it, head down the pipes, you'll come to a room containing a Blizzard Sword and a ZephyrCape. |
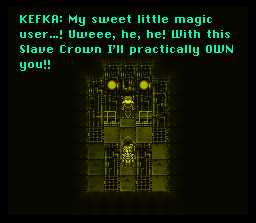
| Now head back down and get on the moving ramp. You'll see a little cutscene involving Kefka abusing his espers (someone is a little repressed). After watching this, head down the ramp. | 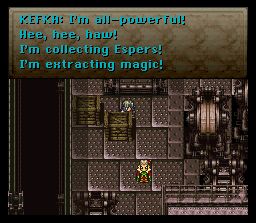 |
 |
You'll see the espers lying here seemingly unconscious. If you need to heal, the room on the left contains a save spot. Else, talk to the red esper on the bottom left corner to initiate a fight. |
| These guys aren't too hard. Have Celes cast Runic, and use strong physical attacks. Don't use magic against these guys. After a bit of fighting, they will realize that Ramuh is with you and they will help you... |  |
 |
by turning into magicite! Yes, those shiny little crystals of joy. They're warm to the touch aren't they? Anyway, you now have the Ifrit esper, which teaches fire magic, and the Shiva esper, which teaches ice magic. After collecting your espers, head up into the room on the right. |
| After going up a long flight of stairs, you'll end up in a room filled with tubes. Kinda creepy, huh? If you head down from where Locke is standing here, then walk left a bit, you'll come to a hidden chest which contains the Break Blade, the most powerful sword you can get your grubby little hands on for a while. |  |
 |
Walk into the next room and you'll come to yet another pansy boss. Don't bother using magic on this guy. Just use strong physical attacks and he should fall within a minute or two.
Recommended Level: 22 |
| In the next room you'll see more tubes, but this time there appear to be espers inside! Right about now you should be thinking to yourself "Crap, something big is going to happen." |  |
 |
Go up and push the lever, and a story sequence will happen where you introduced to Cid (yay for Cid!). I won't ruin any of what happens here, since it is a rather big story element and I'm a rather nice guy. |
| Looks like ol' Cid is repenting for his evil deeds. Too bad he didn't think of this a couple minutes earlier. |  |
 |
When you get to the bottom of the elevator you can save your game. Looks like someone is missing from the party, eh? Don't worry, she'll be back, black, and bad. Oh wait, that's Mr T. How silly of me. You'll also notice your esper list has extended to 12 espers now. Lots of magic to learn. Make sure everyone is equipped optimally and has espers equipped, because you won't be able to access the status screen in the next scene. |
| With Kefka approaching, there is only one way out. The train car, coming at you in pristine, state-of-the-art mode7 graphics. It almost brings a tear to my eye. |  |
 |
Once again, just use strong physical attacks to wipe out the enemies. Flash and fire dance work particularly well. |
| This boss is easier then the last one, if that is possible. First take out his two arms which only have like 500 HP each, then go after the body with strong physical attacks. A couple pummels and drills take em out. Cyan's dispatch also works well here if he is in your group. And after beating this guy, you are done with the Magitek Research Facility. And the peasents rejoiced. |  |
 |
After leaving the Research Facility, Setzer will meet you and tell you to get your asses moving. |
| You didn't think you'd really get out of Vector that easily did you? Well, Kefka has other plans for you. Unfortunately, Kefka really does make it that easy for you to escape. |  |
 |
I killed these crane things in exactly 36 seconds. You should be able to also. Just use strong physical attacks once again, and utilize Setzer's command "Slots". |
| After annihilating those cranes it's finally time to head back to see how our favorite half-human, half-esper is doing. And, of course, you'll be travelling in style. |  |
 |
Yes, folks, that's right. For only four easy payments of 19.95 this airship can be yours. Shipping and handling not included, other charges may apply, tax exempt for residents of Rhode Island and Wyoming only. |
| When you get to Zozo, you'll find that Terra has finally regained some of her senses, and that the esper Maduin, which you received in the research facility, is actually Terra's papa. And so a long cutscene ensues here explaining about Terra's past, espers, the empire, blah blah blah...just watch it for yourself. |  |
 |
Terra understands. Yippee Skippee. Now it's finally time to play again. |
| Listen to Setzer's instructions on how to fly the ship (as if you couldn't figure it out yourself, dummy). But before you start flying around like a kid high on pixie stix, head down into the ship to take care of a few things. |  |
 |
You might want to reconfigure your party to gain some levels with people you haven't been using much. Nothing you're going to be doing for a while demands a lot of power, so go ahead and take some weaker characters with. |
| Before you go any further, make sure you have at least 33000GP in your inventory. If you don't, fight and get it before doing this, cause you're going to need it. First, head back to the town of Tzen (the northern city on the Imperial continent). Talk to the weird looking guy in the northeast corner of town, and he'll sell you the esper Sraphim for 3000GP (definitely worth it). |  |
 |
Now head to the auction house in the town of Jidoor (the city by the opera house, closest to the Imperial continent). You can purchase two more espers here. They come up randomly, however, so if you're playing in zsnes, you can use the tilde button to fast forward through the auctions you want to ignore (such as that stupid fricking chocobo!!). |
| Zoneseek is usually the first esper to show up. He goes for 10000GP. |  |
 |
The next one to come is Golem. He can take a while to show up, sometimes an hour (if you aren't using an emulator to fast forward). He goes for a hefty 20000GP. |
| Now you can admire your much larger esper list. You should have 15 of the little buggers by now. |  |
 |
Now it's time to head north to Narshe to "plan your next move" with Arvis, Banon, and the elder of the town. |
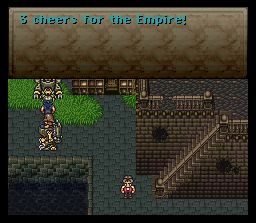
| Yes, the people of Narshe have finally decided to fight. Took them long enough, the rotten bastards. But... |  |
 |
They can only do so with the help of Terra. Unfortunately, Narshe can't take on the empire all by itself, but with the help of the espers they might have a chance. And, of course, only Terra can accomplish this (bet you didn't see that one coming...right). And so it's off to the sealed cave. |
 |
Ah ah! Don't leave Narshe yet, at least if you are interested in getting Final Fantasy VI's most slam-dancingest moogle. If you're confused by me having Celes in my group, don't be. You can actually get Mog at any part of the game between this walkthrough section and the final part of the world of balance. I simply chose to do it later in the game. |
| First, you're going to want to head to the house right beneath Arvis' house. It's the one in the southeastern corner of Narshe. |  |
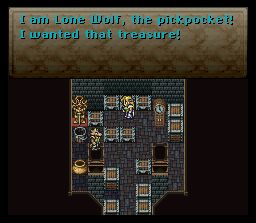 |
Here you'll meet Lone Wolf, everyone's favorite and furriest thief. He'll complain cause he wanted the treasure for himself. Grab it for yourself, then head out of the house. |
| You'll see Lone Wolf again coming out of the house here. If you don't get it, it means you're supposed to follow him. | 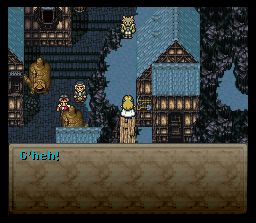 |
 |
Head north out of town toward the cave you went to in the very beginning of the game with Terra. |
| If you keep your eyes peeled, you just might see a sasquatch here! | 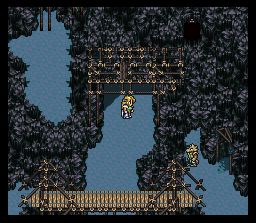 |
 |
Inside the cave, you're going to turn right here instead of going straight. |
| The rest of the caves are completely straightforward. There is only one way to go. Eventually you'll get back here. Remember this place? It's where you first wasted Kefka's ass. | 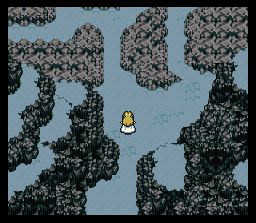 |
 |
Walk north out of the battlefield to find a bridge. Cross the bridge and you'll see Lone Wolf holding a moogle hostage. |
| Turn away from them and just sit still. Eventually, Mog will act on his own and... | 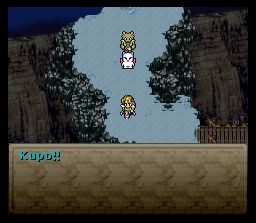 |
 |
you have to make a decision. You can either go to Mog or Lone Wolf. If you go to Lone Wolf, he'll give you a Gold Hairpin, a nice little relic which halves magic usage. You can still get Mog in the World of Ruin by doing this, but you won't be able to learn the Water Rondo dance. You can get another Gold Hairpin in the game. |
| You know you want Mog. He's just so...moogle-tastic. | 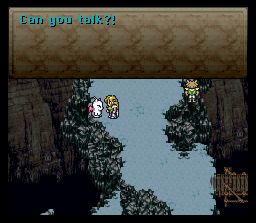 |
 |
Not to mention slam dancing. |
| You know you've made the right decision. Besides, who wouldn't pass up the oppurtunity to see Lone Wolf committ suicide? | 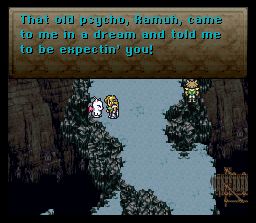 |
 |
Before leaving Narshe, make sure to stop by the weapon and armor shops, for they have restocked their shelves. You'll definitely want some of this new equipment. If you can't afford it all, you can always go and get some money. You might want to gain a couple of levels before heading to the Sealed Gate anyhow. |
| Now head to this little house on the far northwestern corner of the world map (it's just a ways above Kohlingen). Why would you go here? | 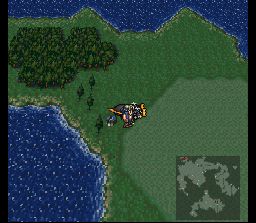 |
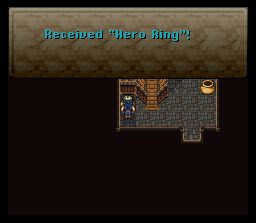 |
Because you can get a Hero Ring here, a nice little item which raises fight and magic damage. Also, though this guy might appear crazy, you just never know if his dream might come true... |
| Now, if I were you, I'd take some time off to gain some levels and magic before heading to the Sealed Gate. I like to get all my characters to at least level 24 before heading in. The best place to gain levels for now is in the forest just east of Miranda. You get 2 to 3 magic points per level (not bad at all), and 250-300 experience points per battle, not to mention 1000+ gold. |  |
 |
Once you've gained a couple of levels, head to the sealed gate. You have to travel through this imperial fortress that is on the east side of the dessert across from Albrook. Don't worry, there aren't any Imperial soldiers here. Terra has to be in your group, or else you will end up at the sealed gate and won't be able to communicate with the espers.
Recommended Level: 24 |
| Don't bother heading into the house for now, because the door to the treasure room is locked. You can unlock it later, however. |  |
 |
Now head out of the fortress on the other side and into the cave across the bridge. There are a couple of easy to spot treasure chests in the first couple of rooms. The enemies aren't too bad yet. If Sabin is in your group, use aura bolt. If Edgar is in your group, use Flash. Else, just use strong physical attacks. |
| The trick to this room is to head out on the planks to the edges and wait. If you'll notice different bridges appear at certain intervals. The shift appears to be completely random, so just experiment. Make sure to grab both trasure chests, as they contain an X-potion and a Coin Toss respectively. |  |
 |
After exiting this room, the enemies get noticeably harder. You'll fight lots of Ings and Zombones. Watch out for the Ings. Make sure to kill them quick, or they'll use Lifeshaver and suck up all your XP. And kill those Zombones before they have a chance to turn your characters into Zombies. At this first fork, head right before heading down the stairs to grab an Ether. |
| When you push this switch, the bridge underneath you will break. Head left and up to find a chest containing a Genji Glove (a very kick ass relic indeed!) Then continue heading right. |  |
 |
When you get to this point, if you need to save your game or rest up, hit the switch on the left to open up a room with a save point. If Locke is in your room, I would recommend hitting the switch on the right. You'll have to fight a ninja, but you can steal a Cherub Down from him. Then, head right to the bridge and hit the third switch. |
| Before heading into the cave on your right, make sure to pick up the Ether in the chest there. You won't be able to see where you are going when you are in the cave, but just keep heading up until you stop, then head left or right until you can go up again. |  |
 |
Don't bother trying to get that chest up there yet. You'll want to just go ahead and head down the stairs first. Make sure to hit the switch on the left side of the rock first. |
| Hit the switch here to open up a secret room that leads to some very nice treasure. Inside you'll find two Magicite items, an Ether, and an Atma Weapon (arguably the best sword in the game much later on). |  |
 |
Now head right and go up another pair of stairs. You can grab that chest now. There is nothing else to get here now. Head right to find the entrance out of the room, then climb up the stairs until you see this large entrance. Inside is the Sealed Gate. |
| So there you are. Guess Locke said it better than I could. |  |
 |
But, of course, like everything else, it just isn't that easy. Looks like Kefka followed you all the way through the cave. The bastard. Don't worry about this fight...it isn't much of a fight really. While you're busy holding him off, the espers break out of the cave and run a rampage, knocking Kefka far, far away. |
| Now head back out of the cave. There is a new door here which will lead you quickly and painlessly back to the entrance of the cave. |  |
 |
As you're escaping, someone from your party will greet you by the exit of the fortress (depending on your group, this person will be different. In my case here, it was Edgar). He'll inform you that the empire is in total disarray from the Esper attack. |
| You'll automatically head back to the capital, but not without event. On the way there, the espers attack the ship and Edgar loses control. Apparently, Terra can "feel it". Locke, you naughty naughty boy. | 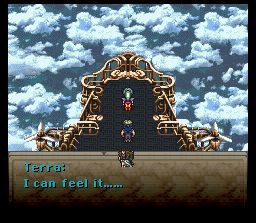 |
 |
Anyway, the ship crashlands just outside of Miranda and you're going to have to make your way back to the capital yourself. Your party is rather unimportant here. Nothing too exciting will be happening. |
| If you're in the mood you can gain another level two here in the forest. It's not of dire importance however.
Recommended Level: 25 |
 |
 |
Unless you're in the mood for a long hike, grab a chocobo there in the forest by Miranda and travel in style (and play that choco hip-hop to the max brotha). |
| When you arrive back at Vector, you'll notice the entire town has been destroyed. Arvis says it was like that when he got there. A likely story. |  |
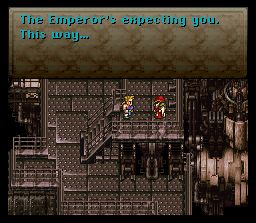 |
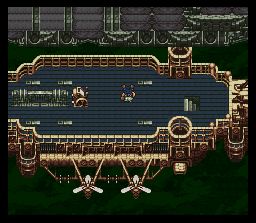
Make your way up Vector toward the Imperial palace. There isn't much to see around the city except a bunch of soldiers that all say the same damn thing. A guard will greet you and tell you to follow him. |
| The guard leads you to a room where Gestahl tells you he has "lost his will to fight." Sounds a little fishy. But...on the other hand, his entire town WAS decimated. No need to pick sides yet though. You have a mission to do. | 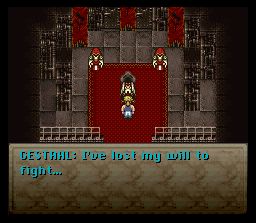 |
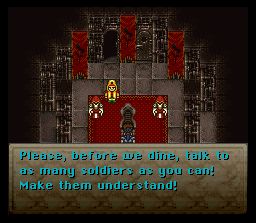 |
The emperor says that some of his soldiers still refuse to side with the returners. Your mission is to talk to all of his guards (there are 24 of them) and weed out any of the unfaithful ones. Sounds simple enough, right? Well, you've only got four minutes to do it. |
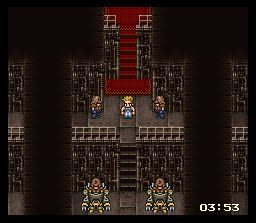 |
Allow me to deviate a bit from my usual crazy walkthrough style to get you through this next part as quickly and painlessly as possible. Since you've got only four minutes, speed is imperative. When you first walk out of the the room you were in with Gestahl, talk to the four soldiers here in the room. If you're using an emulator, save state before doing this, in case you mess up. If you are using the system, well, I hoped you saved earlier on. |
| Next, head down as if you were leaving the fortress. There are three guards outside to talk to, one of them you must fight. | 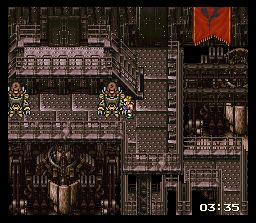 |
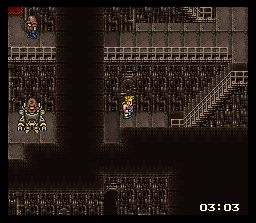 |
Next, walk right through a door. You can ignore the first door in the stairwell. |
| Head up a flight of stairs and you'll come to a second door. Go in. |  |
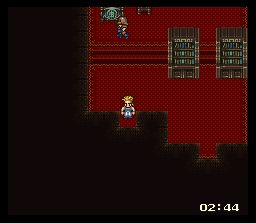 |
Talk to the soldiers in here. There's also a room you must go in underneath where Sabin is standing here. |
| Exit the room and head up the last flight of stairs, and go through the door at the top. | 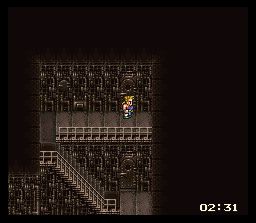 |
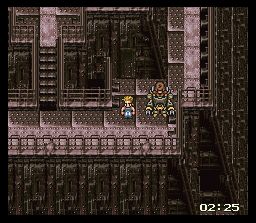 |
Make sure you talk to all the guards on the platform. |
| Head up the flight of stairs in the middle of the platform. Head in this door. (Look familiar? This is the place where the intro cutscene takes place, and also part of the cutscene wayyy back in the beginning where we saw a bit of Terra's past) | 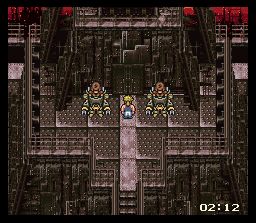 |
 |
There is a soldier in here you must fight. Fight him, then head out of the room. |
| On the left side of the platform is another doorway leading to another stairwell. Well, go in already! | 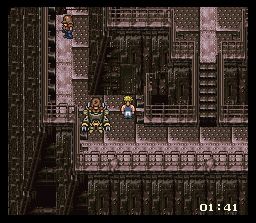 |
 |
Head down the first flight of stairs and you'll come to the last room. |
| There are a lot of soldiers in this room. Keep talking to them until none of them count toward your goal anymore, making sure to leave at least 45 seconds. |  |
 |
At the top left corner of the room is a door. Head in and you'll find the last soldier, whom you must fight. Once you beat him, your count should say 24. If it doesn't, try it again. Getting 24 is necessary to get ALL the special items later on. |
 |
And so the dinner with Emperor Gestahl begins. After the dinner, you will be rewarded depending on a combination of how many soldiers you were able to convince (a maximum of 24) and how you answer a series of questions during this dinner. With that said, have fun guessing... |
| ...A ha ha ha...ha. Of course I'm going to tell you the right answers. What kind of person do you think I am? The first question Gestahl asks is this. Answer "To the Hometowns" |  |
 |
EXECUTE! EXECUTE!!!!!! Er...sorry, got out of control there. The right answer is execu...I mean, "leave him in jail" Really, it's "leave him in jail"
Some Random Guy Who Isn't Zeppelin: He's not kidding folks, it really is "leave him in jail". |
| "That was Inexcusable" |  |
 |
"Celes is one of us!" |
| Next, Gestahl asks if you have any questions for him. Ask the first question. |  |
 |
Then Gestahl will ask if you can go on, but don't let the bastard shove ya into it. Go back and ask him the other two questions, but make sure NOT to repeat any of the questions to him. Once you've asked him each question once, go ahead and move on. |
| "Yes, the Espers Have Gone Too Far" |  |
 |
Next, for some stupid, idiotic, pointless reason, Gestahl asks you what your first question was. If you were a good person, you picked the first one first, so pick the first one! If you decided to be a rebel, just pick whichever question you asked him first. |
| Opt to take a break. |  |
 |
Go up and talk to one of the soldiers sitting at the table (it doesn't matter which one). He'll ask you to fight him. Fight him and kick his ass, and you'll be rewarded. Fun, huh? |
| After kicking their puny asses, choose to get the show on the road with ol Cid. |  |
 |
Last question. Last answer. "That your way's truly over" |
| Gestahl then asks you for a favor. He wants to find the espers and "make peace with them." Apparently they've fled to some place called Crescent Island. Choose to help him. |  |
 |
And look at that! He's sending General Leo with you. Remember him? No? Dummy. He's the guy you met in the never ending scenario...he was the guy "who could be your friend if he wasn't your enemy". How could you forget? He tells you meet him to Albrook, the port city to the south of Vector. |
| Of course, Terra has to go, considering she's the only one who can communicate with espers. And, of course, Locke has to be the hero and go with her. Looks like he's mackin' it on the side. Wonder what Celes would think? |  |
 |
Looks like it's just Locke and Terra for this mission. Don't worry, you'll make more friends! Friends are good. Unless they sleep with your wife...ahem, sorry. Walk out of the room and you'll be approached by a strange hooded guy. If you did everything perfectly like I instructed you to do, you'll get all the following things: |
| Yay |  |
 |
Woo hoo |
| VERY nice |  |
 |
Already have one, but beggars can't be choosers. |
| One of a kind item here. And that's it. If you didn't get all of them, you can always try again. You know you have nothing better to do with your miserable, pathetic, drab existence anyway. |  |
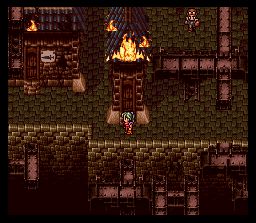 |
This little house is a good place to keep in the back of your mind. Inside is a lady that will heal you for free, as long as you don't pledge your alliegance to the Empire. |
| Now leave Vector and head South to the town of Albrook. If you'll remember, it's the town you landed the airship by on your first trip to the Imperial continent. |  |
 |
But don't go into town yet. First head across the dessert and go to the little fortress you passed through on your way to the Sealed Gate. Remember that room full of treasure you couldn't get into before? Well whoooo doggy you can get in now. Here's a list of the treasure waiting for you: Cherub Down, X-Potion, Ether, RunningShoes, Elixir, Back Guard, Cure Ring, Wall Ring, Flame Sabre (in the oven!), and 51000GP! |
| Now it's time to go to Albrook. By talking to the people, you get the feeling spirits are on the rise with the empire all pooped out. | 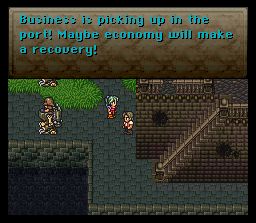 |
 |
Head down to the town's port to meet up with General Leo. He'll introduce you to a couple of people travelling along with you. One of them is even another General! I wonder who it could be... |
| Well, you knew she had to return eventually! Personally, I was more intrigued by Shadow, just 'cause he's so cool and stuff. |  |
 |
Damn right. |
| Anyway, after Celes runs off out of embarassment, head to the inn and the easternmost part of town. General Leo pulled some strings for you and you will be able to stay the night for free. |  |
 |
Locke just can't sleep, however, so he heads out of the inn to take a walk around when you know who shows up. A truly tear-wrenching scene will take place between Celes and Locke, with Celes running away in the end, of course. How sad. Ah well Locke, you can still mack it with Terra. |
| In the morning head back down to the ship and you'll embark for Thamasa! Nothing very exciting happens here though, so Locke and Terra decide to go rest. Well, you know what they say. When the house is a rockin' don't come a knockin'. |  |
 |
This time it's Terra that can't sleep. She goes out onto the deck to have an...interesting little chat with Leo. Everytime I hear this line by Terra, that horridly awful Foreigner song of the same name comes rushing into my mind and I JUST CAN'T GET IT OUT!! |
| Locke seems to be having some problems of his own also. |  |
 |
The next morning you land on the shores of Crescent Island, but you're going to have to hike a bit before you reach Thamasa. Shadow will accompany you, and Celes goes off with General Leo. I'd reccomend not bothering to equip Shadow with equipment or an esper, because he won't stay with you very long. |
| Obviously, the people in Thamasa are a bit backwater. They've got some kickass equipment in the store you won't want to miss, however. |  |
 |
Whatever you do, don't stay at the inn yet. The innkeeper charges outrages fees to strangers. I don't quite understand how an inn, which exists to offer travelers (i.e. strangers) a place to stay the night can survive by raping its only customer base, but hey, that's just me. |
| If you walk around the town a bit, you might run into a few strange situations involving magic. Obviously, there's some whacked out baloney goin' down in this here crib. |  |
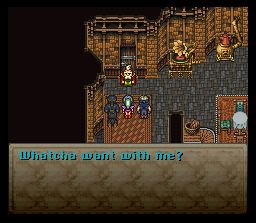 |
Now it's time to meet Strago and Relm. Go in the house on the northeast side of town, and you'll see this old man standing by a door. |
| Yep, that's Strago. I don't know how pure of heart he is (after all, he's a lying bastard), but just go with it. |  |
 |
Next, Relm will come down. Her introduction might not make much sense now, but it will. Just wait. |
| Anyway, some conversation ensues that I'm sure you are fully capable of reading. This is my favorite part of the conversation here. Did I mention how much I love Shadow? |  |
 |
Well, it looks like you're going to have to look elsewhere for help. Proudly march out of this forsaken abode while you still have a smidgen of pride. |
 |
Now that you've got the hook ups with old man Strago, you can sleep for free at the inn. In fact, in order to advance to the next part of the story, you have to! Don't bother leveling up or anything. You won't have any problems in the next part.
Reccomended Level: 25 |
| In the middle of the night, Strago will come running to you yelling that Relm is trapped inside a burning building. Locke and Terra head off to help, but Shadow decides he'd rather catch up on his zzz's. What a guy. | 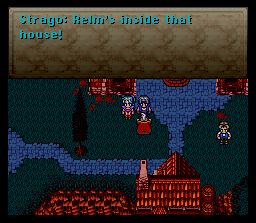 |
 |
What's this? Why, the folks can use magic after all! A ha ha ha, what an unprecedented turn of events. Looks like you have no choice but to go inside the building though. Their magic just can't quell that burning feeling...inside... |
| Advice of the day: Never Pet a Burning Dog. | 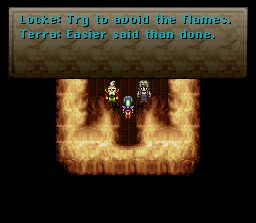 |
 |
There are no random battles here. You can see all of the enemies and avoid them if it suits your fancy. They're not too hard though. Make sure to equip Strago to the max and give him an esper so he can learn some magic. His Lore ability aqua rake is very useful here, but save it for the boss. All you have to do to knock out the little flames is to bash them with weapons. |
| First go in the door on the right. Then the left. |  |
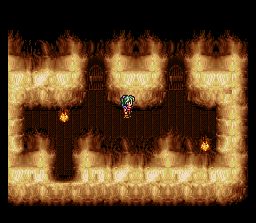 |
Now do the opposite. |
| I'll be completely honest. I forgot which door is which here. Just try them both. One leads to treasure, the other leads to... |  |
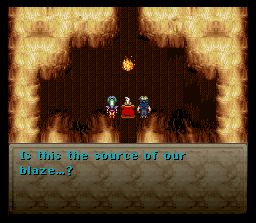 |
the boss. |
| No problems here. Just use aqua rake to rid yourself of the little ones, then blast his ass with Ice 2 a couple times and he'll be nothin' but a snowball in hell. |  |
 |
Well, after kicking that guy's butt you find Relm hanging out with Interceptor. But it's too late! Or is it? |
| Enter hero, stage left! Yes folks, that's right, nothing but the immutable, indescribable, impeccably imperceptible Shadow! |  |
 |
Boring story time again. Thanks are exchanged, you know the deal. |
| And so the tale of the War of the Magi is finally told in detail. Well, perhaps not as much detail as the flashback in Final Fantasy VII (thank god). |  |
 |
After learning about the Magi, Strago decides to come along and be your pal... |
| but Relm doesn't get to come along. Enjoy this Woolsey-ism. There aren't too many of them left in the game. But it's okay. I'll still be with you to make up for it.
The peasents rejoice |
 |
 |
Looks like Shadow isn't coming along either. But you'll be fine. You've got a curmudgeony old man with you, what could possibly go wrong? (Stay tuned to find out what goes wrong) |
 |
Head out of Thamasa following the northern coastline and up around the mountains.
Reccomended Level: 26 |
| Eventually (actually pretty quickly) you will come to this cave, which, if you explored a bit before going to Thamasa, was not there before. |  |
 |
The first room of the cave has three exits. First, grab the cure rod from the treasure chest. This is a nice item to equip if you're facing tough enemies, which you aren't in this level. Just attack your own party members with it to heal 1000+ HP. If you're in the mood for exploring, head into either the left or top exit. As you'll soon discover, they are just a loop to one another. In order to advance, you must go in the exit to the right. |
| This part is pretty straightforward. Only one way to go. |  |
 |
Just a quick note about an enemy you might encounter in the next cave. That big green thing called the Adamanchyt has a lot of HP and has very high physical defence, and often will sneeze your characters out of battle if you attack it physically. Instead, use magic attacks on it and it will die quickly. |
| Head toward the door on the bottom right section of the cave. If you haven't noticed yet, you have company. |  |
 |
It's story time with grandpa again. Now you get to learn all about the magic statues which will play a rather important role in the story soon. But first... |
| It's time to deal with everybody's favorite Octopus again! Ultros! Just keep fighting him for a couple minutes. You can't kill him, because a cutscene has to take place first. |  |
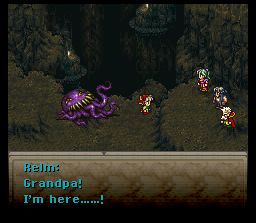 |
And, of course, it involves Relm! I think this is my favorite part of the entire game. |
| You can enjoy the next part for yourself. I've simply included these pictures for those of you out there who've played the game so you can enjoy this lovely little part again. |  |
 |
|
 |
|
 |
|
| Back to reality again. In order to end this fight, simply sketch Uncle Ulty's portrait so he can realize he's nothing but a big stupid octopus, something we've discovered three times already. |  |
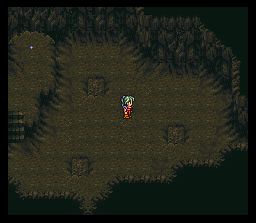 |
Head up to the door on the left and you'll enter a room with three drop zones. Go in the two on the left first in order to get some treasures (you'll have to make your way back to the room every time you drop through a hole). Then, once you've done that, drop in the hole in the right. |
| You'll end up in a room filled with espers! But they don't look too happy... |  |
 |
But then another esper named Yura enters the scene and he and Terra have a battle of magical wits. |
| Yay! Apologies are exchanged, everyone is happy again. The end. Goodbye. |  |
 |
I'll bet you believed me too. You silly person. Everybody hops into the Garth mobile and heads back to Thamasa where more apologies are exchanged. |
| But that was far too easy, wasn't it? Of course Kefka has to ruin things again. |  |
 |
After Kefka knocks everyone out and turns the espers to Magicite, you get the one and only chance to play as General Leo. And no, DON'T ask me how to resurrect Leo. It can't be done people! GET OVER IT ALREADY! Anyway, head on up to do battle with Kefka. |
| Unfortunately, Leo is about as successful as I am getting laid. In other words, Leo is dead in the water. |  |
 |
And so Leo is dead, Kefka kills half the world's population of espers, but for some reason doesn't kill anyone in your group. What a nice guy. |
| And so the death of Leo is mourned, and it looks like Celes has joined back up in the crew. |  |
 |
And it appears they got Shadow too...or did they? ::cue creepy musical bump thingies:: |
| Despite the rampant murder and slaughter and pillaging, this walkthrough section does end on a happy note, however! It looks like everybody was able to escape the empire safely, much thanks to Edgar's chicanery. |  |
 |
And so I leave with you one of the last Woolsey-isms of the game. |
 |
If you want to learn some magic very quickly then follow these simple instructions. The only prerequisite you need is someone in your party who knows the spell "Doom" and has at least 1000 HP. Get in your airship and head to this island in the shape of a triangle in the northeast corner of the map. |
| On the island, about 30% of the time you will fight an enemy called "Intangir". You'll know you're fighting him because you won't see him. | 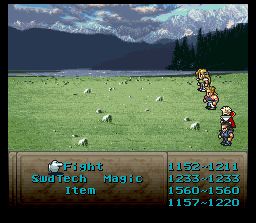 |
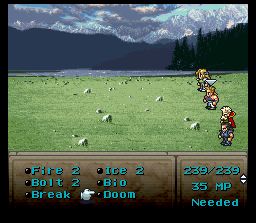 |
"So what the hell do I do?" you may ask. Well, I'll tell you. You simply cast Doom on him. Before he dies, he'll cast meteo on the character which takes off about 750-950HP. Then he dies. |
| He gives no gold, no experience, but does give a whopping 10 magic points. | 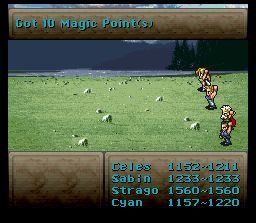 |
 |
The rest of the time you'll fight these little pansies. |
 |
You can only get Mog's dance "Water Rondo" in the world of balance, so it's now or never. Is it worth all the work you need to do just to get this dance? Probably not. But if you're the kind of gamer who plays to do everything possible, then this is just for you. There are actually two ways to earn the dance. I'm covering only the one that takes much less time to do. Perhaps at some later time I'll go over how to do it the other way. Your destination? The cave on the southern section of the Veldt. |
| If you remember, this is the place where Gau found the "shiny thing". Well, thankfully, you still have the shining thing, so it's time to jump in the water! | 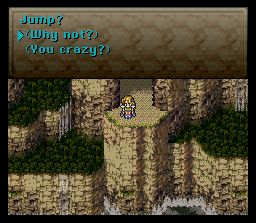 |
 |
After just one fight you've learned the dance. So it's all over, right? Wrong. Now you have to make your way back to where your airship is. The rest of the scenario involves doing just that. |
| You'll end up at the port town of Nikeah again, and there is just as little to do this time as there was last time. |  |
 |
Make your way out of town and head northeast, following the little path between the mountains and the ocean. |
| Eventually, you'll end up back where Sabin's scenario started, by the house with the crazy guy. Make your way down along to where that little dessert imperial fort was. |  |
 |
Thankfully, you don't have to go through the fortress again. Now make your way down to Doma Castle. |
| Search the castle in and out and you'll find all kinds of goodies waiting for you. | 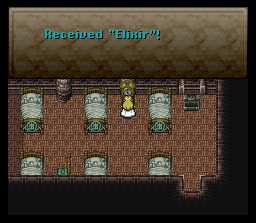 |
 |
Now it's time to go through the phantom forest again. Luckily, you don't have to deal with the train again. Just make your way through the forest and you'll end up at the other end. |
| Head to Baren Falls and jump in! Deja vu, huh? Well, once again, instead of having to fight on your way down, you'll simply end up back on the Veldt. |  |
 |
And so make your way south back to the airship, and wah lah, you now have Mog's Water Rondo! |
 |
If for some God forsaken reason you actually like playing with Gau (and I can't imagine any good reason why this would be so), you might want to collect the rages for all the new enemies you've fought against. In case you've forgotten how this is done, or never bothered to do it before, I'll remind you. Cause I'm such a nice guy. First...head on back to the Veldt. |
| Walk around on the Veldt to fight some monsters. | 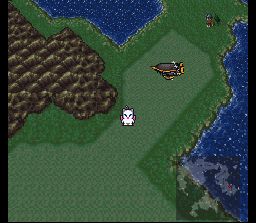 |
 |
When you see a new monster you want, have Gau leap in. |
| If you were me, I'd leave Gau to rot and die on the Veldt and go on with me, but not everyone is as delightfully devilish as I am, unfortunately. If that happens to be you (you pansy!) keep fighting until Gau eventually rejoins your party. Repeat until you've gotten all the rages you want. For a complete list, go here. |  |
 |
If I could change the world... |
| And so up goes the floating continent, your final destination! Until the next final destination. |  |
 |
When you're ready to go kick Kefka's butt, head up to the airship and choose "go to floating continent"...but first make sure you've got the party you want.
Reccomended Level: 27 |
| This is my preferred party. I know you can only have 3 people, but it's a good idea to equip Celes and get her ready, even though you don't want to bring her, because she'll join your party later. This is a good party, because it lets you steal (Locke), gives you good physical attacks (Sabin), and just good all around everything with Mog's dances. |  |
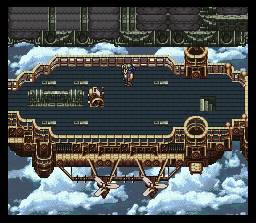 |
Now it's time to fight the Imperial Air Force! You'll be randomly attacked on the airship about 6 or 7 times, and you'll have time in between battles to heal and such. |
| These guys aren't too tough. If Locke is equipped with the Wing Edge, he'll use his special attack against flying creatures which will knock one ship out in a hit. Use Mog's Wind Song dance, and have Sabin use aura bolt. | 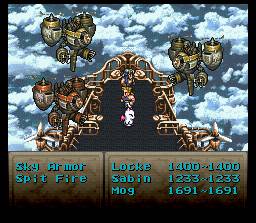 |
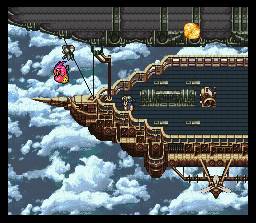 |
After a few battles you'll see something strange approaching the airship... |
| If you head to the back of the ship, guess who you'll find! That's right folks, it's everyone's favorite octopus, Ultros, back for the fourth and final time. | 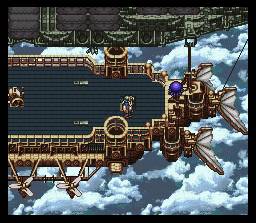 |
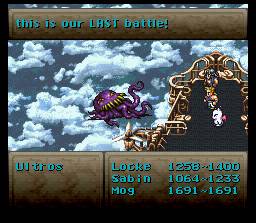 |
He's right ya know. |
| Except this time he's brough a friend along...Chupon. "Fungahhh!" You said it Chupon...you said it. These guys shouldn't give you much of a challenge. Pound on Ultros first, then take on Chupon. |  |
 |
It's allergy season, however, and before you get the chance to take care of Chupon, he sneezes you overboard! Can you say "Fungahhh!"? |
| Time to fight another boss. This is probably the most challengine boss you've faced yet, just because he gets three attacks per turn until you take care of his arms. So obviously you're going to want to kill the arms first. Not before stealing from them though! You can get the first "X-Ether" of the game here, by stealing from the right arm. |  |
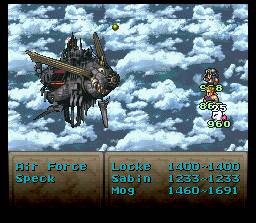 |
After a small amount of time, a speck will appear above the ship that will absorb all magic. You can either try and take it out (it's kinda hard to hit) or just kill the body. He has a weak attack power by himself, and not much HP to complement it. |
| And so, you finally end up on the floating continent. |  |
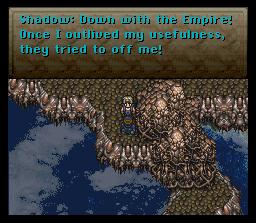 |
And so now you see why you only got to choose 3 party members. Everybody's favorite masked crusader Shadow decides to join the crew! Did you really think he could die that easily? He's Shadow for God's sake. |
| Most of this level is pretty straightforward. The only trick is that you'll often have to run into inlets in the wall to discover the path to the next section. | 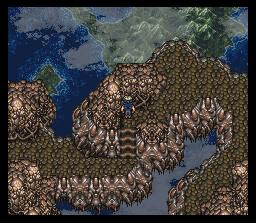 |
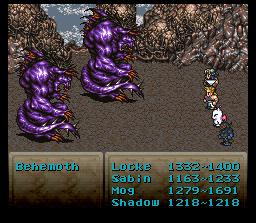 |
The enemies here are nothing to laugh at unlike most of the enemies you are used to. Some of them can be very powerful, especially these behemoths. Make sure to keep yourself decently healed at all time. |
| Just to remind you...those inlets in the wall often disappear if you run into them! |  |
 |
When you get here you'll run into your first split in the path. If you're feeling lucky, head down to the right to the blue treasure box. |
| They look like this on this silly continent |  |
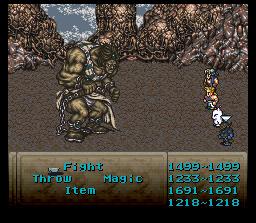 |
You'll have to fight Gigantos...and this bastard is strong. He counter-attacks you every time for up to 1000 damage! Use your most powerful attacks and hope to waste him quick. You'll get a Hardened, a better dirk for Shadow, as your reward. |
| Now head back to that weird looking mound thing. They just happen to be transportation devices. Despite Locke's scared fast, we assure you he was not harmed in this production. | 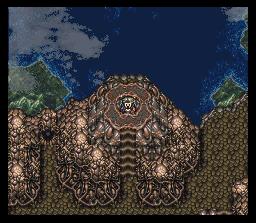 |
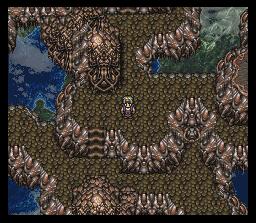 |
You'll end up in a new area of the floating continent a la the transportation thing-a-ma-bobber-mazoo. Head down that ladder and to the right... |
| When you get here, you'll want to take the middle road. No living on the edge here. | 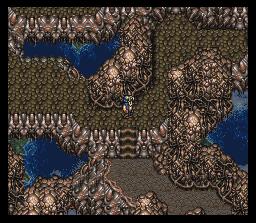 |
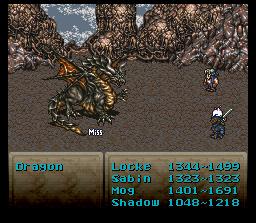 |
Just a note. If you run into this enemy and have Locke in your party, you can steal a genji glove from it. Very rare and good item indeed! |
| Once again, two decisions to make here. Don't bother going in the transportation device on the right. It just leads to a dead end. Take the one on the left. | 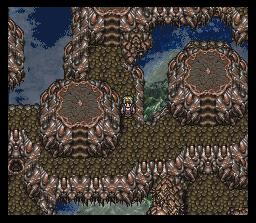 |
 |
Make sure to hit both switches, and you'll end up back at the place where you took the middle road before. This time you're going to take the low road (I'll take the high road). |
| One more split in the path. If you want to save and use a tent, head down to the right. Once you're all refreshed, hit the switch to open up the last area. |  |
 |
Before you reach the end, you're given the option to return to the airship. Unless you're crazy and a massochist, just keep going for God's sakes!
Reccomended Level: 29 |
| You killed my father. Prepare to die.
Time to fight the boss: Atma Weapon. This guy is by no means easy. Make sure to keep yourself nice and healed. He has some powerful attacks, and attacks often. If you're using my party, have Shadow throw shurikens or weapons, have Sabin use aura bolt, have Mog use his Earth Dance, and have Locke steal and heal. |
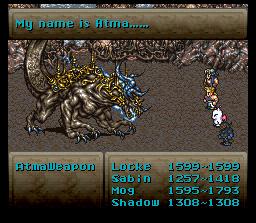 |
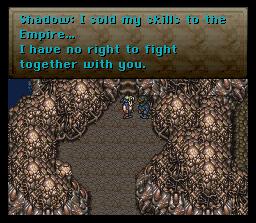 |
After the battle, Shadow gets all self-reproachful and stuff so he decides to leave. Head on up those stairs anyway. Be strong!
I won't ruin the following plot sequence for you, as it's one of the best in the whole game ;-) |
| Shadow returns to buy you some time! You better hurry. | 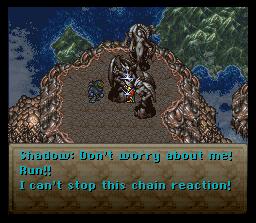 |
 |
You've got six minutes to get to the airship. You shouldn't have any problems accomplishing this. When fighting the enemies here, if you have Sabin with you, use Aura Bolt and attack with the rest of your party. |
| When you get here, don't bother going down. Head over to the ladder. |  |
 |
You're going to have to take the long way around here. Make sure to head back and get the treasure chest though. |
| I don't really consider this a boss. He condems you, only giving you a limited time to kill him, but he has so little HP that it doesn't even factor into the battle. Just attack his ass. |  |
 |
And so you're at the end, probably with time to spare. In order to keep Shadow in your party for the rest of the game, however, opt to Wait instead of jump. If you hate Shadow and you're a horrible, immoral person, then by all means jump. And we all hope you fall and break a leg. |
| And with six seconds left, Shadow shows up! Told you say. Time to haul ass. |  |
 |
But it's all for naught, because the world blows up and everyone dies. The end. Go home. Shows over. No refunds.just kidding |
World of Ruin
Note on World of Ruin Walkthrough: The world of Ruin is, for the most part, non-linear. There are only a few parts of the walkthrough which are mandatory and that you must do. The rest of the parts are optional, and need only be done for completeness. Refer to the key below for more information.

