
")
")
Final Fantasy 6
ไฟนอล แฟนตาซี 6
บทสรุปเกม
WALKTHROUGH
-
 Final Fantasy 6 Pixel Remaster [By LunaEleven]
 -
 Final Fantasy 6 [By Soi13 WM]
 -
Final Fantasy 6 [By Mink]
-
 Final Fantasy 6: [1.World of Balance - By rpgclassics.com]
 -
Final Fantasy 6: [2.World of Ruin - By rpgclassics.com]
-
Final Fantasy 6 [By อิ๊
This email address is being protected from spambots. You need JavaScript enabled to view it. ] -
Final Fantasy 6 [By shonocha]
-
Final Fantasy 6 [By ป๋าเปี๊ยกอยากแคสต์]
-
Final Fantasy 6 [By Zande]
-
Final Fantasy 6 [ EndlessChannel TH]


World of Ruin
Note on World of Ruin Walkthrough: The world of Ruin is, for the most part, non-linear. There are only a few parts of the walkthrough which are mandatory and that you must do. The rest of the parts are optional, and need only be done for completeness. Refer to the key below for more information.
1) Grandad, Do I Really Smell Like Fish? *
2) The Valiant Return of An Aerobics Instructor
3) Phunbaba is the Coolest Boss Name Ever
4) To South Figaro and Beyond - The Sequel *
4a) I Used to Have a Turtle *
4b) Fear and Loathing in Kohlingen *
5) Kodak Moments with Old Friends (D)
6) The Eight-Legged Receptionist
7) Phunbaba's Flatulence
8) Underage Starving Slave Girl Artist
9) Holy Hidon Hulabaloo
10) The RPGC Furry Community's Favorite Chapter (D)
11) A New Spin on Necrophilia (D)
12) Cyan Sucks
 |
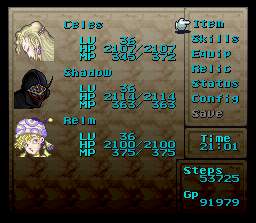
And so we now start the second half of the epic. This time Celes is our starting heroine instead of Terra. She awakens to find that Cid and her are the only survivors in this mess. |
| Not only does she awaken, but she's been asleep for over a year! Well, perhaps not asleep. More like a death-defying coma. |  |
 |
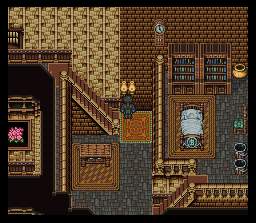
Looks like the world is pretty damn screwed up. Looks like Cid's Barry Manilow addiction finally came back to bite him in the ass... |
| Cid isn't doing very well himself either. But thankfully Celes is here to nurse him back to health like a good obedient Japanese grand-daughter. Time to go fishing! |  |
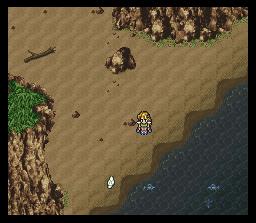 |
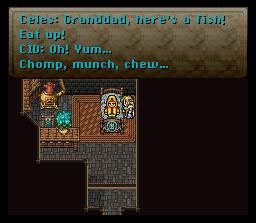
It's now up to you whether your new grandpa Cid lives or dies. In all honesty, it won't affect the outcome of the game, and I sometimes like to kill him off just cause the cutscenes are more dramatic. But, I'm assuming here that you are a kind, loving person (and probably making an ass of myself in the process) and that you want to save your beloved grandpa. In that case, I'll tell you the easiest way to do it. When you walk out and see fish swimming around, about 3/4 of the time you will see a fish swimming a LOT faster than the others. ONLY capture those fish, and no others. |
| You can tell you have the right fish by going to the rare items menu. If it says "A yummy fish" you've got it right. If it doesn't say that, committ seppuku you failure, for you have ashamed your family for seven and a half generations. |  |
 |
Then take your fish to old gramps and feed it to him. He'll make some annoying sounds as he's eating. Then go back and fish again. If you don't see any fast swimming fish, go and talk to Cid and go look again. His health will slowly deteriorate by doing this, but it will increase by large amounts by feeding him yummy fish. The ratio of health degradation to health "bettering" appears to be somewhere around 1:e or 1:3, in case you're interested. |
| Oddly enough, you can spend all the time you want fighting and Cid's health will never decrease. It isn't worth it to fight on this continent (yet) however, since you only get like 5 experience points per battle. Later on, however, you can steal some megaelixirs from these guys... |  |
 |
As Cid's health starts to improve, his sayings will change. If you get this one, that means you're on the right path. |
| Depending on your luck, it will take anywhere between 5 and 15 minutes to nurse this guy back to health (he dies a lot quicker, in case you're intersted). Once Cid's gotten all healthy and stuff, he decides to show you his "secret". |  |
 |
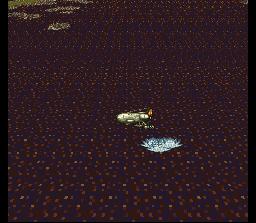
It's a raft! Yay! Time to leave the old man behind and make something for yourself in this cruel, cruel world. |
| I love mode 7. |  |
 |
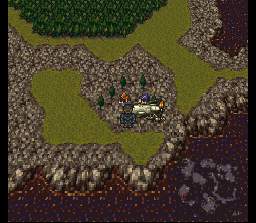
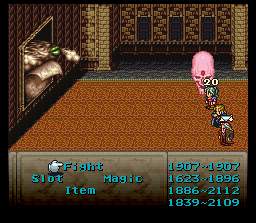
You'll end up by the town of Albrook. Make sure to equip yourself with the best stuff you have before heading out. The enemies are quite a bit tougher now. I usually put myself in the backrow and equip a morning star. It's basically as powerful as the break blade, but you can be in the back row and thus only take half damage. This helps considering you're still fighting alone. |
| The town, as you can see, is looking pretty beat up. There really isn't a hell of a lot to do here. There is nothing new to buy in any of the shops. The only thing to do now is to talk to the villagers and learn about what Kefka has done to the world. | 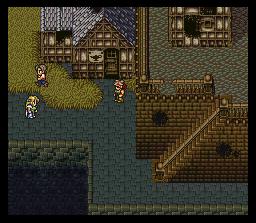 |
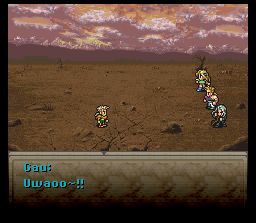
 |
Seems like he's having fun, anyway. |
| Grammar errors! Noooooooooooooo! | 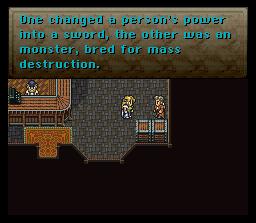 |
 |
Gotta love politically correct translations. |
| So where to go now? Well, that's pretty much up to you in this world. The World of Ruin offers just about the most freedom of choice of any Final Fantasy game outside of perhaps Final Fantasy II. There are only a few things you have to do, but there are a wealth of options. If you want to do everything, then just keep following this walkthrough, cause I ain't leaving a single thing out. | 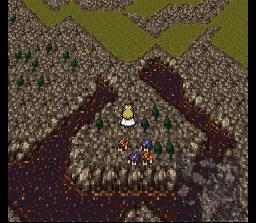 |
 |
The first thing I always do is get Sabin. Why? The quest to get him is one of the easiest in the game, he's close to where you are, and he's just so darned powerful. Head north past Kefka's tower a ways and you'll come upon the town of Tzen relatively quickly.
Reccomended Level: Whatever you're at. |
| As soon as you get into town, you get your first view of Kefka's light of judgement. For some reason, everyone in the town already knows you're a hero, so it's up to you. Head to the house on the north side of town, and guess who you run into? Why, if it isn't Sabin! | 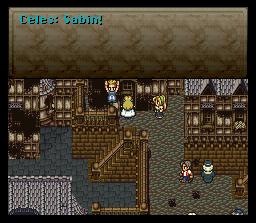 |
 |
Thanks to Sabin's beefy aerobics instructor muscles, he's able to hold the house up for exactly six minutes while you run in and rescue the child. Or...if you really wanted you could not save the kid and kill him, but Sabin will then disappear forever, and you don't want that do you? DO YOU? |
| So head on into the house. But first, make sure to equip a jewel ring, or you might get petrified! Grab all the treasure chests on the floor, as some of them actually do have useful tools. The only exception is the treasure chest located by the stairs. All it contains is four enemies. The only reason you might want to open it is if you're a Gau fan and you want to collect as many rage monsters as possible, because this (and a treasure chest downstairs) are the only places to fight "Pm Stalkers". |  |
 |
There are three treasure chests downstairs. Grab the one down and to the left of here. Then head up. |
| Grab the treasure chest on the right. The treasure chest on the left only contains Pm Stalkers yet again. |  |
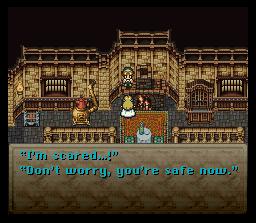 |
Grab the kid and haul ass out of here. You'll probably need to start running from battles or using smoke bombs to escape from battles if you start running low on time. There is no shame in running. |
| As soon as you leave the house, it will collapse. Thankfully everyone is safe. How sweet. |  |
 |
As you can see, Sabin is still his self-confident self. |
| Of course, Sabin agrees to join you. He'll be a big help in the quests to come. | 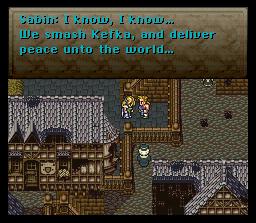 |
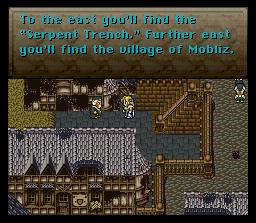 |
Talking to the townspeople will give you and idea of where you'll be headed off to next. Remember the serpent trench? It's above ground now! That's where we're headed next. |
| One last thing. If you forgot to grab the Sraphim esper in the world of balance, you can get it dirt cheap from the guy up in the forest of this town. Of course, if you've been following my walkthrough, you never would have missed such an oppurtunity. |  |
 |
If you are following me in the walkthrough, this is where you should begin. IF you're playing out of order and know how to get to Mobliz already, click here. To get to Mobliz from Tzen, start heading East, following the coastline. |
| Eventually you will come to a bridge. This leads you into the serpent trench. |  |
 |
It's a long walk to Mobliz from here. But it's quite straightforward. Just keep heading East until you can't head East no mo', then head North. Along the way, you will come to a forest. If you need to do any level gaining or magic learning, this is the best place, as the enemies give better magic points/experience on average here than on the plains. |
| Watch out for these guys though. They like to turn you into Imps (the bastards!). A white cape will protect you against this, however. | 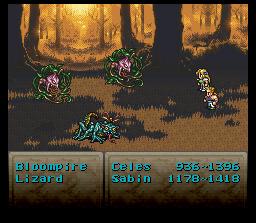 |
 |
And after much toil and trouble, you come to Mobliz. |
| When you head into town, it looks like these dogs are going to eat you for breakfast...
Reccomended Level: 30 |
 |
 |
...But they turn out to be pretty wimpy. They only bark at you. Duck and cover! |
| Point of interest: you can still sleep for free in the abandoned relic shop in this town. Nice if you want to gain a level or two. |  |
 |
When you're ready for the next sequence, enter the house to the bottom right of the relic shop. There will be a door downstairs that wasn't there before. |
| And look who it is! Terra. She's been quite busy it seems ::wink wink nudge nudge::. Just look at all those bloomin' kids! |  |
 |
Well, it turns out those kids aren't hers after all. What a shame. It looks like Terra isn't interested anymore in fighting with you though. She'd rather play the role of the good Japanese mother figure. |
| So let her do whatever she wants. Just leave. That's right, scidaddle! Forget about her! Who needs her anyway? |  |
 |
Of course, that's not the end of it. Phunbaba is coming!
Okay...I just have to ask? Where in the @#)%* did they get the name Phunbaba? I mean sure, it's fun to say and all. Phunbaba Phunbaba Phunbaba. Try it some time. Still doesn't make any sense though. |
| No matter what you do here, Terra won't do any damage. So just let her die. |  |
 |
Thankfully, it's Celes and Sabin (or whoever else if you aren't playing MY way...as if you'd considering such a thing) to the rescue! This guy isn't that hard. Attack with "Bio" magic with Celes and Aura Bolt with Sabin and he'll run away pretty quickly. |
| Guess Terra really is useless now. Oh well. See ya later. |  |
 |
And now for the reason you REALLY came here: Hardcore Nudity!!!
Er, I mean, the Fenrir esper. |
| After the castle lifts out of the sand on the other side of the mountains, you'll want to be heading northwest a wee bit til you reach the town of Kohlingen. |  |
 |
A friend will be waiting for you at the inn/cafe. This time he won't play games at least. |
| Of course, just like everyone you've met on this trip so far, he's filled with doubt and self-loathing about the state of the world. But hey, at least it isn't Canada. | 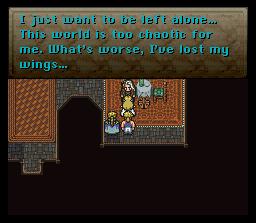 |
 |
You knew he'd end up joining you though, right? I mean, his little icon appears at the bottom of the armor shop screens. If that wasn't enough of a give away for you... |
| You'll probably want to head to the item/weapon/armor shop before heading out again. Make sure everyone is equipped to the max. Then again, you might not want to. Maybe you're just so full of yourself that you don't think you need my help. Well, fine. Do whatever you want. See if I care you big meany. | 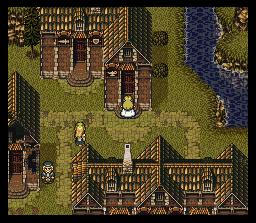 |
 |
...Yeah. Anyway, there is one other cutscene you might want to see in this town just for completeness value. Head to the house where the guy keeps the dead girl (wonder what he does with her at night, eh?) in his basement to learn something about Locke. |
| Now head out of town and go a bit southwest to the tomb icon on the map. It's not very far away at all. You can probably see it from where you're standing. Don't bother fighting enemies to gain levels out here, cause the enemies suck. By the way, remember how I told you to buy those amulets? I hope you did. |  |
 |
And so the tomb to Setzer's dead girlyfriend opens. Like always, there are monsters waiting for you. Why? Good question. Because it wouldn't be an RPG otherwise. |
| Right off the bat, this dungeon throws a 5-way split at you. Of course, you won't get confused by this, because you have my immutable presence to guide you. Aren't you lucky? |  |
 |
First head to the two doors on the right. The bottom door leads to a Genji Helmet, and the top door leads to a water switch you'll be wanting to hit. |
| Now head to the door on the bottom left. You'll see a treasure chest with Crystal Mail in it and a stairway leading down. |  |
 |
Downstairs there is a hidden secret. Walk right from where Celes is standing in the picture to find a passageway to an Expierence Egg! |
| In the same room, you'll see a door right above the treasure chest. Walk in that door and you'll see a switch just ahead of you. Hit that switch. Now head back to the room with 5 doors and go in the middle one. You'll end up above where you just were! Hit the switch and the room will flood, and the turtle will be more than glad to carry your sorry ass 'cross the water. | 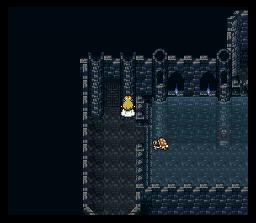 |
 |
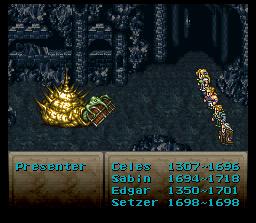
The rest of the dungeon is completely straightforward. Watch out, however, for the treasure chest by the save point. There is a monster hidden in it! This guy is tough if you remember the strategy for the first boss you fought in the game, who coincidentally looks very similar to this one. That's right, the whelk! Remember what you never do to a whelk? Don't attack his shell and you'll be fine. A very nice claw for Sabin is your reward. |
| Just soon after fighting the Presenter, you'll fight the real boss of the dungeon, Dullahan! You'll be glad to know he isn't much harder than the last guy, though. Use Aura Bolt with Sabin, and attack him with your strong fire attacks to take care of him quickly.
Reccomended Level: 33 |
 |
 |
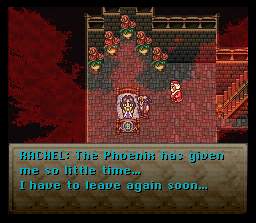
And that's the end of that chapter. Now to the epilogue. Walk through the door above the tomb to learn about Setzer and Daryl and all that crap. |
| Isn't it purdy? |  |
 |
And so you've got wings again. Don't fly too close to the sun now, kiddies.
This is the last mandatory event you must complete in the World of Ruin. If you were so inclined, you could go fight Kefka right now. Of course, if you want a complete game, you'll stick with me. So you'll stick with me, right? Right? |
I Used to Have a Turtle
 |
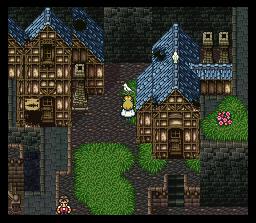
Welcome back to South Figaro. This town, as you can see, has been left relatively unscathed by Kefka's Light of Judgement. |
| Once again, you're probably going to want to head to the weapon and armor shops. |  |
 |
The only thing which will catch your eye is the Diamond Armor. Buy one for Celes. |
| When you're ready, go the upper level of the cafe/inn, and in the spare room you'll find Gerad. He doesn't appear to happy to see you again. Perhaps you should try showering? |  |
 |
He scidaddles outta town pretty quickly, but of course you won't leave him alone that easily. You're like glue you is. |
| Head out of town and you'll see a cave just to the southwest of town. Do I really have to tell you to go there? |  |
 |
If you were looking to fight and gain levels out here on the plains, think again. You don't get much in the way of experience from these enemies. You shouldn't need to gain any levels as it is. If you're desperate, level up with the enemies in the cave. |
| Upon entering the cave, you might see a vaguely familiar figure: "Sigfried". If you remember, he's the l00zar that you fought on the Phantom Train way back in the world of ruin. Of course, then his name was Zigfried. Well, Ted Woolsey wasn't too worried about stuff like "consistency". But we still love him. |  |
 |
This is the same cave you've been in a number of times now, so I won't tell you where to go. If you really don't remember, perhaps a lobotomy is in order. |
| You'll run into Gerad again in the room with the pool. This is perhaps the most absurd line in the entire game. "I used to have a turtle." Who the hell cares? Why did he say it? Does it have some sort of deeper philosophical meaning us philistines aren't capable of comprehending? Or perhaps it really is just absurd. |  |
 |
To get across, jump on the turtle when it swims in front of your path. |
| Unfortunately for you, the thieves have taken all the treasures from this path. Oh well, they were probably crap anyway. This is a one-way path folks. |  |
 |
Nevermind. This line is even more absurd. "On the hum, let's go"?!?!?!?! What does THAT mean? Sounds almost as bad as "Someone set up us the bomb". |
| And so you end up in the dungeon room of Figaro Castle. Gerad sure does seem oddly sympathetic. |  |
 |
The path through the castle is also a one-way path until you get to this room. First, grab the four treasure chests. Then, head in the door on the left. |
| This will lead you to a "Regal Crown", a nice helm equippable by Sabin and Edgar. |  |
 |
Now head back and take the central path. You'll quickly come across a boss, but lo and behold, Edgar finally reveals himself and joins your troupe to fight! This boss can be tricky as he likes to immobilize you and such your HP out. Use Air Blade with Sabin, the Drill or Chain Saw with Edgar, and attack with Celes. Heal often in this battle, as you never know when you will be immobilized.
Reccomended Level: 32 |
| At least he's got the decency to explain himself to you. |  |
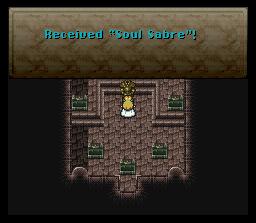 |
The thieves get away with all the treasures but one, the "Soul Sabre", an interesting sword that drains MP from enemies. |
| ...And so Figaro castle rises from the depths of hell yet again. |  |
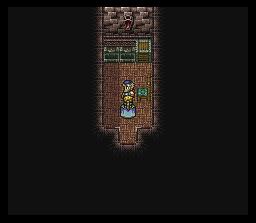 |
If you need to stock up on supplies or tools, make sure to list Edgar as the first guy in your party. You'll get a 50% discount! |
| Explore the castle if you want. Or don't. Nothing interesting happens here. So when you're ready, it's time to take a dive and head across the mountains to Kohlingen. Deja Vu? |  |
Fear and Loathing in Kohlingen
| After the castle lifts out of the sand on the other side of the mountains, you'll want to be heading northwest a wee bit til you reach the town of Kohlingen. |  |
 |
A friend will be waiting for you at the inn/cafe. This time he won't play games at least. |
| Of course, just like everyone you've met on this trip so far, he's filled with doubt and self-loathing about the state of the world. But hey, at least it isn't Canada. |  |
 |
You knew he'd end up joining you though, right? I mean, his little icon appears at the bottom of the armor shop screens. If that wasn't enough of a give away for you... |
| You'll probably want to head to the item/weapon/armor shop before heading out again. Make sure everyone is equipped to the max. Then again, you might not want to. Maybe you're just so full of yourself that you don't think you need my help. Well, fine. Do whatever you want. See if I care you big meany. |  |
 |
...Yeah. Anyway, there is one other cutscene you might want to see in this town just for completeness value. Head to the house where the guy keeps the dead girl (wonder what he does with her at night, eh?) in his basement to learn something about Locke. |
| Now head out of town and go a bit southwest to the tomb icon on the map. It's not very far away at all. You can probably see it from where you're standing. Don't bother fighting enemies to gain levels out here, cause the enemies suck. By the way, remember how I told you to buy those amulets? I hope you did. |  |
 |
And so the tomb to Setzer's dead girlyfriend opens. Like always, there are monsters waiting for you. Why? Good question. Because it wouldn't be an RPG otherwise. |
| Right off the bat, this dungeon throws a 5-way split at you. Of course, you won't get confused by this, because you have my immutable presence to guide you. Aren't you lucky? |  |
 |
First head to the two doors on the right. The bottom door leads to a Genji Helmet, and the top door leads to a water switch you'll be wanting to hit. |
| Now head to the door on the bottom left. You'll see a treasure chest with Crystal Mail in it and a stairway leading down. |  |
 |
Downstairs there is a hidden secret. Walk right from where Celes is standing in the picture to find a passageway to an Expierence Egg! |
| In the same room, you'll see a door right above the treasure chest. Walk in that door and you'll see a switch just ahead of you. Hit that switch. Now head back to the room with 5 doors and go in the middle one. You'll end up above where you just were! Hit the switch and the room will flood, and the turtle will be more than glad to carry your sorry ass 'cross the water. |  |
 |
The rest of the dungeon is completely straightforward. Watch out, however, for the treasure chest by the save point. There is a monster hidden in it! This guy is tough if you remember the strategy for the first boss you fought in the game, who coincidentally looks very similar to this one. That's right, the whelk! Remember what you never do to a whelk? Don't attack his shell and you'll be fine. A very nice claw for Sabin is your reward. |
| Just soon after fighting the Presenter, you'll fight the real boss of the dungeon, Dullahan! You'll be glad to know he isn't much harder than the last guy, though. Use Aura Bolt with Sabin, and attack him with your strong fire attacks to take care of him quickly.
Reccomended Level: 33 |
 |
 |
And that's the end of that chapter. Now to the epilogue. Walk through the door above the tomb to learn about Setzer and Daryl and all that crap. |
| Isn't it purdy? |  |
 |
And so you've got wings again. Don't fly too close to the sun now, kiddies.
This is the last mandatory event you must complete in the World of Ruin. If you were so inclined, you could go fight Kefka right now. Of course, if you want a complete game, you'll stick with me. So you'll stick with me, right? Right? |
 |
The first thing you see while you're flying around wasting precious fossil fuels is a bird. Holy SHIT, not a BIRD! You never see those while flying in the air! We better follow it, because it must be important. Well, needless to say, it takes you to the town of Miranda. I strongly reccomend not going into that desert yet, unless you're suicidal, in which case by all means. |
| Thou? What the hell are you talking about you old crackpot? (time passes) Oh right, Cyan, that loser. ::sigh:: I guess we have to go save his sorry ass now. Come on team. |  |
 |
But wait. You almost forgot weapons and armor dummy. You can by a lot of very useful stuff here. Get crystal equipment for those who can equip it, though I reccomend the oath veil for the chicks. Dark Gear is good for Sabin. Don't forget to buy weapons either. |
| Go to the house on the far right side of town to see what this desperate lass is up to. Apparently she's been receiving letters from Mobliz? I don't think so. This could only be the doing of one man! Or maybe two, if they're lazy. |  |
 |
You guessed it. Talk to the bird. Time to follow him once more. |
| But first, forget about Cyan. Learning cool and powerful techniques is much more important. So fly your ass on over to the top center of the map until you see this formation of five trees in a cross-shape. |  |
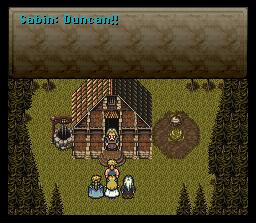 |
Enter into this area through the center tree to FINALLY find out who that damn Duncan character is. |
| In fact, Duncan is so happy to see Sabin again, that he teacher him the ultimate blitz: Bum Rush. Go ahead, try it out, but only under strict parental supervision. Many a broken vase and dead cat have happened because of this move.
Aren't you glad I captured this image with all their faces like that? It's like...a Kodak moment or something. |
 |
 |
Head back to the Miranda area. Don't gain any levels around here yet, though. Why, you ask? Cause sometimes you'll come across this group of enemies, and though they probably won't kill you, they'll do some seriously pounding on you, and they're more trouble than it's worth right now. |
| Head north of Miranda to the place you saw the bird go, land your ship, and head on in. I wonder what town this could be? |  |
 |
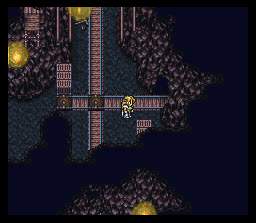
You knew it would be bad, didn't you? Yes, welcome back to Zozo. Talk to the truth telling dude and he'll tell you where to go. Also make sure to buy the Rust-Rid from him, or you'll be sorry! Well, maybe not, cause you could just go back to him and buy it anyway. |
| Somehow they managed to fit a mountain in that building. Frank Lloyd Wright, eat your heart out. This place is pretty straight forward, so I won't bother you with petty details. Make your way through the cave, grabbing the treasure chests along the way. There's a lot of good stuff here! |  |
 |
My personal favorite is this one. Damn good shield. And no Final Fantasy game is complete without it. |
| When you get here, you'll see a little switch that you can step on. So step on it. You should really know these things by now. A dragon will pop out of the treasure chest above you and start flying around. He's not very bright, so you have to get in his path in order for him to notice you. How rude. |  |
 |
This is the first dragon you'll fight. In case you aren't aware, there are eight dragons in the world of ruin. In order to get the Crusader esper, you're going to have to kill all of them. So unless you feel like coming back here again later on, you might as well take care of it now. Just Bum Rush him with Sabin, use your most powerful thunder attacks on him with everyone else, and he'll go pretty quickly. He does have a few nasty wind moves though, so make sure to keep healing.
Reccomended Level: 35 |
| And that's pretty much the end of the level. Eventually you'll end up in a room filled with flowers. Gee, this must be where the letters and flowers are coming from. Those excellent deduction skills you learned in school finally paid off. You can't open the treasure chest yet, so head out the door on the right side. |  |
 |
Mr. Thou? What the hell are you doing? This guy must be DESPERATE. I mean think about it, his wife is dead, he's getting old, he probably won't be able to remarry, and I doubt he'll get any action from Celes or Terra. Poor guy. I'd feel sorry for him if he wasn't Cyan. |
| Whoa dudes, you want a hit of this shit? It's the bomb. |  |
 |
A nice gesture Cyan, except for the fact you're a lying scumbag. |
| Foreshadowing....oooooh.... | 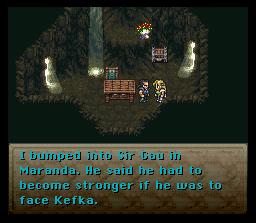 |
 |
So now Cyan is in your group, but if you're like me, you'll never use him again anyway. Head outside to where he was standing before to get a hidden key. |
| This will allow you to open the treasure chest and get two completely, utterly useless items. Yay! |  |
 |
It's time to get the hell out of this stinkin' town. Grab your airship and head into the bowels. |
| You'll be wanting to change your party at this moment, and the only place you can do so is in the engine room by talking to Cyan. Don't worry though, you won't be adding this useless old man to your party... |  |
 |
Instead, you'll be removing a member of your party. As you can see, I got rid of Edgar, cause he's just a horny pervert, but by all means feel free to remove whoever you think is the most useless. The next place you'll be heading to is the Veldt to reunite with Gau (remember that clue in Miranda?). Unfortunately, Gau will only join your party if there are three people in it, hence the removal. Fight around randomly on the Veldt for a while and he'll appear and join your party again whether you want him to or not. |
| You can fight around here some more and get some of Gau's rages if you really care, or you can head into this cave here at the bottom of the Veldt. You can remove Gau from your party now, if you want to. He is not necessary for the next part. Even though he is probably more useless than Cyan, I was too lazy to return to the Airship and do all that work, so I kept him along for the ride. |  |
 |
Inside the cave, you'll have a run-in with your old bow-wow friend Interceptor. Before you have a chance to toss him a bone, he goes running off into the cave. You'll want to follow him, because obviously Timmy got stuck in the well again (why do kids named Timmy always play around wells anyway?), and you've gotta haul his ass out. |
| Inside the cave, you'll see a lovely-looking group of young chaps curled around a fire rolling some strange looking herbs. What's that strange smell anyway? Feel...so....happy. Dragon? Hee hee hee. |  |
 |
Don't you feel like you're missing out on something by reading this walkthrough? You know, that whole sense of adventure, finding things out on your own, making your own decisions. Oh...what am I saying. Who's interested in those things anyway? |
| Head north from these strapping fellows and you'll come to a room with a treasure chest that seems impossible to get to in this same dimensional fabric. Unfortunately for you, the game player, you are stuck viewing the world from a top-down view, like God would see things. Unfortunately for your deity-like self, you can't see the hidden passage that leads to this chest. Option? Randomly walk around until you find it. |  |
 |
It don't always come so easy. You'll have to fight for this treasure. Word to the wise: Don't use doom on him, for he is undead. Regular attacks are the best, along with MAGICK! |
| Now head down from this treasure chest to come to a room with a very obviously-placed switch. Hit the switch to move the very obvious block that is obviously moved by hitting this obvious switch. Obviously, you'll be wanting to head through this newly opened passage. How obvious was that? |  |
 |
Not all of you will see this scene here. If you didn't save Shadow, cause you didn't listen to me and are thus a stupid moron head, you'll see Relm instead. But I know you're too cool not to have saved Shadow, so if you didn't, well, go find another walkthrough. |
| Clearly this is the work of some new breed of cave-dwelling, ninja-attacking, slam-dancing, mr. thou, owauuuuuuuuuu, son of a submariner, thingamabobber. |  |
 |
Or this weird boss thing. This image is of the boss, Sr. Behemoth, in his second form. In his first form, use physical attacks with Sabin (bum rush, obviously), and ice magic with everyone else. After defeating the first form, he'll knock you to the other side, and come at you in his menacing undead form. If you're a cheap-ass like me, just cast life on him or use a fenix down on his second form to KO this chump in one go. Or, for the more stoic, the same techniques as the first form will work. I offer you no remedy for the extra minute of your life you could have spent staring at nudey pictures on the internet.
Reccomended Level: 35 |
| Hmm. Apparently that gaping hole in his crotch area wasn't a wound after all. But how will we explain this revelation to Interceptor? |  |
 |
So you mean this isn't Canada? Well, that's a relief. |
| Cue Shadow flashback. There are 6 more dreams you can have with Shadow, if you want to catch more random glimpses of his past. I won't spoil them for you. All you have to do is go and sleep with Shadow in your party, and they'll randomly appear. Cake! |  |
 |
But what is this? He's gone again. Those crazy ninjas, always appearing and disappearing like...ninjas. Well, head off in your airship to the far northwestern tip of the world. |
| Walk inside, journey around, have a chat with some old octopi friends, but you'll ultimately want to talk to this dude right here, who will allow you to participate in the wonderful events that take place inside. Bet the striker you just found in the cave. |  |
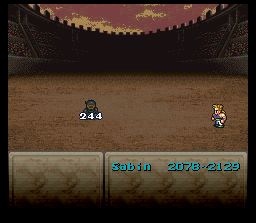 |
And you'll come up in a fight against Shadow. Here in the colloseum, you have no control over your fighter, but this battle is cake anyhow. For further colloseum strategies, go to the colloseum section. Anyway, you'll beat the crap out of Shadow no problem. |
| In return, he will join your group for good, and even strike a pose for you. How cute. |  |
 |
The wonders of personality reconditioning. Is that Beethoven's Ninth I hear? |
 |
Next stop: Mobliz again. |
| Walk into the building on the far west side of town. Talk to Duane here, who forgot to use a rubber. Now where's that hanger... |  |
 |
Remember the secret stairwell here? Walk down it. |
| Walk into the backroom and you'll see Terra and Katarin blabbing away like the teenage females that they are. Duane will come down and mumble some half-said apologies. Love love, blah blah blah, where's the fun? |  |
 |
BOOM! Yay, time to fight. Make war, not love. Phunbaba is back, and boy has he been eating his beans. |
| Terra will naturally wuss out on you, so you're on all your own chump. |  |
 |
Unfortunately, he's a bit stronger than he was last time. Must be those beans. Phunbaba's mad flatulence will blow away two of your party members, and the battle will exit. Just in time, Terra comes to the rescue, esper style. |
| This battle is cake. Just use your strongest physical attacks, such as bum rush, if Sabin is left. For the magic users, it's all about the bio.
Reccomended Level: 35 |
 |
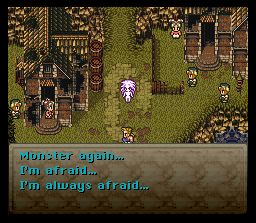 |
I'm sorry children. This always seems to happen at this time of the month. |
| Holding it in will only make it smell worse when it finally comes out, you know. | 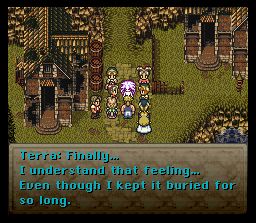 |
 |
Oh...you mean that. Heh heh.....heh. |
| Video games are just rotting their minds to nothing! Something must be done. |  |
 |
It's enough to make you sick, isn't it? Well, at least Terra finally joins you this time. If only she'd shut her yap. |
 |
Head off to Jidoor. This town is now located in the northwest of the world, just south of Zozo. |
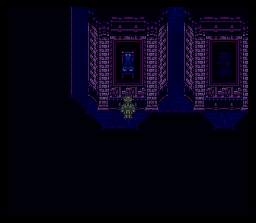
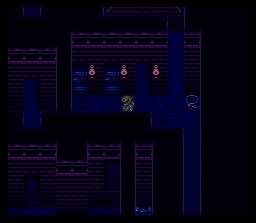
| Heat all the way up to the top of the town and enter the big mansion where you found the letter from the Impresario in the World of Balance. You'll find that it's pretty dark in this place, so if you're feeling a little lonely... | 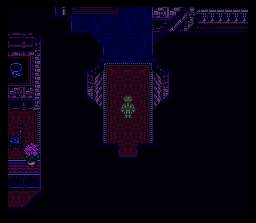 |
 |
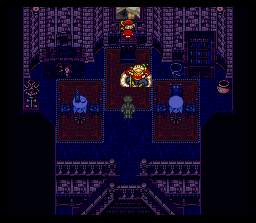
Don't even think about it. You'll want to turn the lights on with this switch here. |
| Head to this place at the bottom left of the room. Click on the painting and it will come alive and attack you. The battle is easy, however, and after you whomp the floor with the enemies, a door will appear. | 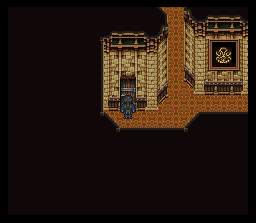 |
 |
This door will lead you to the basement, which is once again very dark. This time there is no light switch, so make sure your shoes are tied. When you try to walk past this painting of a chair with a lady in it, the lady will come alive and attack you (notice a pattern here?). Once again, not a hard battle. Smack that bitch up, and now the painting is just of a boring chair. |
| Continue on and you'll come to two doors. Take the one on the left first to get a moogle suit, then exit and take the right door. | 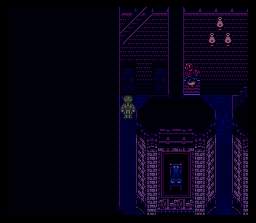 |
 |
This door will lead you to a room with three doors instead of two. First grab the relic ring from the chest hidden above the doors, then change up the doors so the opening is on the left door, and go in. The other two will just take you back to the room you were in. |
| This next room contains three floating chests and another living painting. Attacking the chests will win you three crappy items (though the middle one does contain a semi-useful ether). Whether you want to waste your time on them probably depends on how much of a completist RPG nerd you are. Not that there's anything wrong with that...just keep telling yourself that, kiddo. | 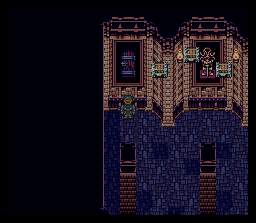 |
 |
To get out of this room, attack the painting of armor. You'll find this guy, who might seem hard at first, cause he casts a countdown move on you. However, his life is so low that it just doesn't matter. |
| The next room contains a save spot. Use it if you aren't using an emulator (you cheating bastard! I only use it to make this walkthrough. Really.). Don't bother with the first door, and head on up to the second door on the right. | 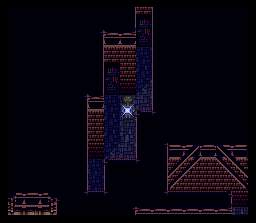 |
 |
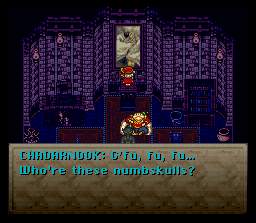
Isn't that Relm you see up there painting that picture? And who's that fat guy? Why are pedophiles always fat, pretend-art-lovers anyway? I mean, judging by this guy's choice in artwork, I think he's got a few problems. |
| Uh oh. Haunted painting boss! Didn't see that one coming... | 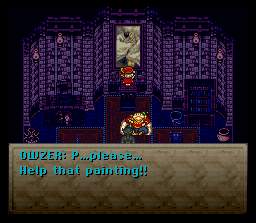 |
 |
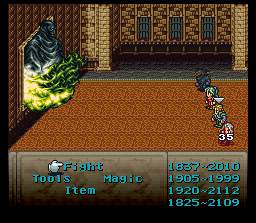
You'll have to excuse me. I only laugh like this because my mouth is merely a 2D representation of its real 3D existence. Silly human. |
| This boss isn't too bad. She switches back and forth between her human and demon form, each with their own attacks. Use your strongest fire attacks on both. If Terra is with you, don't forget to morph her. Watch out for the human side's charm and sleep attacks. Other than that, you shouldn't have too many problems.
Reccomended Level: 36 |
 |
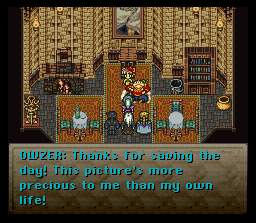 |
This girl...I mean picture is more precious to me...It's a gland problem, I swear. |
| Her amazing "ability" eh? This scene really makes me wonder what the text originally was, before it was butchered in translation. Not that this kind of thing interests me or anything...it's just curiosity. | 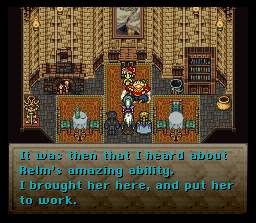 |
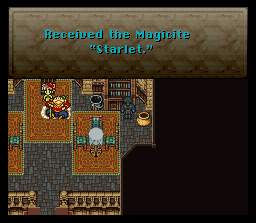 |
So yeah...anyway, make sure to grab the magicite from the bookcase, as Starlet lets you learn the invaluable Cure 3. Then grab Relm and get her some clothes other than that princess leia getup this fatso has got her in. Poor Relm. |
 |
With Relm in your party (and a fourth slot empty), head to this gigantic phallic symbol of a tower near the center of the world map. You can only fly into this little island here. |
| Yeah...don't bother doing paying him. He doesn't tell you anything worth 100000GP, and besides, I'll give you the same info for free and you won't even know it. How devious am I? |  |
 |
Yes, I know that's Strago marching around there. Go and talk to him and a cute little scene will happen between Relm and her granddaddy. |
| Didn't I tell you they were cute? Anyway, Strago will now join your party. Keep Relm and Strago in your party and head off to Thamasa at the southeastern portion of the map. |  |
 |
Walk into town and another little scene will happen. |
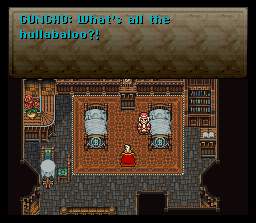
| But not all is well in the peaceful village of Thamasa. Apparently some dumbass named Gungho is hurt (yes, FF4 reference, I KNOW, shut up already, geez). It really is tragic isn't it? |  |
 |
Anyway, head off to see this Hidon dude and he'll tell you something named "Hidon" 0wnzx0r0ed his butx0r0cs. Apparently the old dude isn't as "gung ho" as he used to be. A ha ha ha ha ha ha ha.... |
| Hidon. Hard to find. lolz |  |
 |
Well, clearly, this scene would be pointless if there wasn't a corresponding dungeon filled with monsters and a boss at the end, so there is. Get in your airship and head to the little cave on the island north of Thamasa. |
| The cave is very dark, and you can only see around you with a small radius of light. Head north through the door. |  |
 |
You'll come to this chest. But wait...this is no ordinary chest. This chest is hungry, in case you didn't notice the first time, and he's hungry for more than just lovin'. He wants "coral". And it's your job to get it for him. Throughout this cave you'll see little teleport tiles. Step on the one here to go to another area.
Hint: Most of the enemies in this cave are undead, so watchout when using your weapons that dispatch. |
| It's pretty hard to write a walkthrough for the rest of this, because the teleport tiles are all completely random. The basic gist of this dungeon is you want to walk around aimlessly grabbing coral everywhere you go. When the teleport tile brings you back to the chest, feed it coral. | 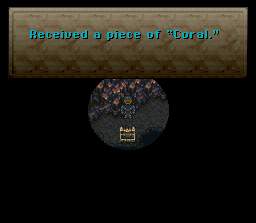 |
 |
For a while this is what the chest will say. I honestly don't know how much coral it wants - and I think it might change every time. But just keep feeding it, and eventually... |
| He will have his fill and let you pass. I don't know about you, but this scene always reminds of a certain scene with a fatso in Monty Python's Meaning of Life...he couldn't eat another bite. |  |
 |
Walk forward and you'll see Hidon. Not to scary is he? |
| Hidon can be kinda tough, but only if you're unlucky. Kill all the little hidonites. I find any of Strago's water magic moves to be pretty effective, or X-zone. Hidon himself only has one powerfull spell, and it hurts. It's called Grand Train, and it's in your interest to not kill him until he casts it, because Strago can learn it, and it's the best Lore. So keep yourself healed, wait for Grand Train, then kill him.
Reccomended Level: 36 |
 |
 |
When the battle is over, you will immediately return to Thamasa, where the two old people shout a bunch of crazy 1920's words at each other. |
| Right...whatever. And now you have no good reason to ever use Strago and Relm again, unless you're stupid, or dumb, or both. kthxbye |  |
 |
Reform your group to anything you want, but make sure to leave one spot open. |
| Head off to Narshe, which is located in the north central part of the map. I'd not reccomend leveling or fighting too many enemies outside of Narshe for now, as some of them can be a bit tough. Just head into the town. |  |
 |
As you can see, this town has been completely abandoned and taken over by the monsters. Yet somehow all the steam engines in the town still seem to be running, and the n00b house is still open. Don't bother trying to get into any of the houses yet. |
| If you go to head into town, you'll run into an old friend of yours. It seems he's spent a bit of time in Canada since you last saw him. |  |
 |
Actually, there is not even any need to go into the town. Just head down around and to the left, like when you snuck into Narshe in the World of Balance. |
| If you remember, this cave is completely straightforward. Just make your way through. None of the enemies here are too much to worry about, and aren't particularly good for leveling up anyway, so don't dilly dally. You'll notice when you get to this room that you no longer have to follow the shining thing. |  |
 |
When you get to this familiar fork, head down through the doorway. |
| This will bring you back to the Moogle HQ. Unfortunately, there's only one left, but fortunately, it's Mog! Talk to him, and if you only took three people like I told you to, he'll join your group. |  |
 |
It seems the fun in Narshe is far from over. Mog has a friend he'd like you to retrieve. Admit it, you can't deny his cute, fuzzy little face. That and the spear he's shoving up your ass as encouragement. |
| Head out of the caves through OLD MAN's house, and make your way north out of Narshe, like in the opening sequence of the game. |  |
 |
Head into the cave and take the right fork. The enemies here are the same ones you faught in the previous cave. |
| When you make it out of the caves, you'll notice a blue dragon flying around. Attack it to defeat your second dragon.
Note: This is also where you can learn Mog's dance Snowman Jazz, so make sure to fight a battle in the snow. |
 |
 |
This fight can be tough, as the ice dragon uses some powerful party-hitting ice moves. Not that hard, really though, because he's INCREDIBLY weak to a certain element, and if I have to tell you what melts ice, you should have been violently abused, slaughtered, and fed to pigs many, many years ago. So just use your strongest attacks in said element. |
| Bada-bing, six dragons left. | 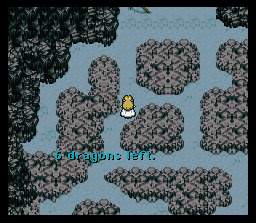 |
 |
Continue heading up to come to yet another boss fight (make sure you healed after the last battle). Doesn't this chilly fella look familiar? |
| That's right kids, it's the esper Tritoch that sent your friends Biggs and Wedge to their untimely demise so many years ago. This time around, however, the ice has got to his brain, and he's ridiculously, incredibly weak. He likes to use Rasp, which only takes off a few of your MPs. Once again, use a CERTAIN ELEMENT that is GOOD FOR MELTING ICE. You obviously beat the ice dragon if you're here, so don't make me hurt you. |  |
 |
Freeing Tritoch from his icy prison will grant you the Tritoch esper, which is far more useful than that pathetic boss fight might have you believe. It is the only way to learn the spells Ice 3 and Bolt 3, though at a measly 1x. The spells, however, are probably worth it. Head to the edge of the cliff and jump through the opening. |
| And wah-lah, you are in another cave. Perhaps I should make this the theme of the day or something. Head through the upper left door. |  |
 |
If you haven't noticed already, the theme is this cave is trap floors. Walking down from here, for instance, will make you fall through. Unfortunately, the point of having trap floors is sort of defeated, because every hole basically leads you to the end of the cave. Not really any strategy here. But don't fall yet. Go back to the first room, and head through the bottom left door. |
| You'll see a treasure chest here. Open with your own risk. Inside are three enemies called Pugs, and they are very, very hard. They attack hard, and they are fast. They don't give you anything either, except allowing you to fight them on the Veldt so Gau can master them, or let Strago learn the spell Step Mine. I beat them at level 37, but I rock. You might want to wait on this one, or not even bother.
Reccomended Level: 40+ |
 |
 |
Now fall through any of the floors. When you get to this room, head to the center, and walk the plank around to the top of the room, where there is a stairwell. |
| In the next room, ignore the switch, as it is really a hidden trap floor. Instead, walk across the planks... |  |
 |
...and hit the second switch. Man, these puzzles are getting REALLY difficult. I might have to start putting up a reccomended IQ here. |
| Finally you'll come to a room that actually has something interesting. God Forbid. Walk up to this skull on a stick and try to take the shiny stone out. |  |
 |
Crap! Who'd have guessed a giant sasquatch was capable of such artistry. This battle is even more pathetic than Tritoch. It's not really a boss battle, though, I don't think. He does do some nice physical damage, but just attack him and he'll die pretty quickly. Well, not really die... |
| He'll join your group (if you have Mog, like I told you to)! Nothing like a bit of violent coercion to influence the mentally challenged. I'm all for it. |  |
 |
Yes, Umaro has muscle, but not much else. You can't control him in battle, but he does good physical damage, and with his Blizzard Orb relic, he can even cast an ice magic spell. Note that you can also not equip him with armor or weapons, but he comes with a snow muffler and bone club already. |
| Leave. Go home. There's absolutely nothing more to see here. Isn't your mother calling you? |  |
 |
Get on the frigging airship already, loser. Haven't you figured out the drill by now?
Reccomended Level: 38 |
| This is my attempt at modern art. This picture has nothing to do with this walkthrough. It is simply here for you to make your own meaning of it. And no, this is not my attempt to cover up the fact I accidentally took this picture and forgot to delete it. It's art. |  |
 |
We are now headed to the phoenix cave, one of the more challenging levels in this game. The Phoenix Cave is located north of the town of Tzen on the Southern continent, where you encountered Sabin. For this map, you will not use but one party... |
| You must use two! I hope you took the time to level up more than just your dream team of 4 characters. Split your best characters up amongst the parties...try to split up your heavy physical damage users like Sabin and Shadow. | 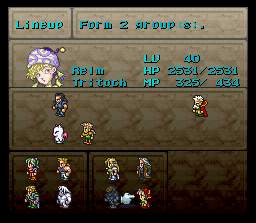 |
 |
From here on out, I will refer to Celes' group as Group A, and Terra's group as Group B. Keep in mind that Group A will fight the boss in this level, though both groups will get a pretty much even amount of regular fighting. To switch between groups, use the Y button. You can also use a trick if you like, of unequipping your good equipment each time you switch groups so that one group doesn't end up with crappier equipment. This is sort of time consuming though. Start with Group A, head up and step on this panel to open a door. Keep Group A on the panel and switch groups. |
| Head through the now-opened door with Group B into this room. Ignore the chest on the left and step on this panel to open up a door for Group A. Switch. |  |
 |
Head through the newly opened door with Group A and step on this panel to get rid of the spikes. These puzzles are pretty difficult, aren't they? Don't worry, the switching gets a bit less infrequent later on. Switch again. |
| Head up past the spikes with Group B and turn right at the fork in the road. Go down and step on the panel. Switch. | 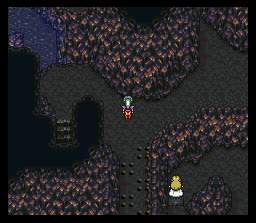 |
 |
Continue heading forward with Group A. When you get to this chest, you'll find that it is....EMPTY! Hah, perhaps that modern art joke I made earlier was more applicable than you thought. Think of the meaning... |
| Continue down into the room with the lava. Follow the one-way path until you come to this panel. Step on it to uncover some rocks in the lava. You won't be switching after this panel, however. Keep on truckin'... |  |
 |
Until you get to THIS panel. Step on it to reveal a path for Group B. Switch. |
| Head back to the fork with Group B, but go down the stairs this time. |  |
 |
Make sure to grab this chest along the way. Remember how I told you not to get it before? You tried to get it anyway, didn't you? But you couldn't, could you? You miserable, worthless failure. I'm almost ashamed I'm telling you how to get it now. Just extend this path up to grab the wing edge, an item for Locke.
Wait, Locke? He's not in our group yet, is he?!?!?! (ominous foreshadowing) |
| It's a good thing you revealed those stepping stones, huh? You can now jump across them. Head through the opening you made and step on the panel to create the path for Group A. Switch. |  |
 |
Go around the corner here with Group A to find the next panel. Switch. |
| Head forward with group B to this panel. Switch. |  |
 |
Now head around these newly-dropped spikes with Group A, until you get to another lava room. Don't worry about that chest for now. For now, just jump along the stones and continue to the next room. |
| When you get here, press this switch. It will drain the water into the lava, cooling it off. Now head down. | 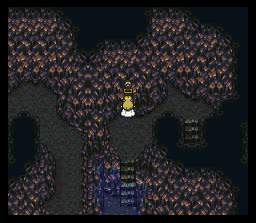 |
 |
Looks like it's time to kick some dragon ass. Engage a fight with it, though you should probably heal up first. This boss is too easy. Seriously, it's pathetic. Just use your strongest ice attacks. Hopefully Celes will have Ice 3. Use Ice 2 with everyone else. Ice 2 will still do MEGA damage to this guy, though. He goes down for the count in no time at all. You'll even get a Strato, Cyan's second-strongest sword, for your troubles! |
| After wiping the floor with his slimy guts, go and grab the dragon horn from the chest. This item is more of a novelty than anything useful, as it allows everyone in your party to jump instead of attack. Yay? |  |
 |
Now walk up and stand on the panel above you. Switch. |
| Move forward with group B into this room which used to be covered in laval. You can now grab the ribbon from this chest. |  |
 |
Head up and around through here. |
| You'll come out in the same room. Together at last! Have both groups stand on these two panels down here to open up the final passage. |  |
 |
Go through and you'll find...Locke! OMG! Never saw that one coming! |
| Dude, are you still ragging on the dead bitch? Get on with it, man. Seriously, there's at least two girls in this party who'd jump your bones anyday... |  |
 |
Anyway, I'll leave the rest of this tear-jerking scene for you to discover by yourself. |
| Yeah, he's back. But more importantly, he gives you some FREE ITEMS! HELL YEAH! FREE STUFF! |  |
 |
Oh wait, you're not actually done yet. With Locke in your party now, head back to Narshe. You can now unlock those doors in Narshe. |
| There's only two houses you need to go to. First, head to the weapons shop. |  |
 |
The guy down here will offer you either the ragnarok sword or ragnarok esper. Only one. The advantage to the esper is that you get to learn ultima. However, you can also learn Ultima with the Paladin Shield, which I will explain in a moment. I usually take the Ragnarok sword, for you can turn it into the Illumina sword at the colloseum, and it's RIDICULOUSLY powerful. Ultimately, the choice is up to you, and either choice is a good pick. For a completist, however, you'll probably want the sword, since you can get the sword AND learn ultima, the best spell in the game. |
| The second house you want to go to is the house on the hill. Here, you will get a cursed shield, which sucks ass. However, if you fight about 255 battles with it equipped, this shield will turn into the paladin shield, the best shield in the game that also teaches the magic spell Ultima. Make sure to equip a ribbon to cancel out the status effects caused by the cursed shield, though you can never get rid of countdown, so don't equip it in boss battles. |  |
 |
If you took the Ragnarok sword in Narshe after saving Locke, you can trade it at the Colloseum for the Illumina sword, which is much more powerful. Reccomnded Level: 40 |
| You'll have to fight Didalos, which at about 12,000HP is not the easiest battle for one person. I chose Cyan, perhaps because I subconsciously was hoping he'd got turn a new one in the battle. Unfortunately, he emerged successfully, but I had my Illumina at least. |  |
 |
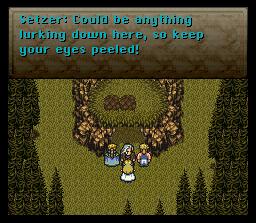
Cyan must be in your group for this next quest. Head to the small island just south of Narshe, and you will find the ruins of Doma Castle. This level isn't particularly difficult. I decided to throw Strago into the mix just for fun. |
| There is nothing left to find in the castle, so you can just jump right into the quest. Head to the bedroom and take a nap. |  |
 |
In the middle of the night, three little demons disguised as children named Moe, Larry, and Curley (unintentional misspelling or evading paying royalties? You decide) come out and jump into Cyan's bed. Come on Celes, you dirty babe, make it a fivesome! |
| Next, you will find yourself inside of Cyan's psyche, which seems to have been designed by M.C. Escher. Let that be a lesson to you girls. You can't get into a man's bed without getting into his psyche. You'll find that you are now in control of the third person in your group. Where'd those other slackers go? Walk up the stairs. |  |
 |
You'll find the first person from your party lying on the ground here. One of the demons is watching over her, but don't worry, you won't have to fight him yet. Speak to her and she will wake up and rejoin the party. Then go through the other door. |
| Do you have stairs in your house? |  |
 |
You will find the second member of your party taking a snooze on the ground. A bit too much to drink last night, Locke? |
| Through the next door you'll find yourself here, which means you're going in the right direction. |  |
 |
The three little demons will be waiting for your here. Ted Woolsey wanted to use the full phrase "Let's Get Ready to Rumble," but the penny-pinching assholes down in corporate told him that he'd have to use the money from his kid's college fund to pay the American Boxing Associate for the rights. This was the single event that drove him to madness, and nowadays the only word he ever says is "spoony" over and over while his kid snorts crack off of his worthless high school diploma. True story. |
| This battle isn't too bad, but you should quickly try to kill one of the demons. They will use a triple attack that does a fair amount of damage. Concentrate your firepower on one enemy at a time, and take them down. After you knock one out, the battle will basically be over. |  |
 |
After the battle, you'll find yourself on a train that looks suspiciously like the Ghost Train from the World of Balance, but with the colors faded out. Ah, reusing textures, the good old days of cartridge gaming. |
| Is that Cyan? I'd recognize that ratty pony tail anywhere. Personally, if I was appearing in my own dream, I'd try to at least make myself a little more attractive. Follow him into the train car. |  |
 |
Pull the switch when you enter the car and grab the treasure chest. |
| Next you'll see two treaure chests. When you try to go to the rear treasure chest, you'll find the first one moves to block you. Grab the lump of metal from the treasure chest on the far left, and feed it to the treasure chest, and he'll stop moving. Finally, pull the switch here and remember which chests close. Or don't, cause you're cheating by using this walkthrough and I'm going to tell you the answer to the puzzle anyway. | 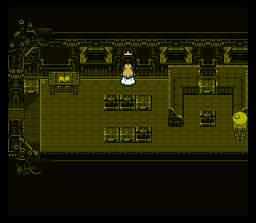 |
 |
In the next room, you'll see four switches. Pull the first switch, then the second switch, then the first switch again, and finally the third switch. Then you'll get to the fourth switch, but you have to close the chests in the order you saw them in the other room before you do. |
| Then you'll get to the fourth switch, but you have to close the chests in the order you saw them in the other room before you do. |  |
 |
Finally, go into the engine room. You don't have to touch any of the switches here, just walk right back out. |
| You'll find you are now in a cave, but there's an added twist! You are in one of the magitek armors that Terra was using at the beginning of the game. This is the last time you'll get to use one, so enjoy it while it lasts. You will have another Cyan sighting, and he again runs off. Follow him. |  |
 |
You'll find yourself outside on some cliffs. Just follow the path. |
| The nightmare is finally over and you'll find yourself lying on the floor of the bedroom at Doma. Was that a dream or just a really bad acid trip? Remember kids, winners don't use drugs, except for Barry Bonds. |  |
 |
Hey! Cyan's gone. Let's get the hell out of here before he finds us and we have to listen to him wank off to thou and thee and...oh crap there's his ugly wife and mongoloid kid. Jesus, I'll go save him as long as it means I don't have to look at you freaks for another second. |
| Flashback time! Why is he suddenly talking normally? Shouldn't he be saying "what dost thou wantest from I?" Damn you Ted, you lazy bastard. |  |
 |
Go to the king's throne room and you'll run into the demon that is really controlling Doma. You see that dude? Two explanation points. You're dead. |
| More flashbacks. It really is Cyan! |  |
 |
This is probably the only battle in the game where you'll use x-zone. Wait for Wrexsoul to possess one of your charactes, then cast x-zone and you will win. Simple as that. If for some reason you don't have x-zone, then you will have to kill one of your characters to make wrexsoul reappear. Then pound on him with your strongest attacks, and repeat the process if he possesses another one of your characters. |
| Clap your hands folks, because now that Cyan's quest is over, you never have to use him again. Make sure to go back to the King's room and grab the Alexandr esper, with all the power of the ancient greeks at your disposal. But you might get the gay. | 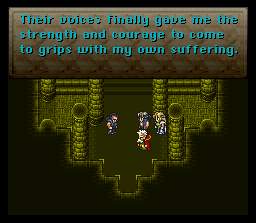 |

